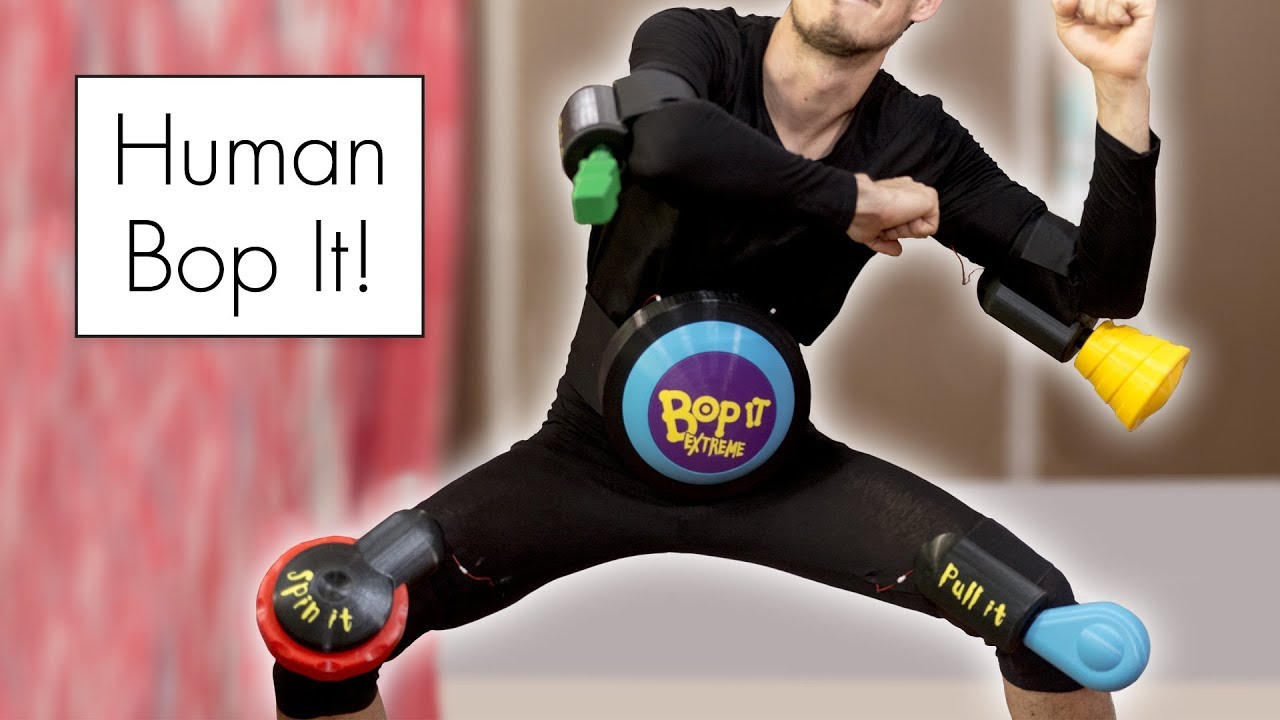
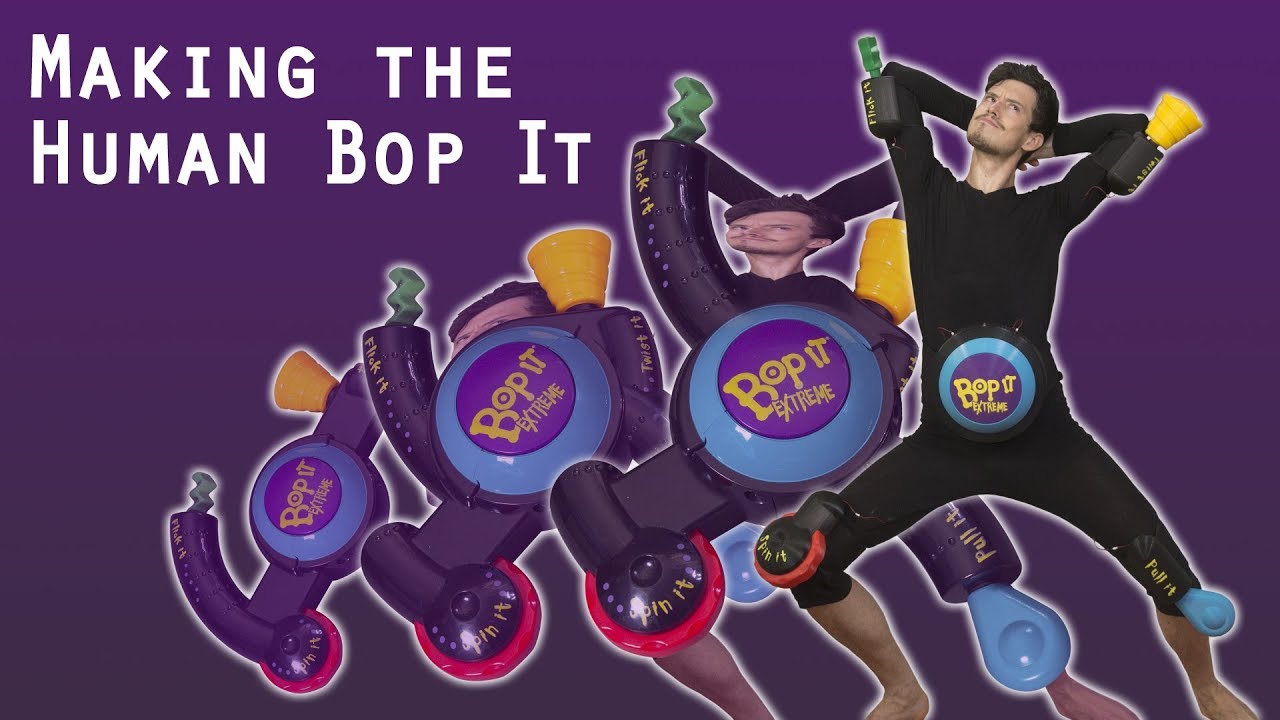
Human Bop It Extreme
Sometimes you think up an idea so ridiculous that you’re driven to realize it. Well… at least that’s what happened when the thought of a working Bop It Extreme costume came to my mind. I was determined to pull off this off, so I dug my old Bop It out of the attic and began taking it apart piece by piece to learn how it worked.
Playlist
2:29
25:56
The Process
I had no clue how the Bop It Extreme works or what I would have to do to modify it to become a wearable costume. I decided to just go ahead and start taking out screws to see what’s going on inside the toy.
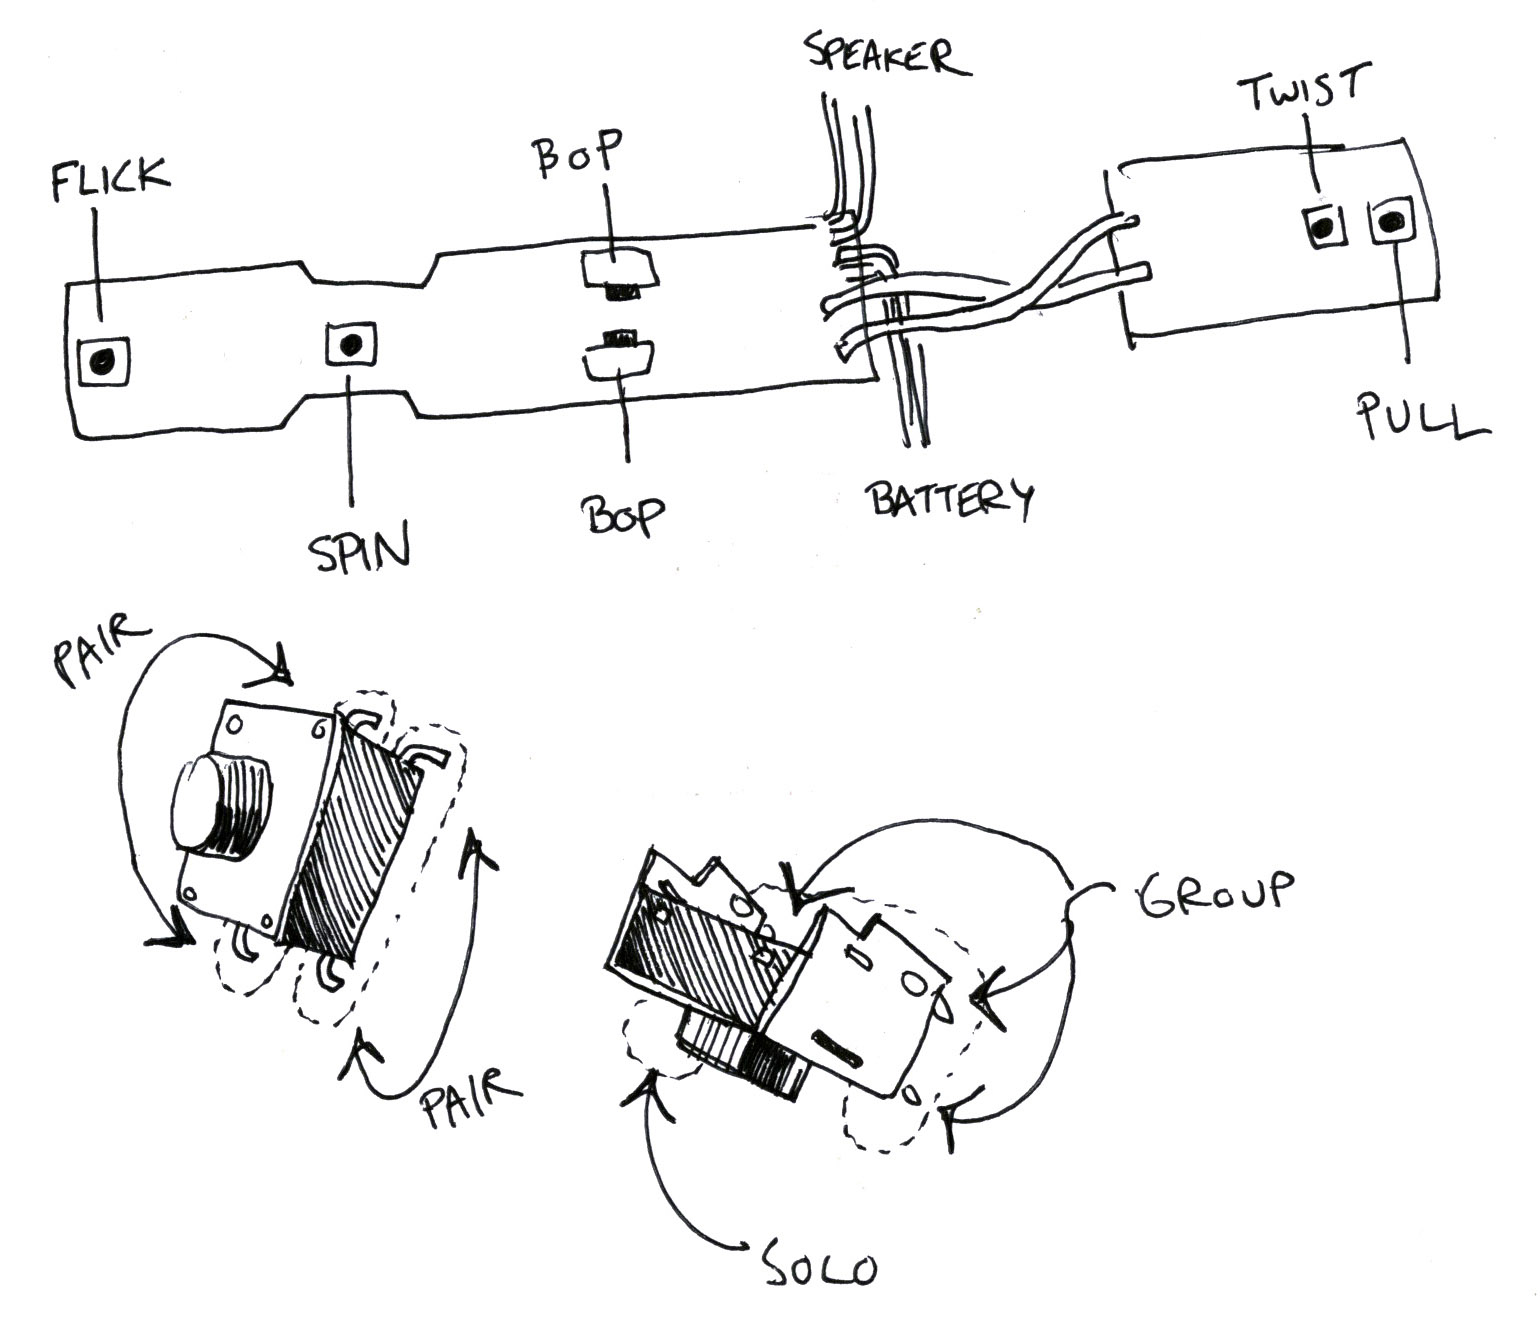
What I found were lots of screws and springs, a battery pack, speaker, and a circuit board with several buttons. As it turns out, all the different actions (twist it, pull it, flick it, spin it, and bop it) are detected using the same simple buttons. The key is in how the buttons are triggered using clever engineering to convert all the actions into button presses.
After tearing apart the Bop It Extreme, I sketched out the mechanisms as well as some ideas as to how I could convert them for my 250% scale versions. In some cases, I wanted to reuse existing parts, but other times I found it easier to create a new mechanism. Here are my concept sketches :
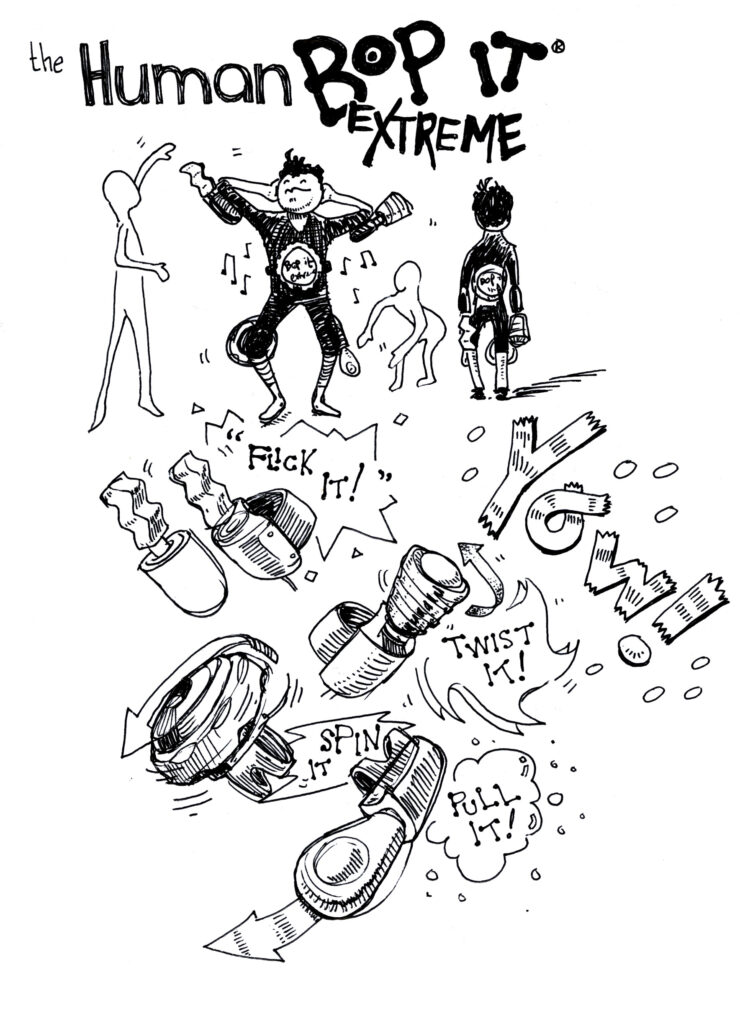
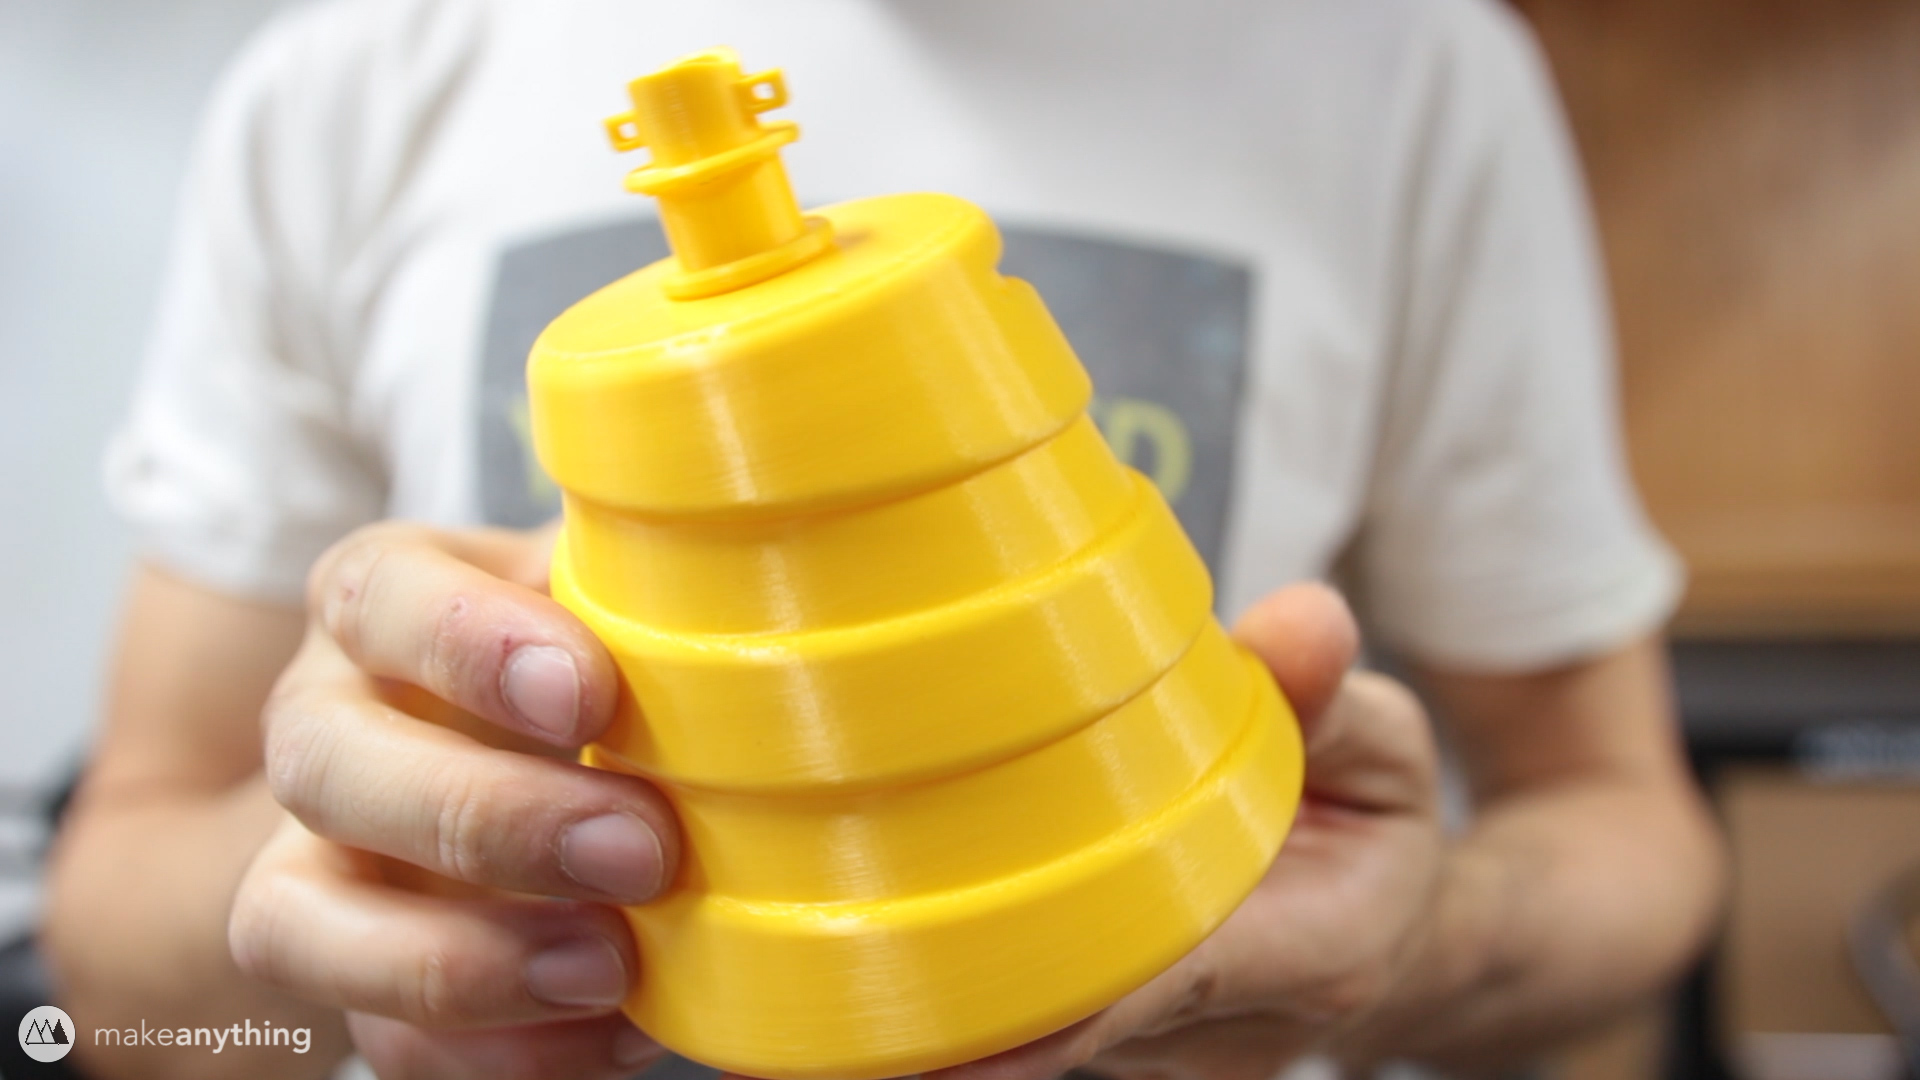
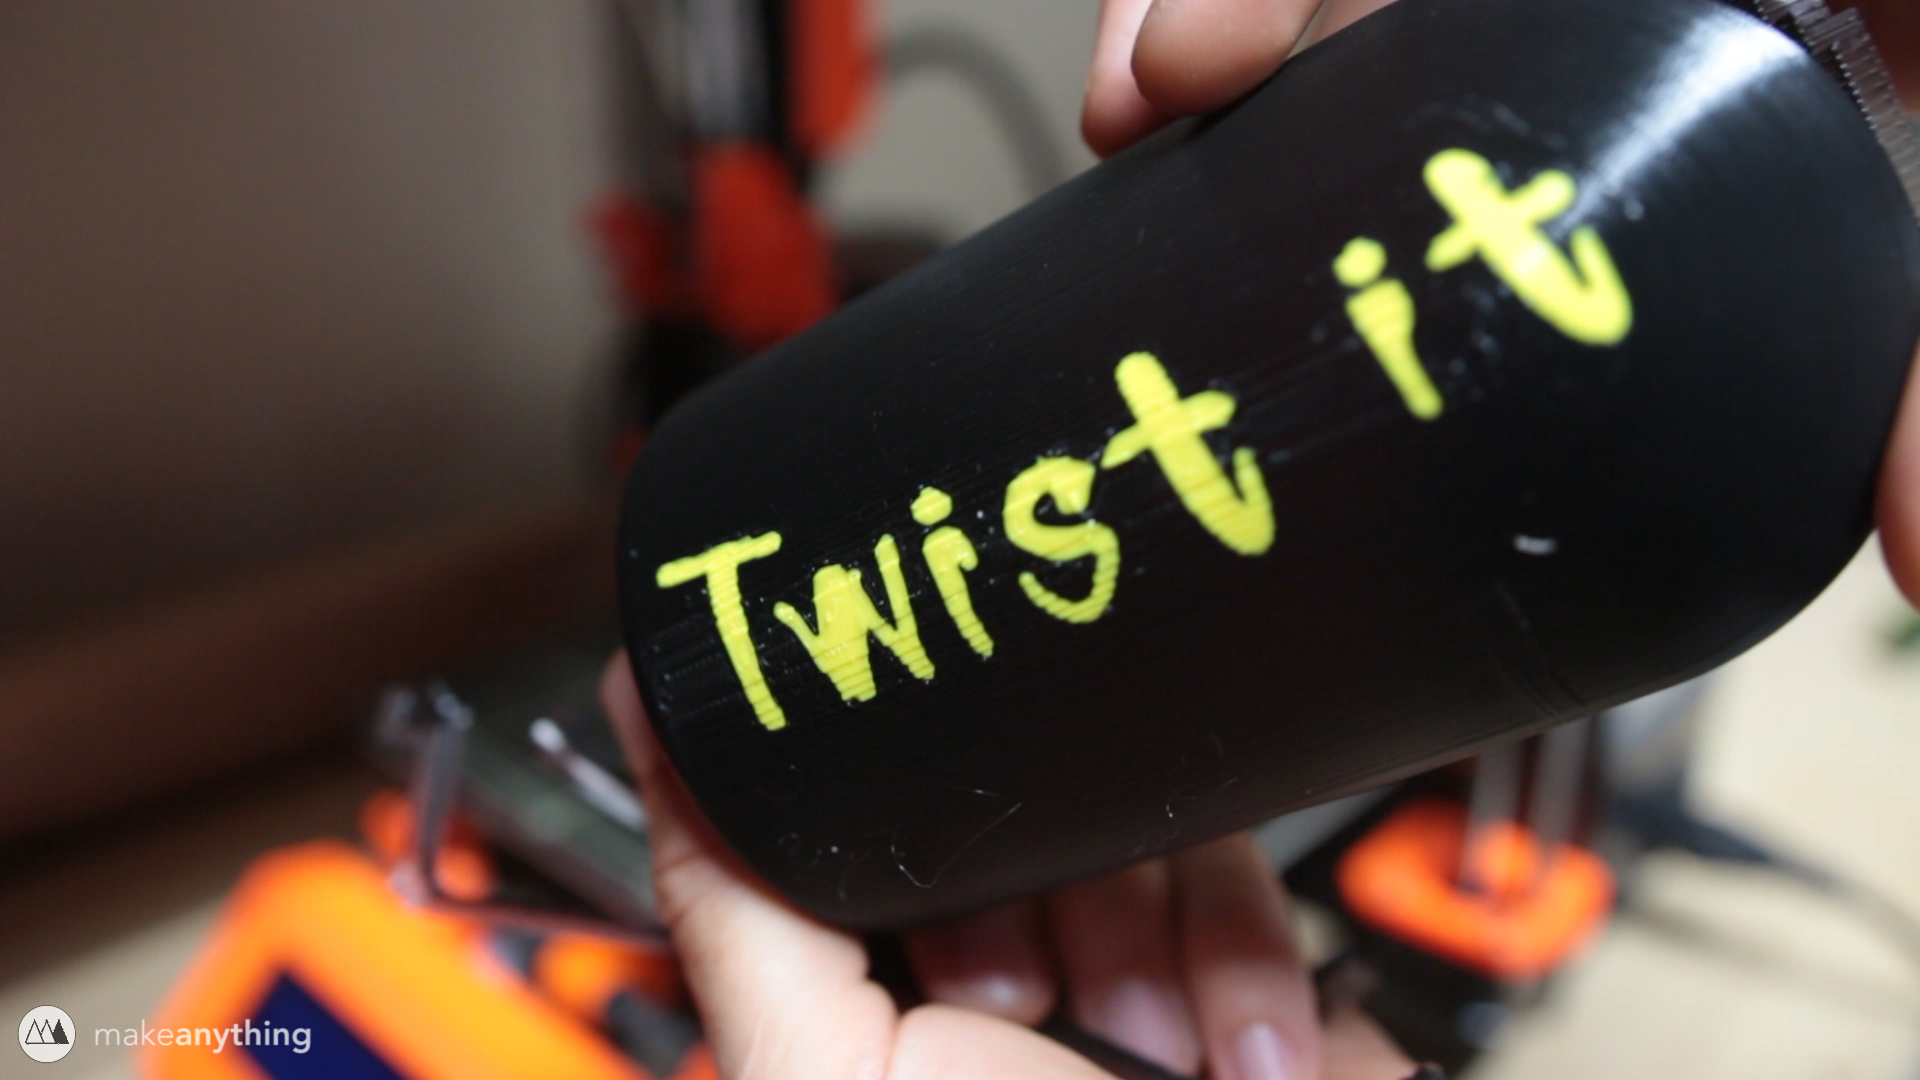
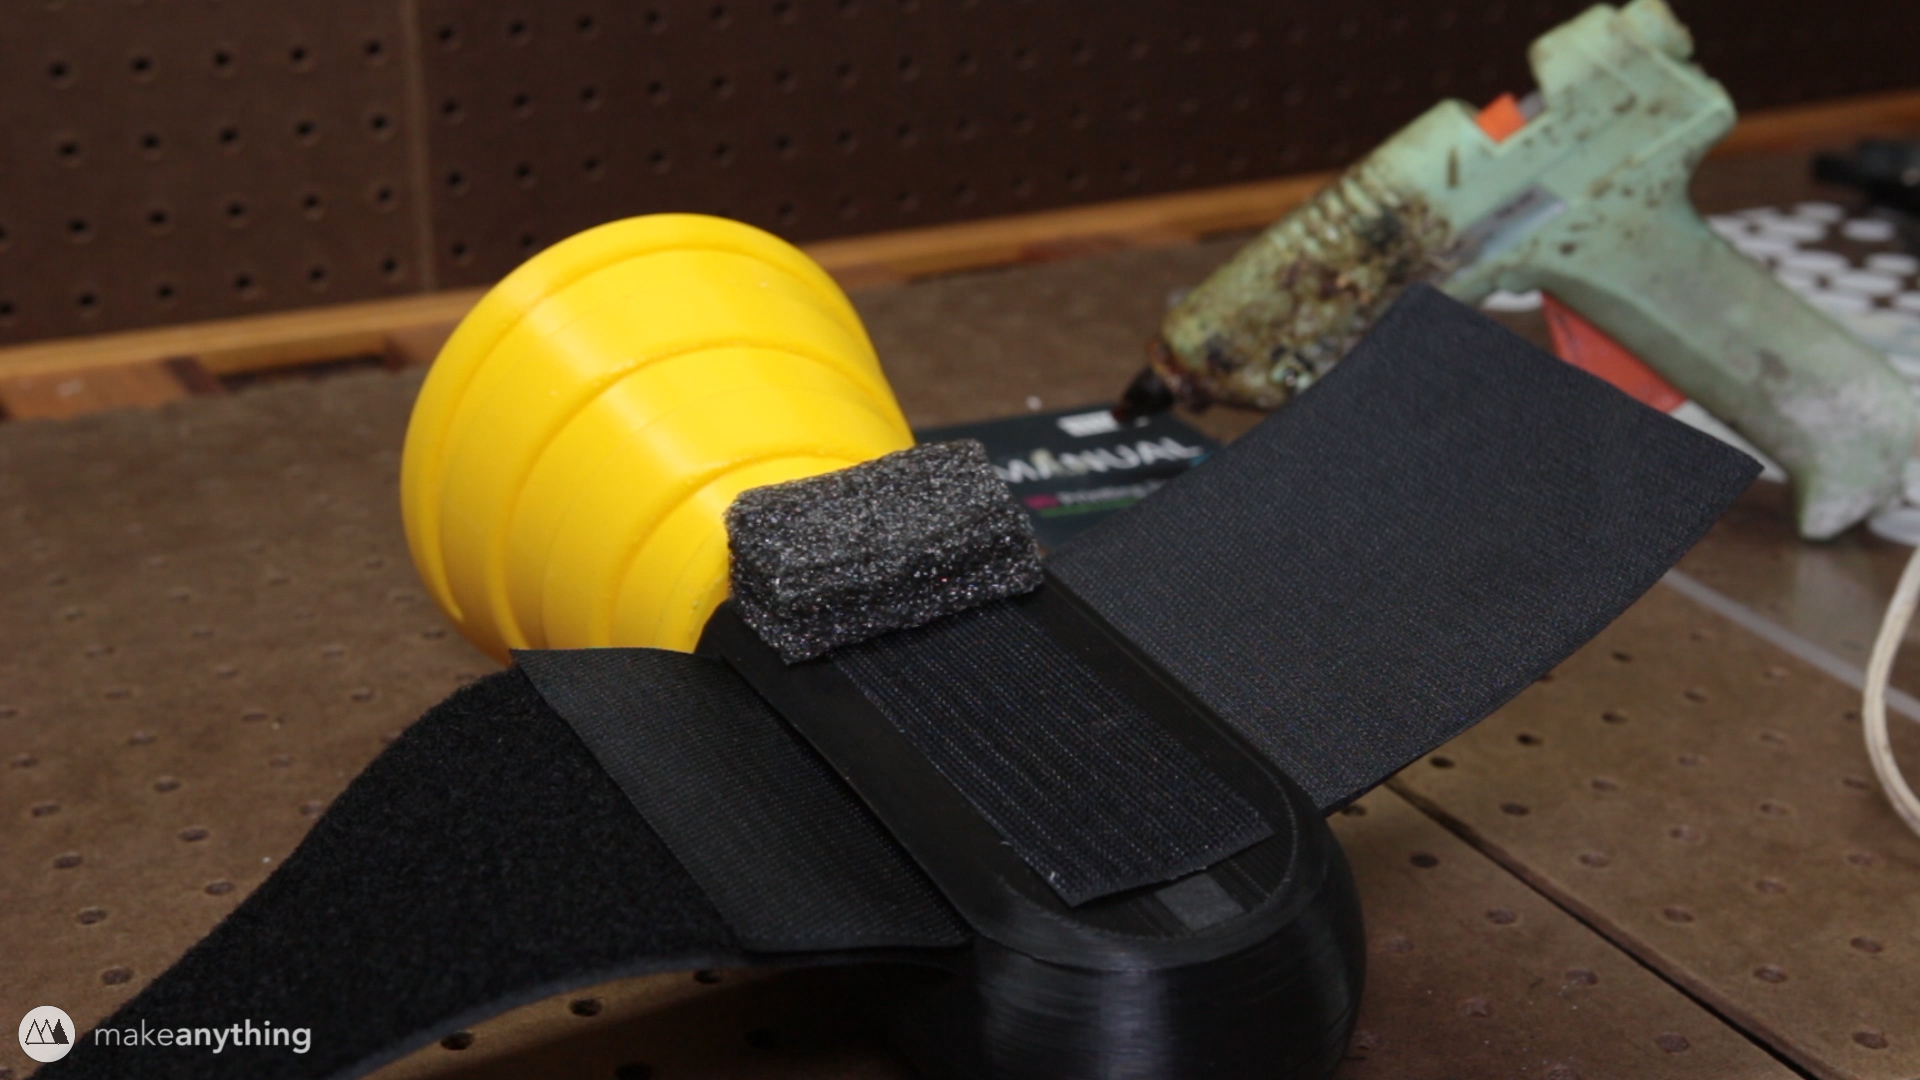
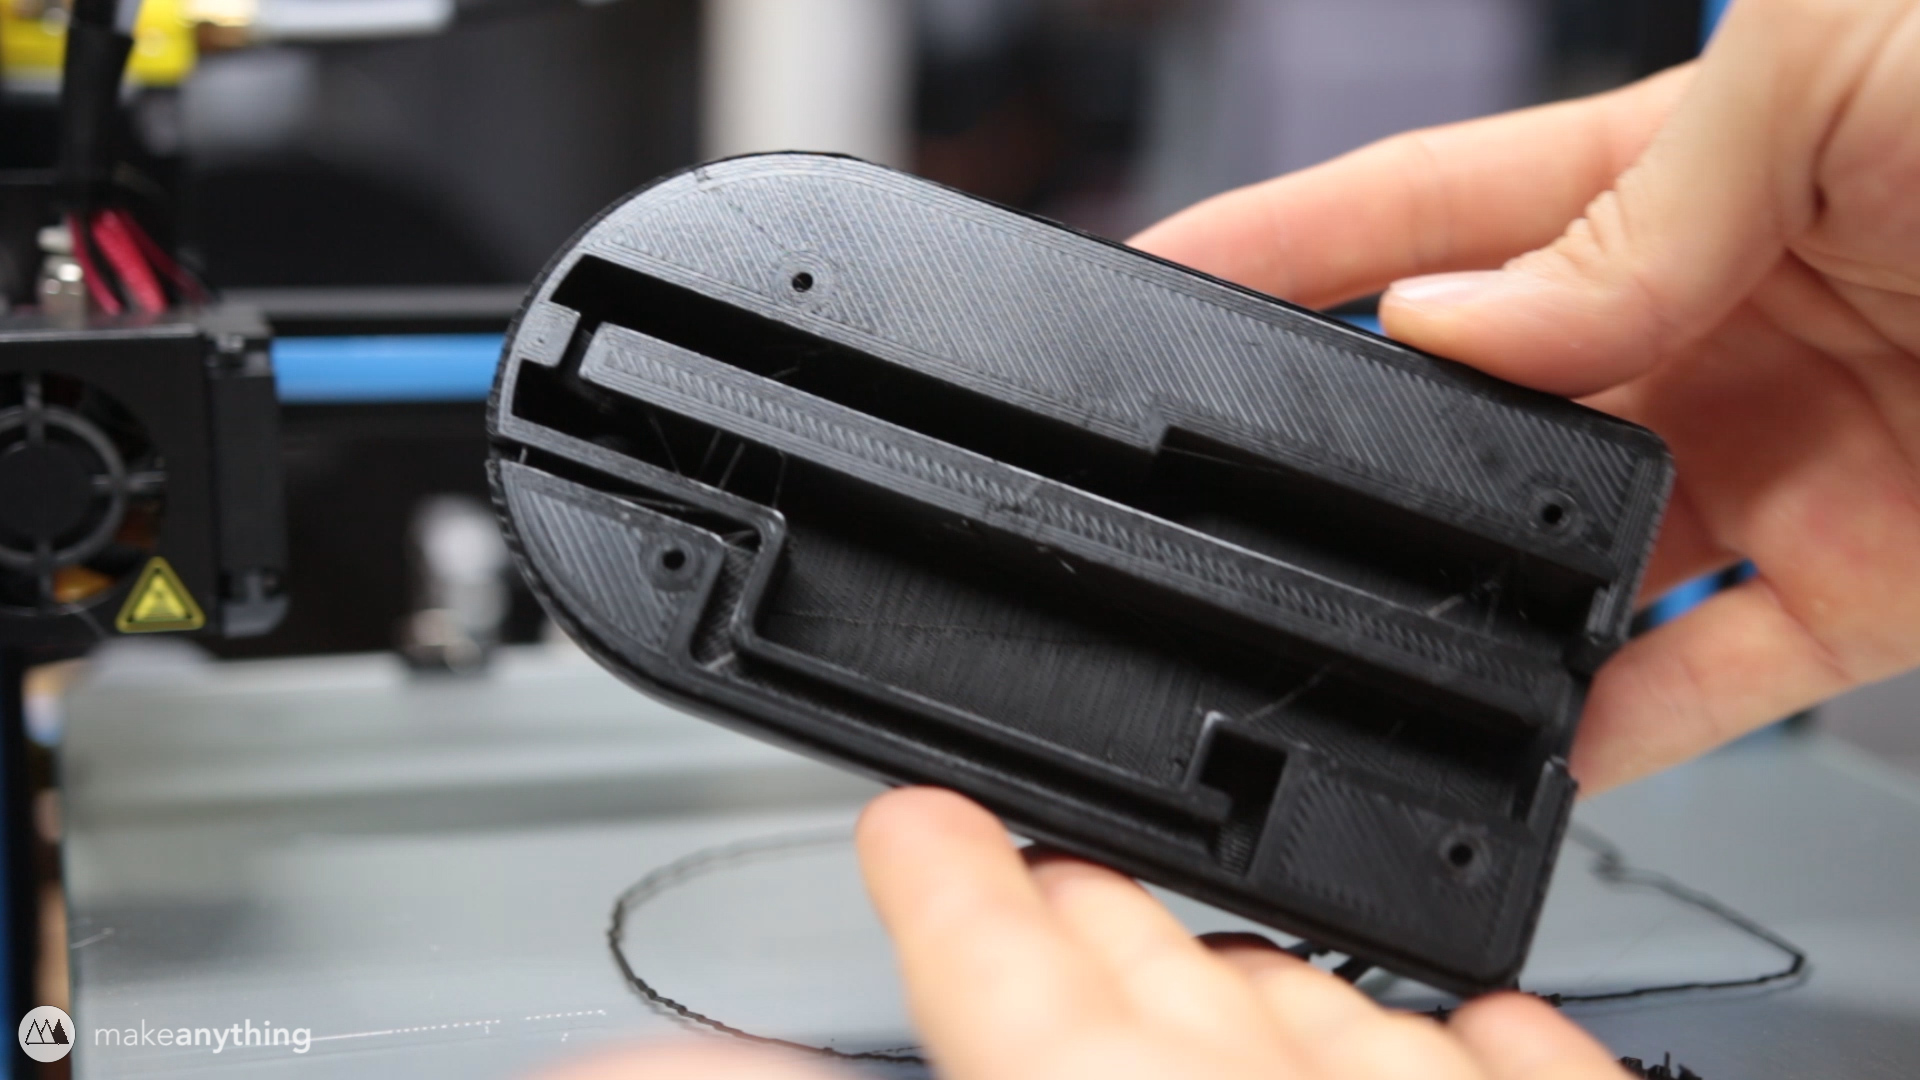
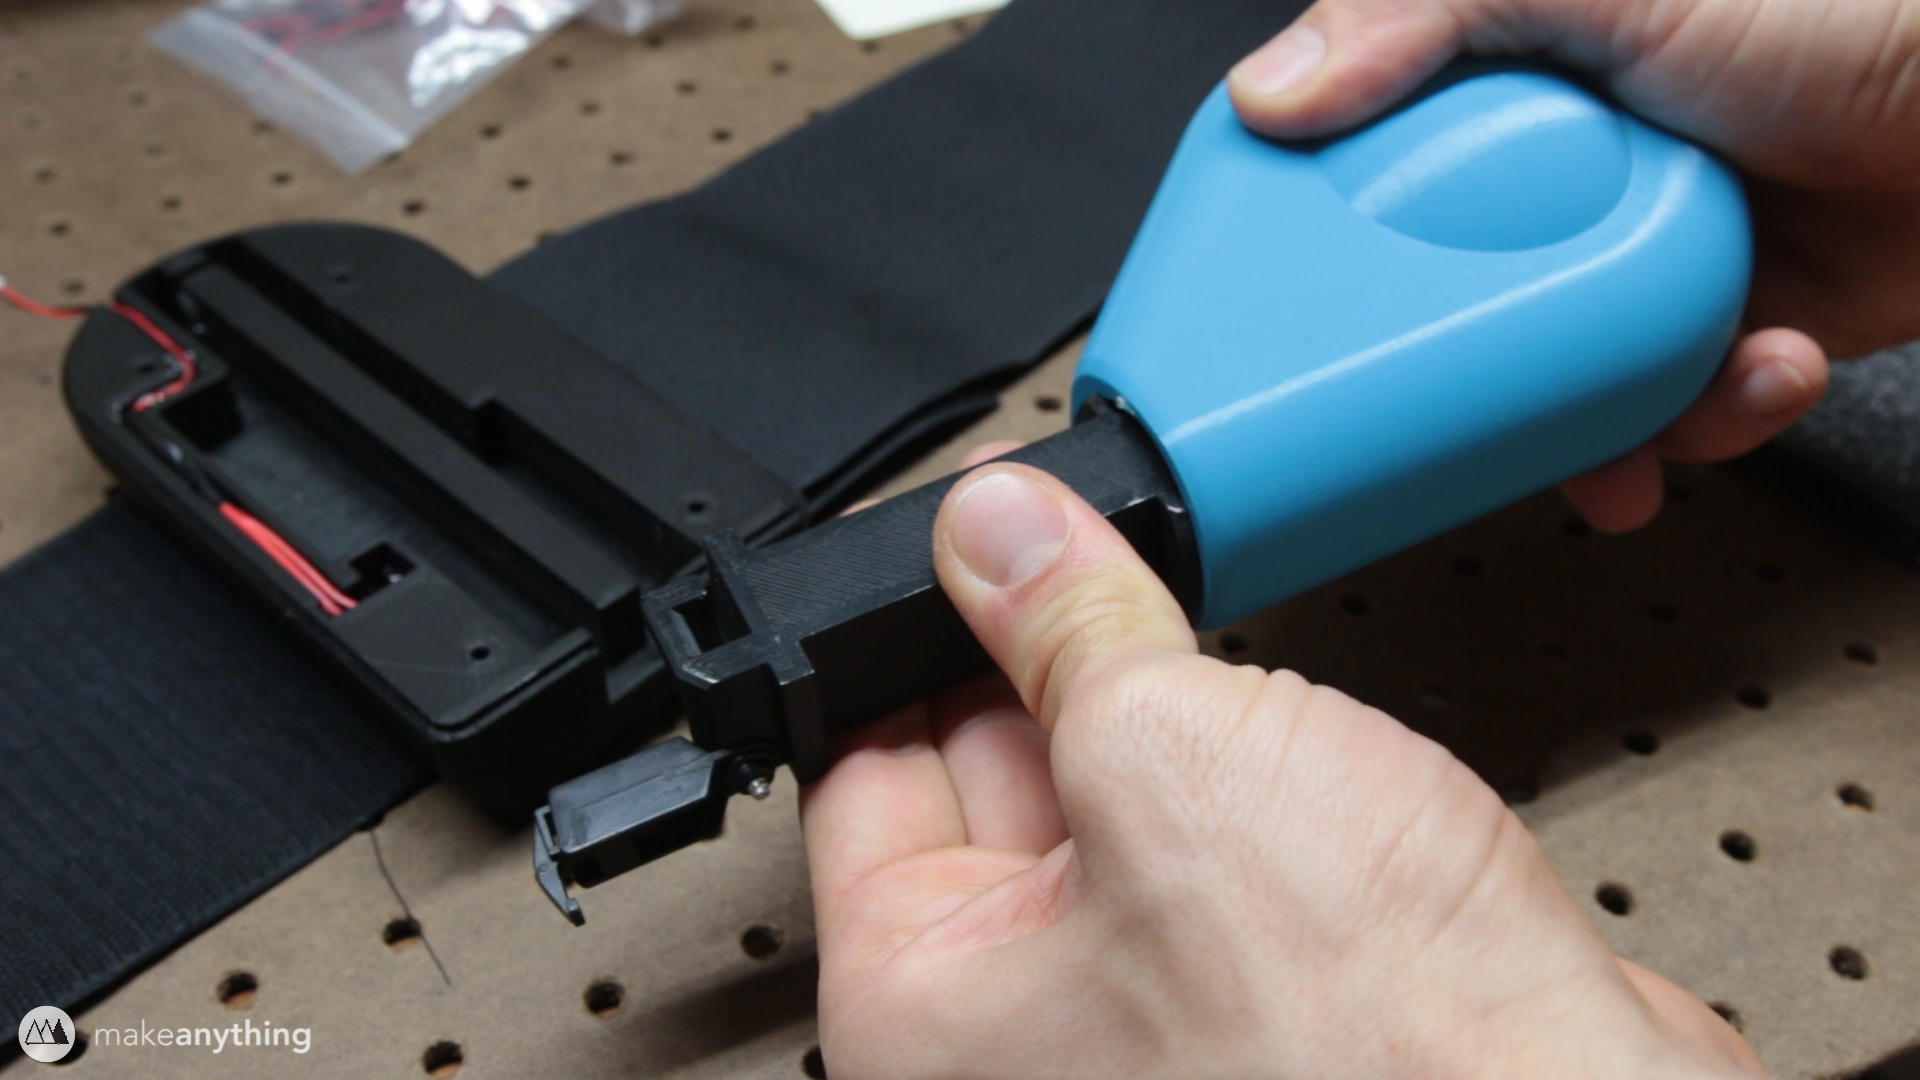
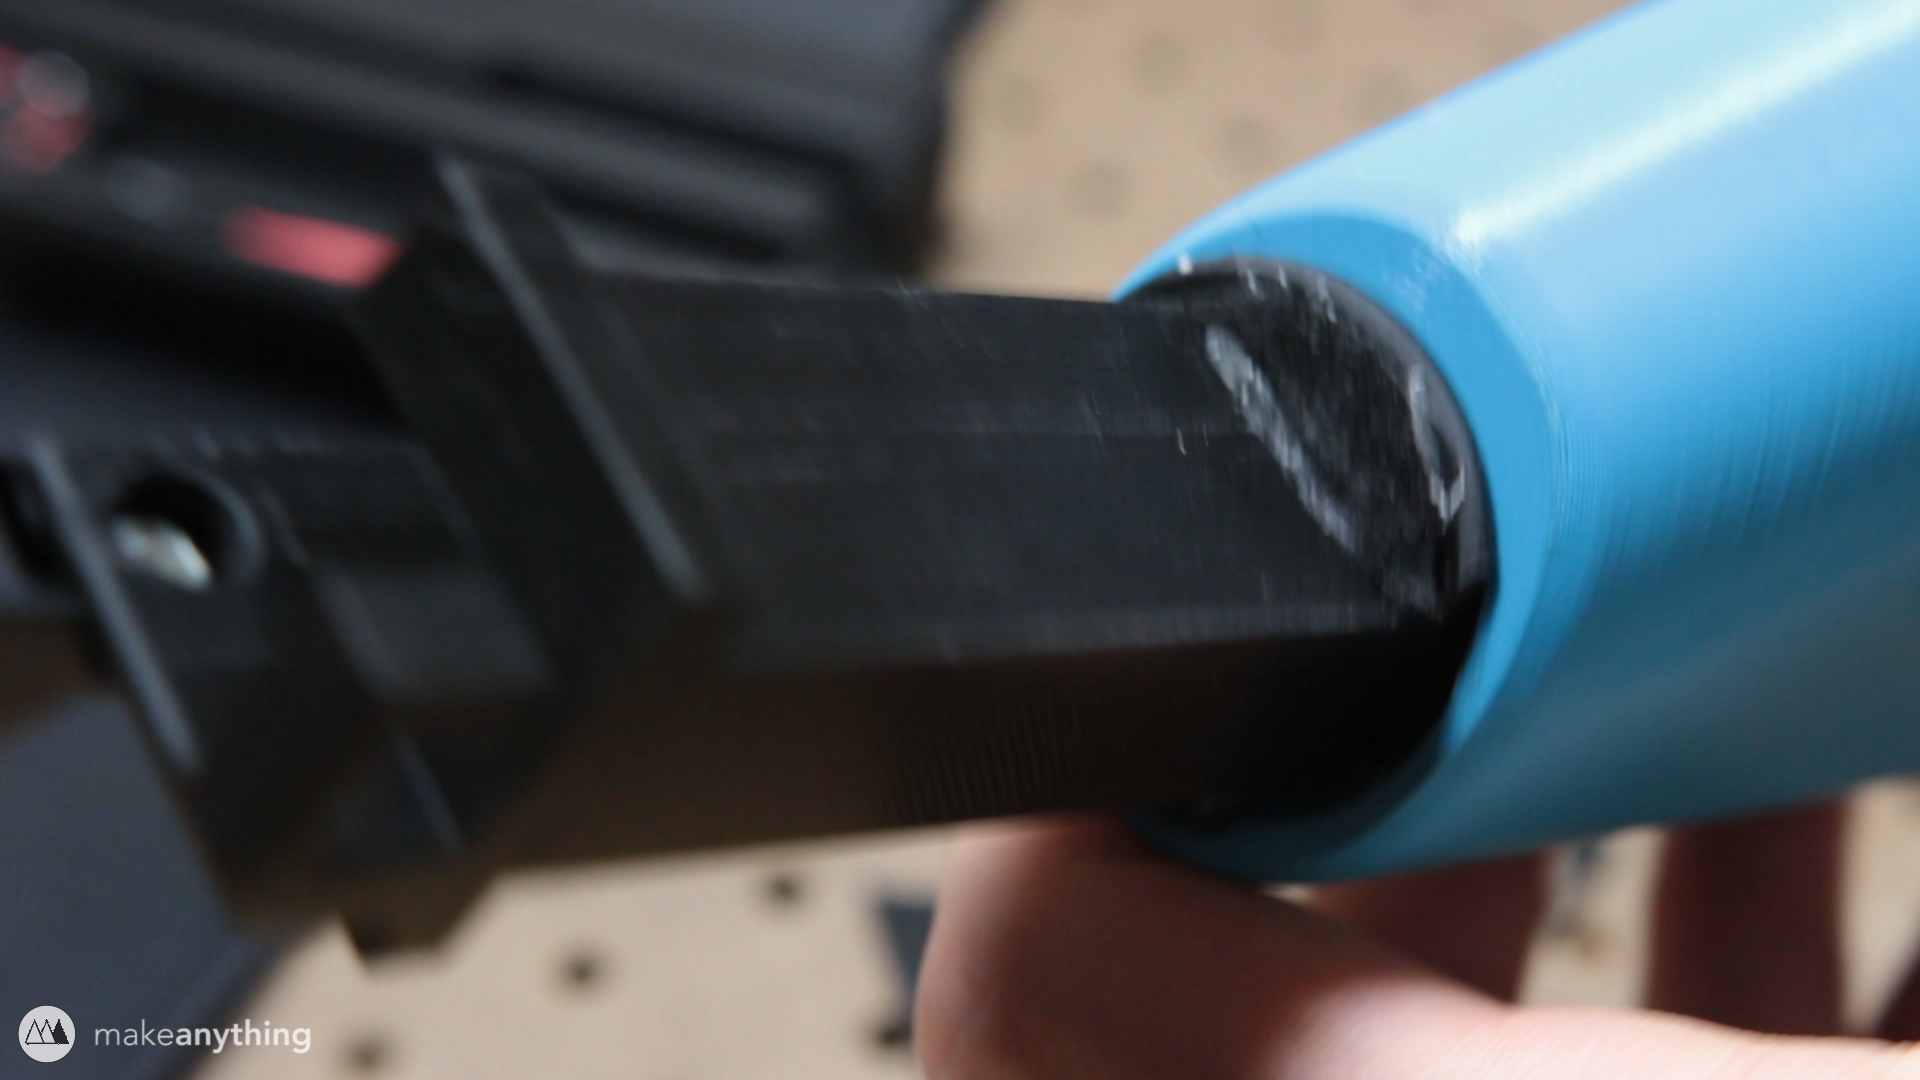
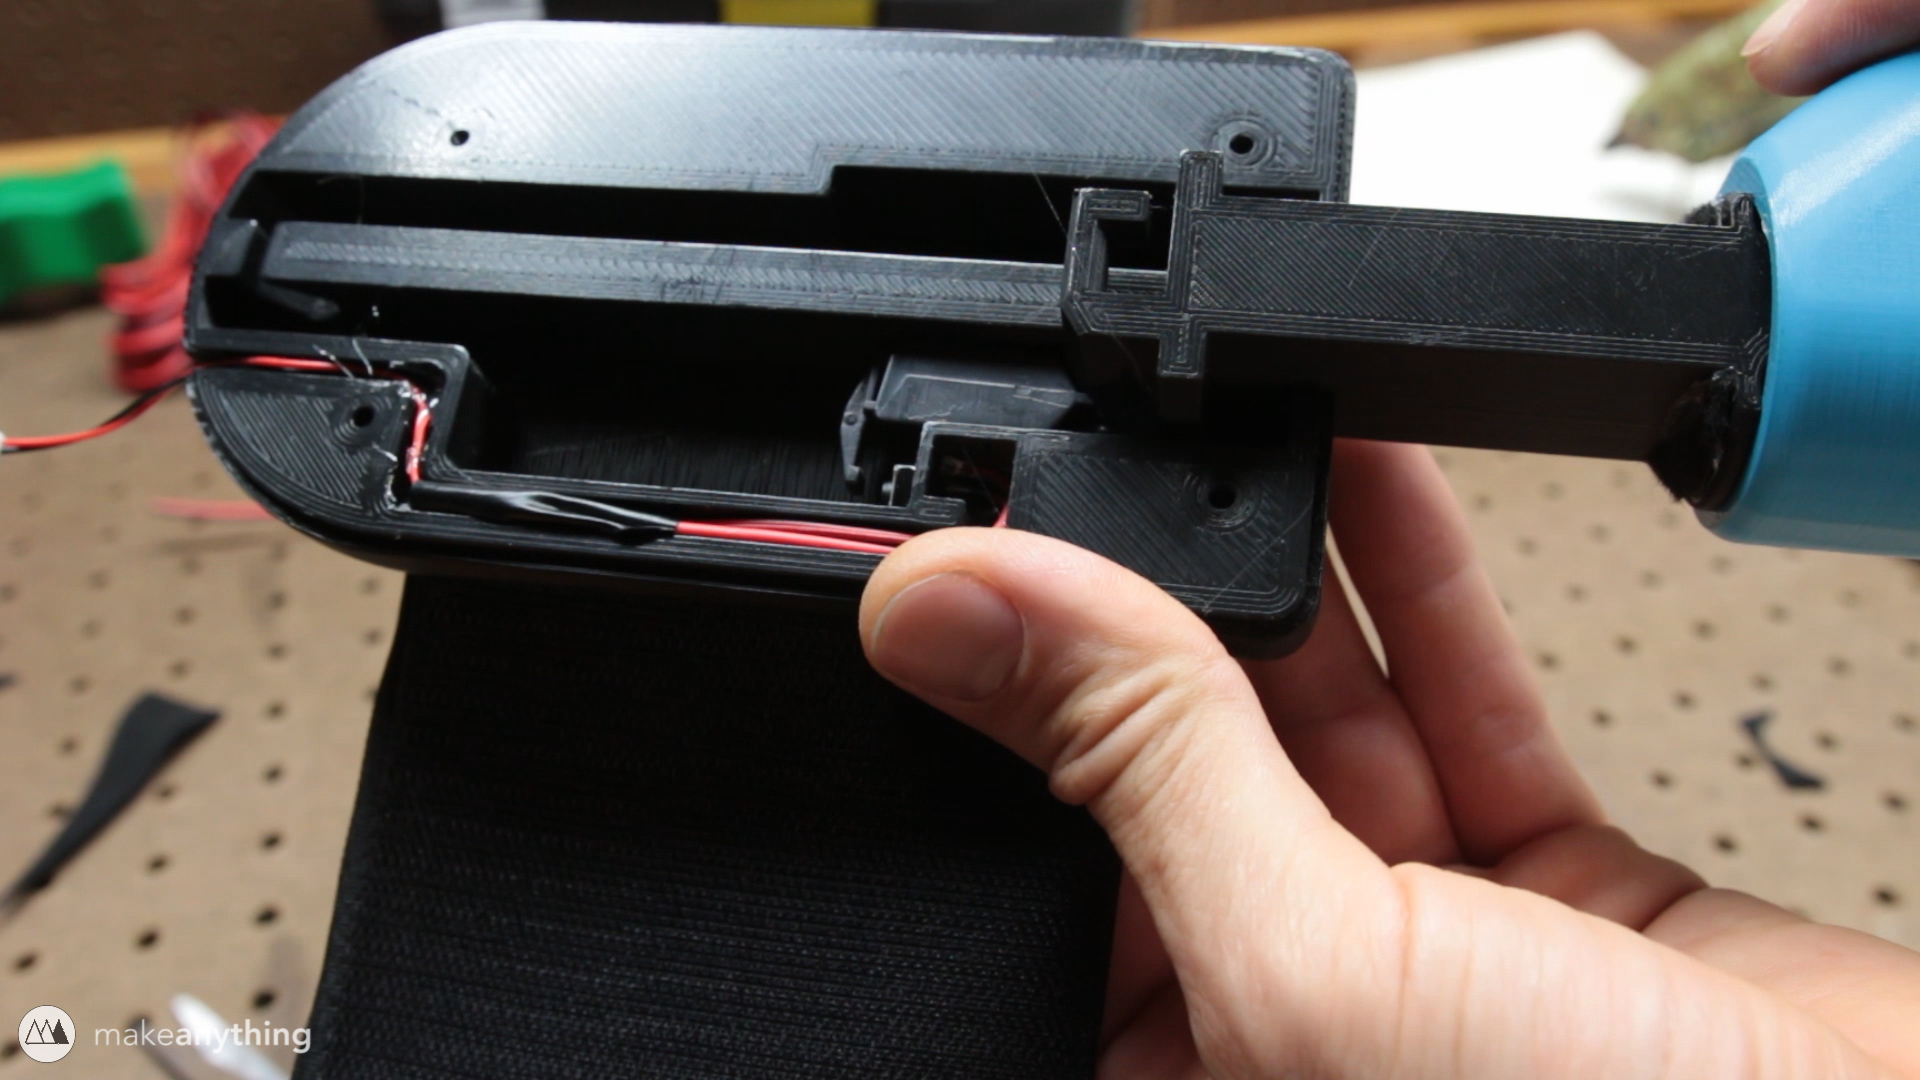
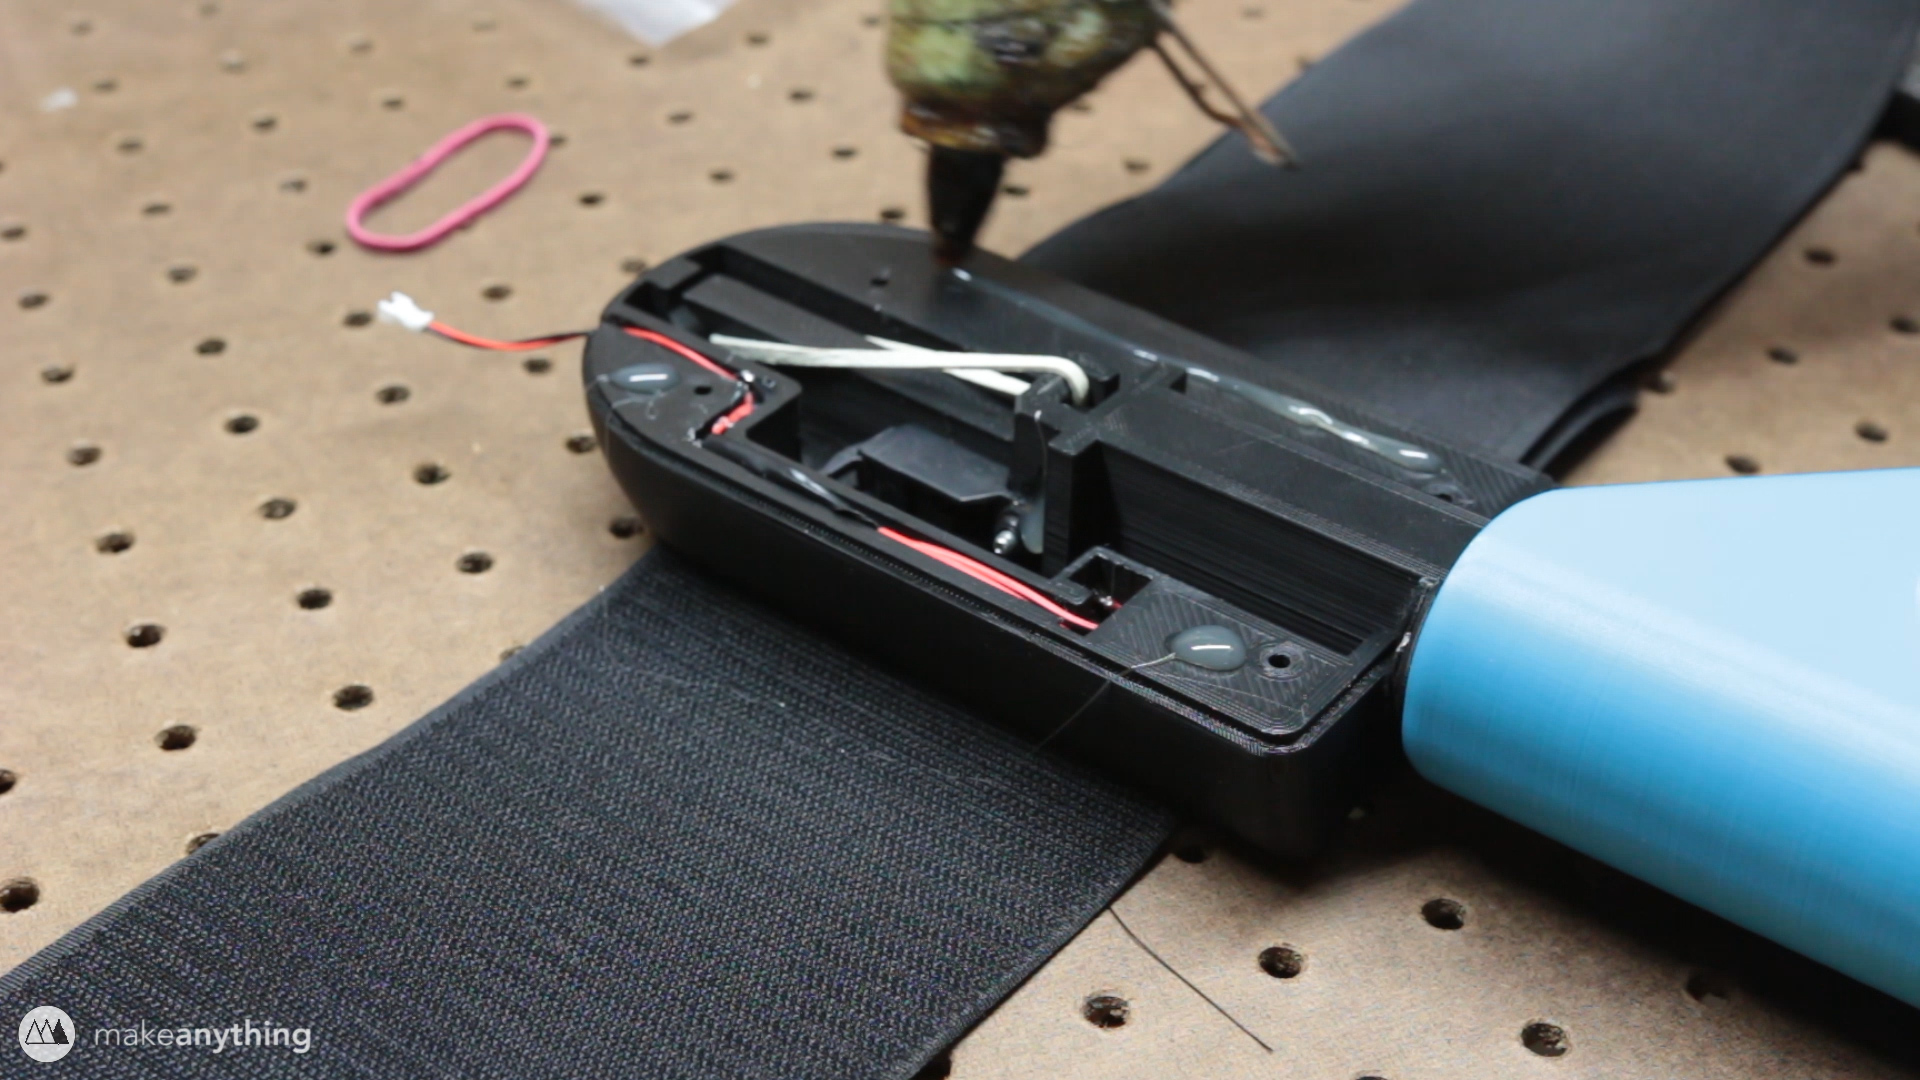
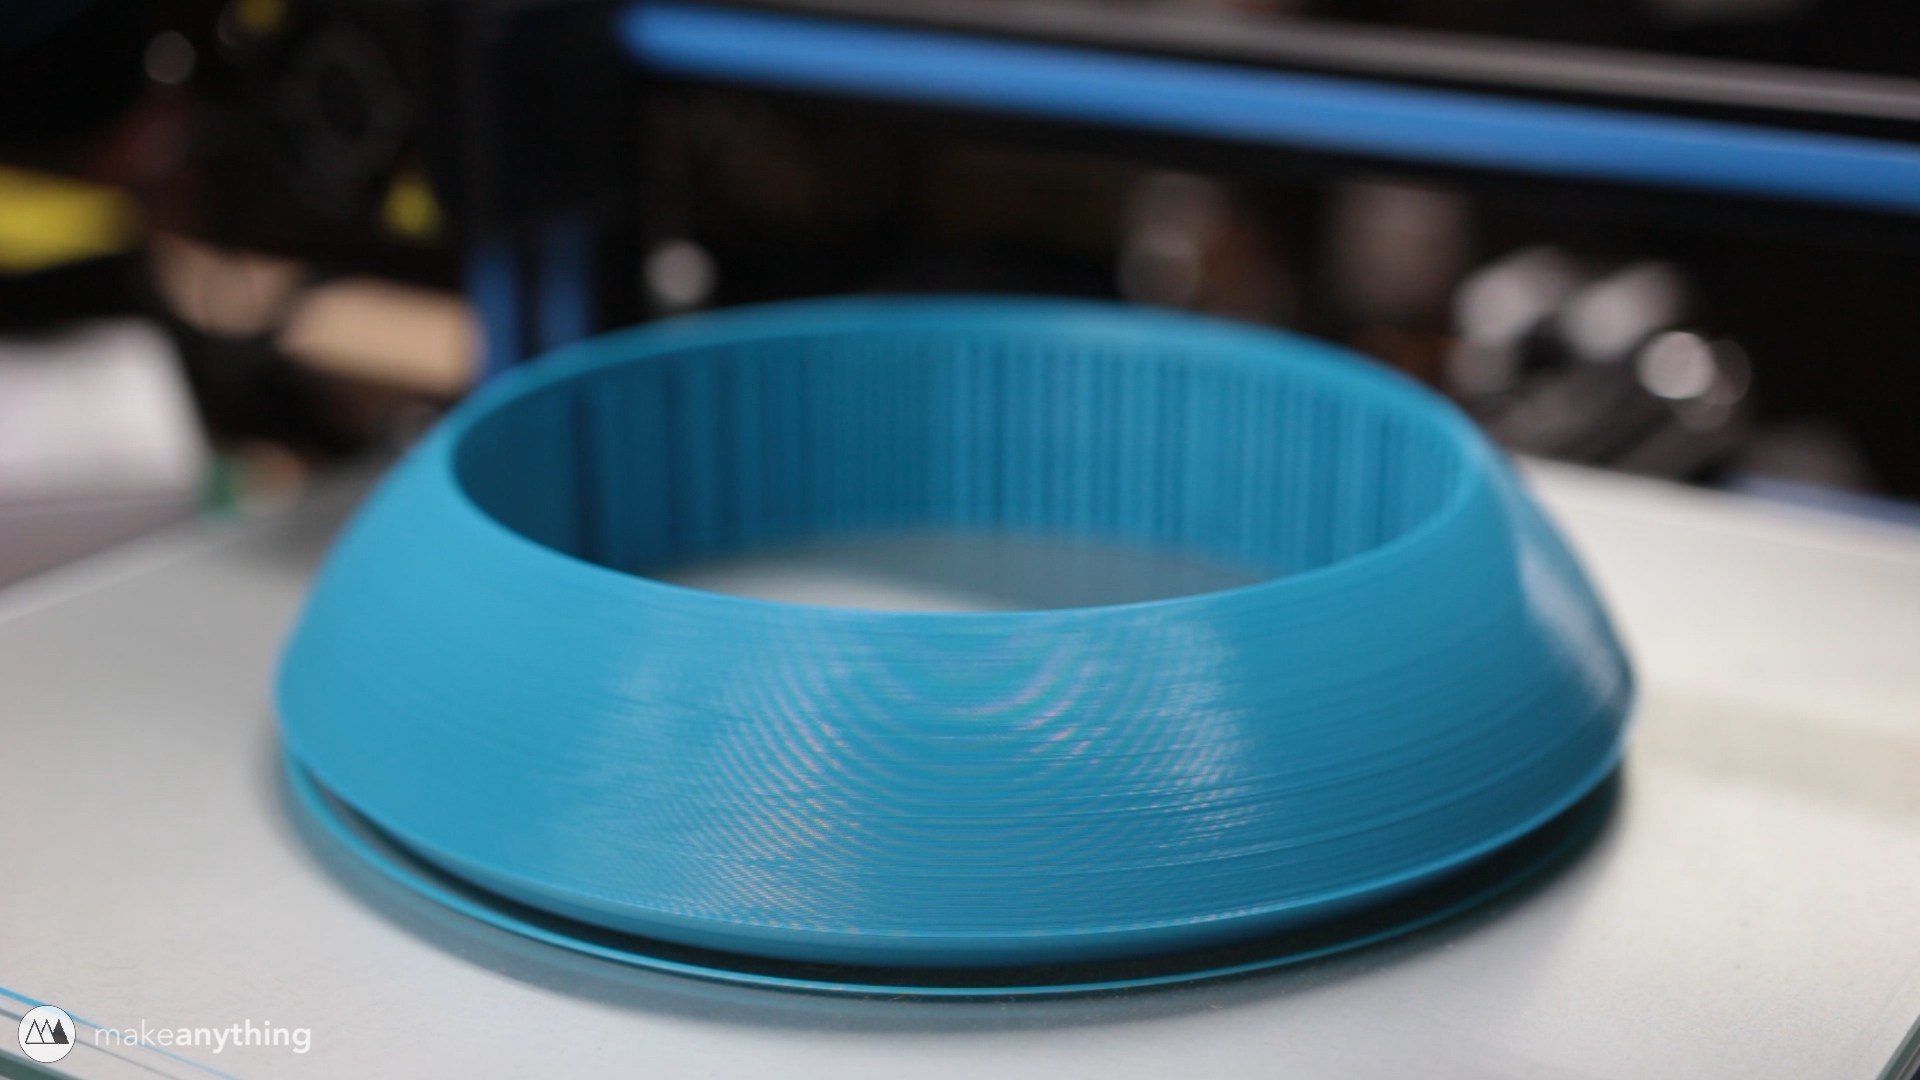
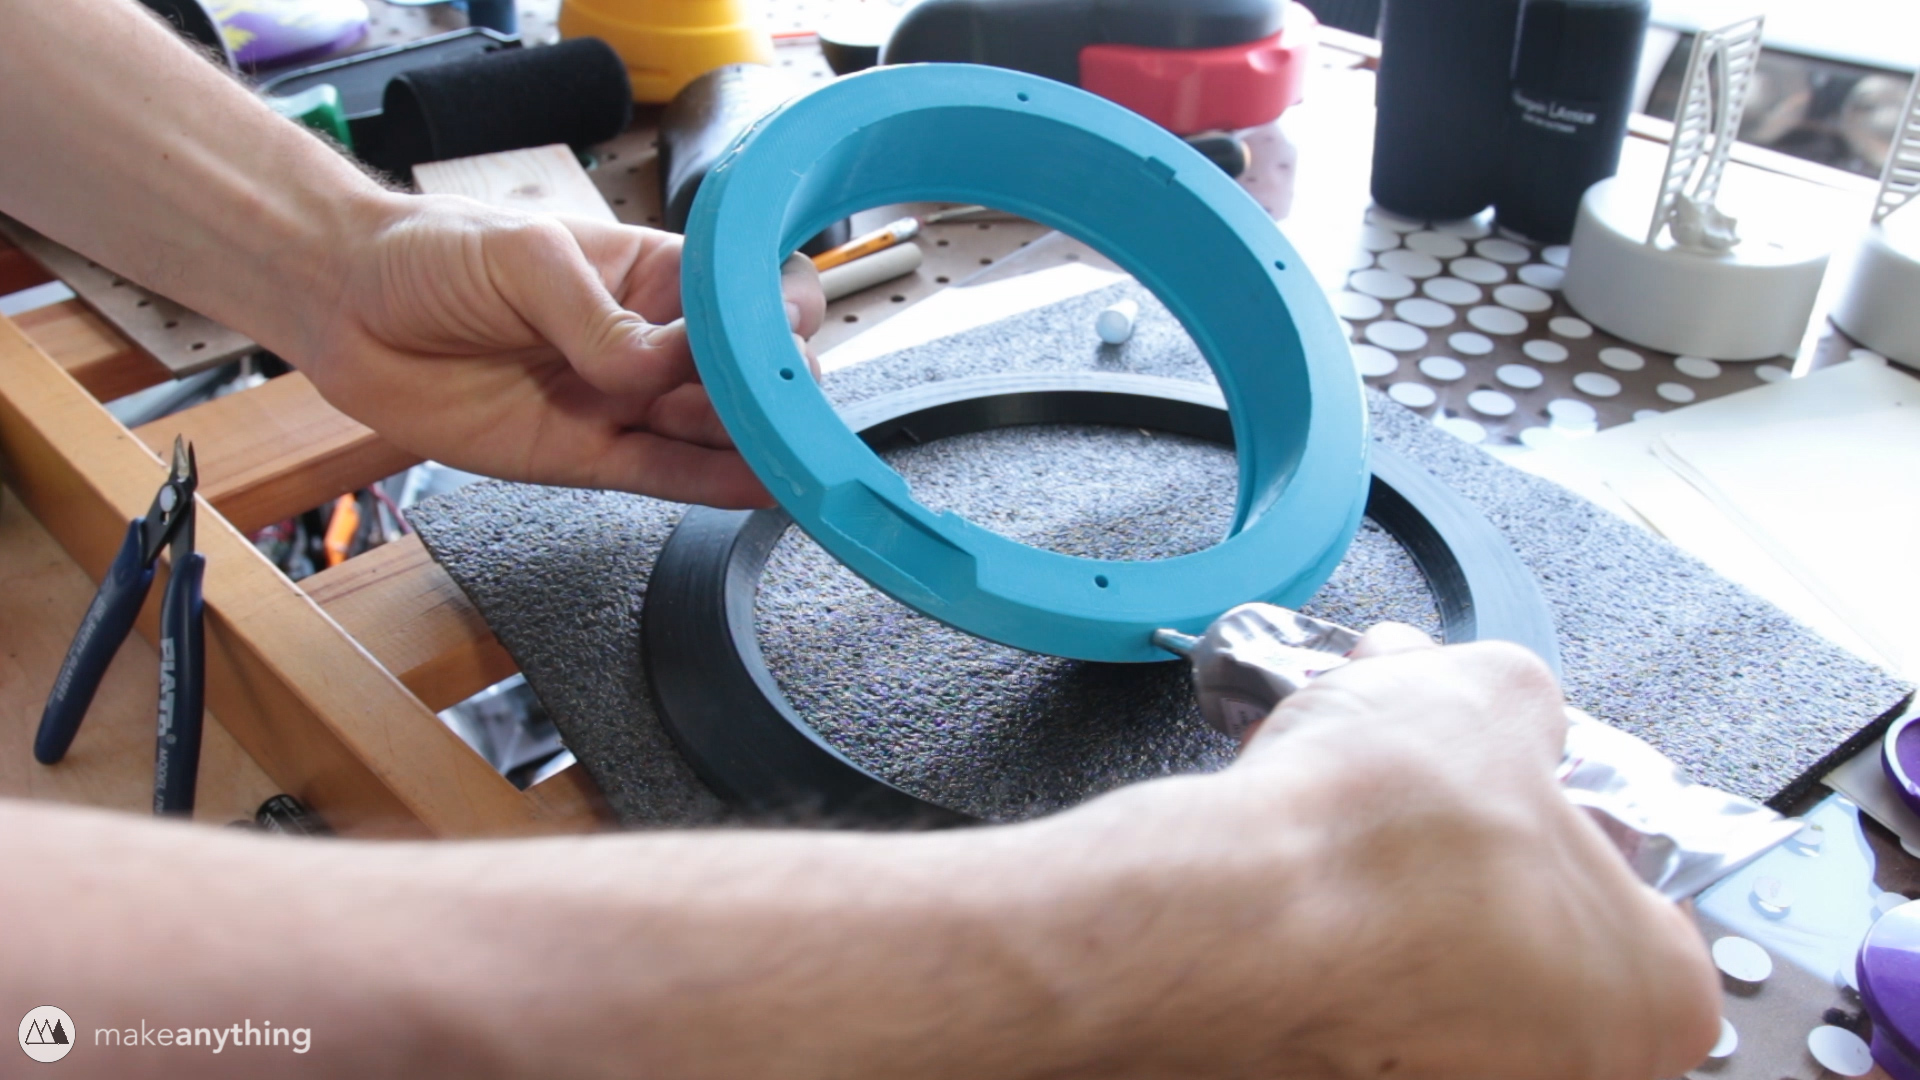
Twist It!
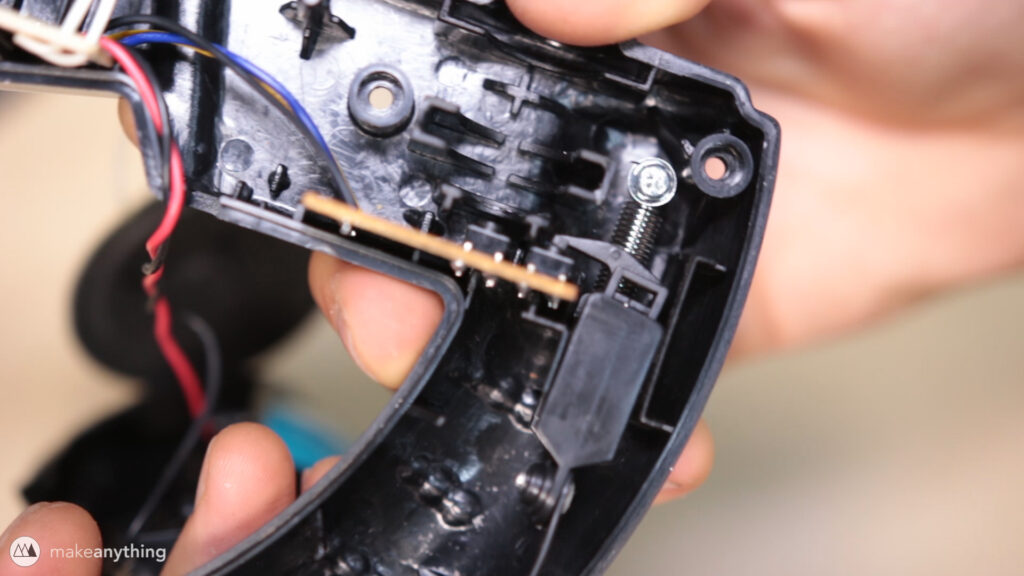
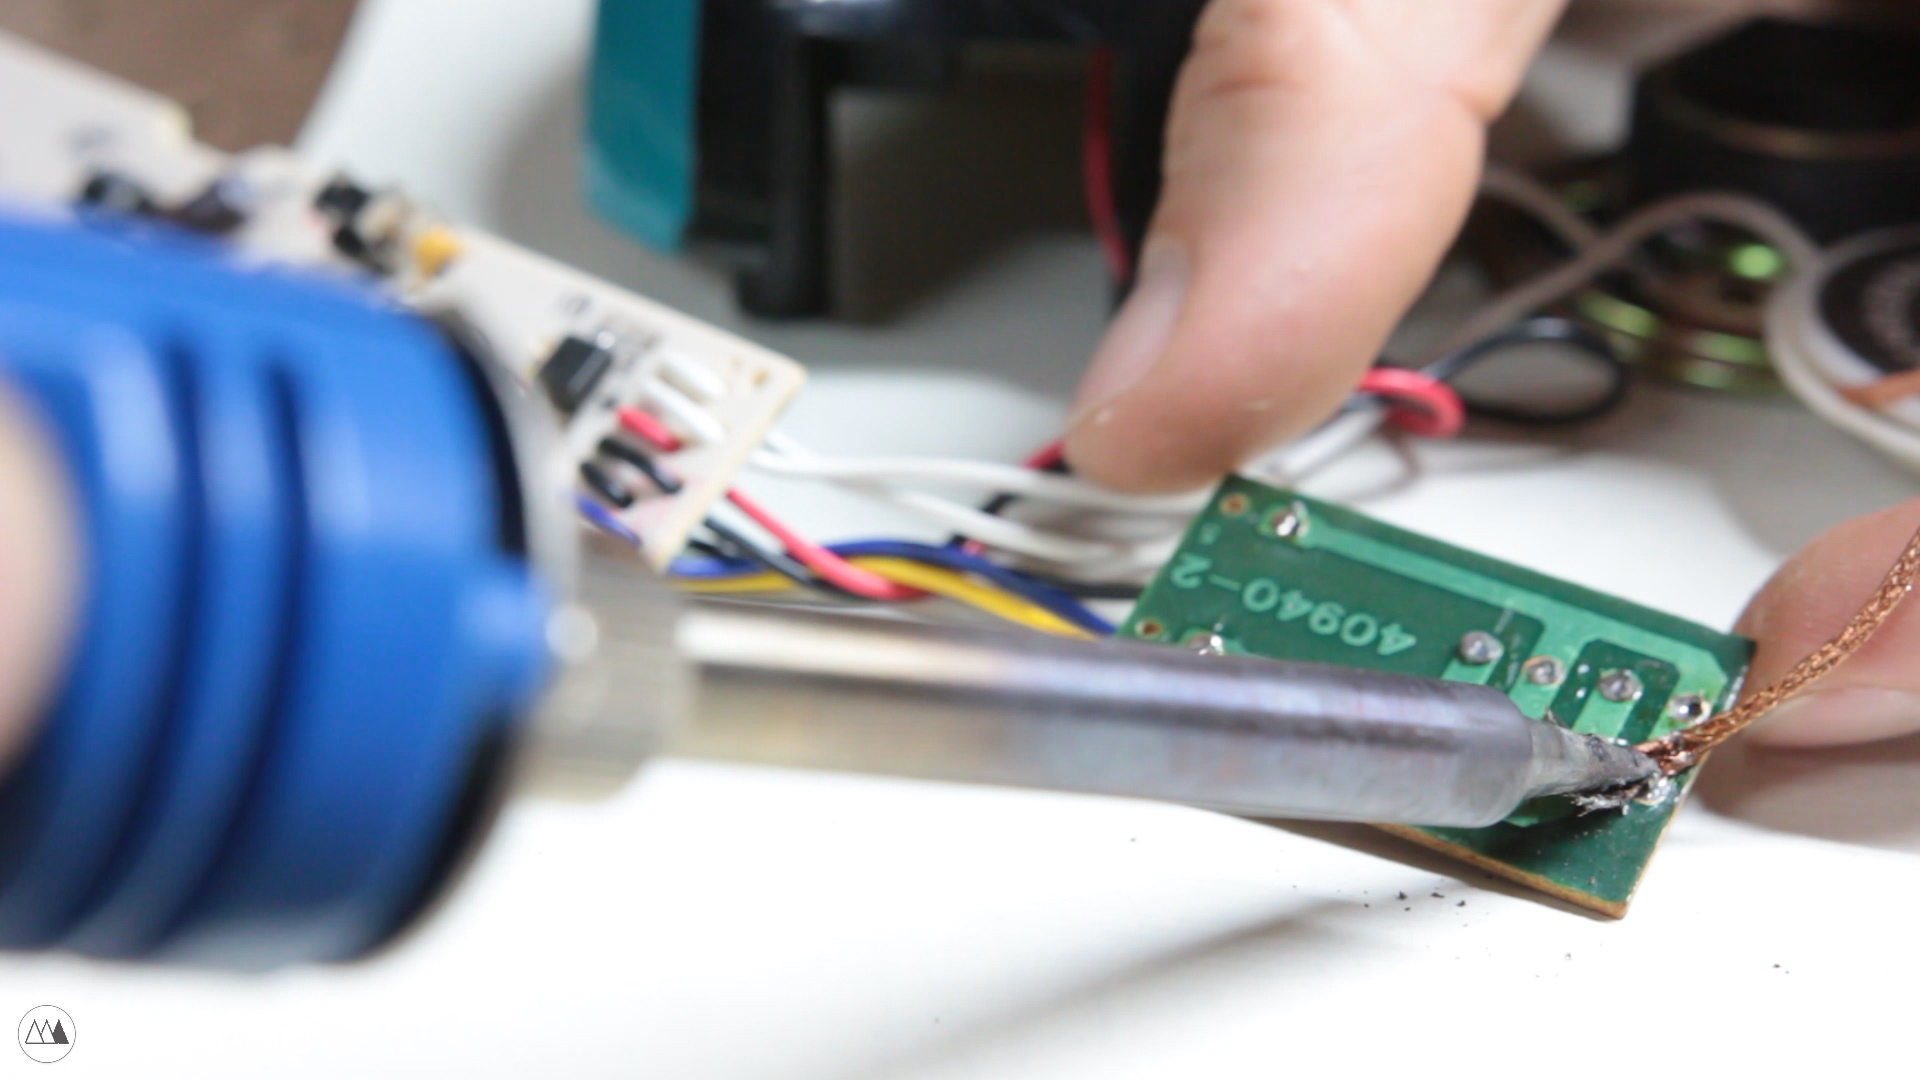
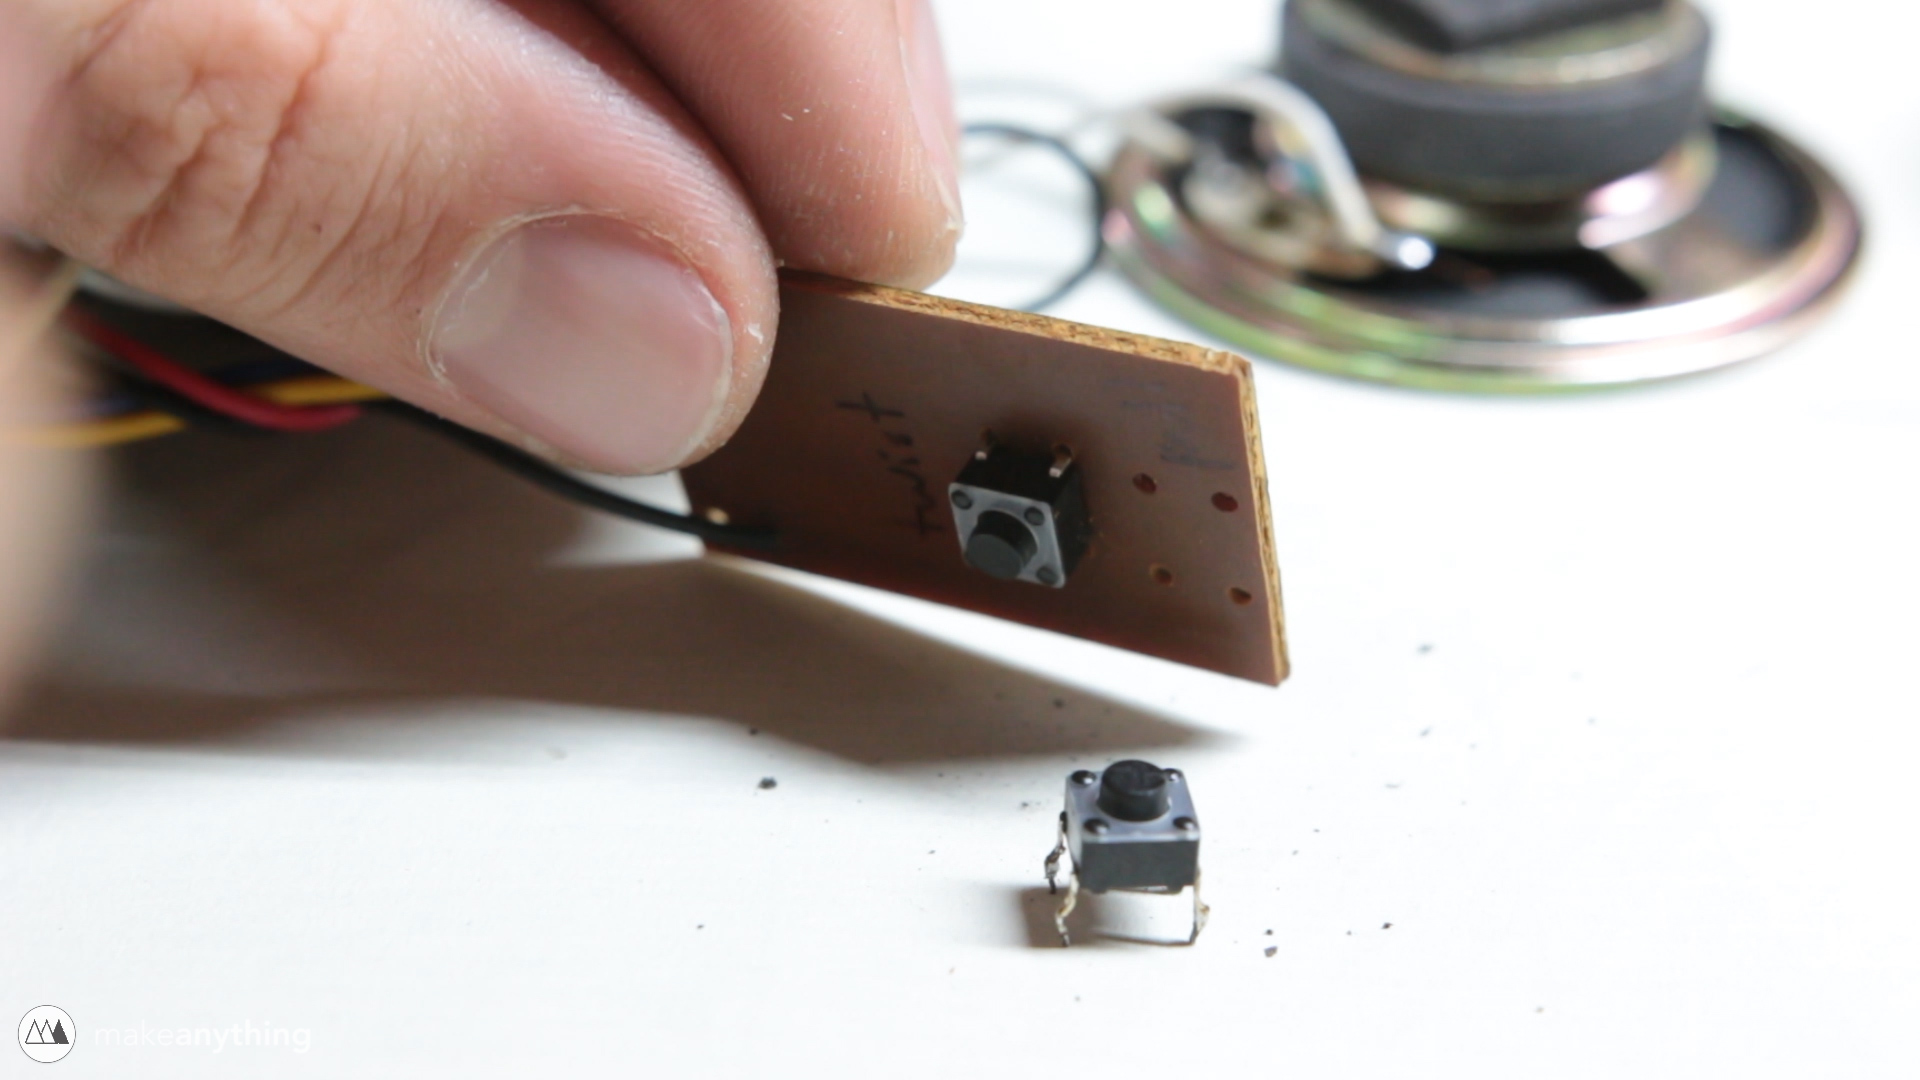
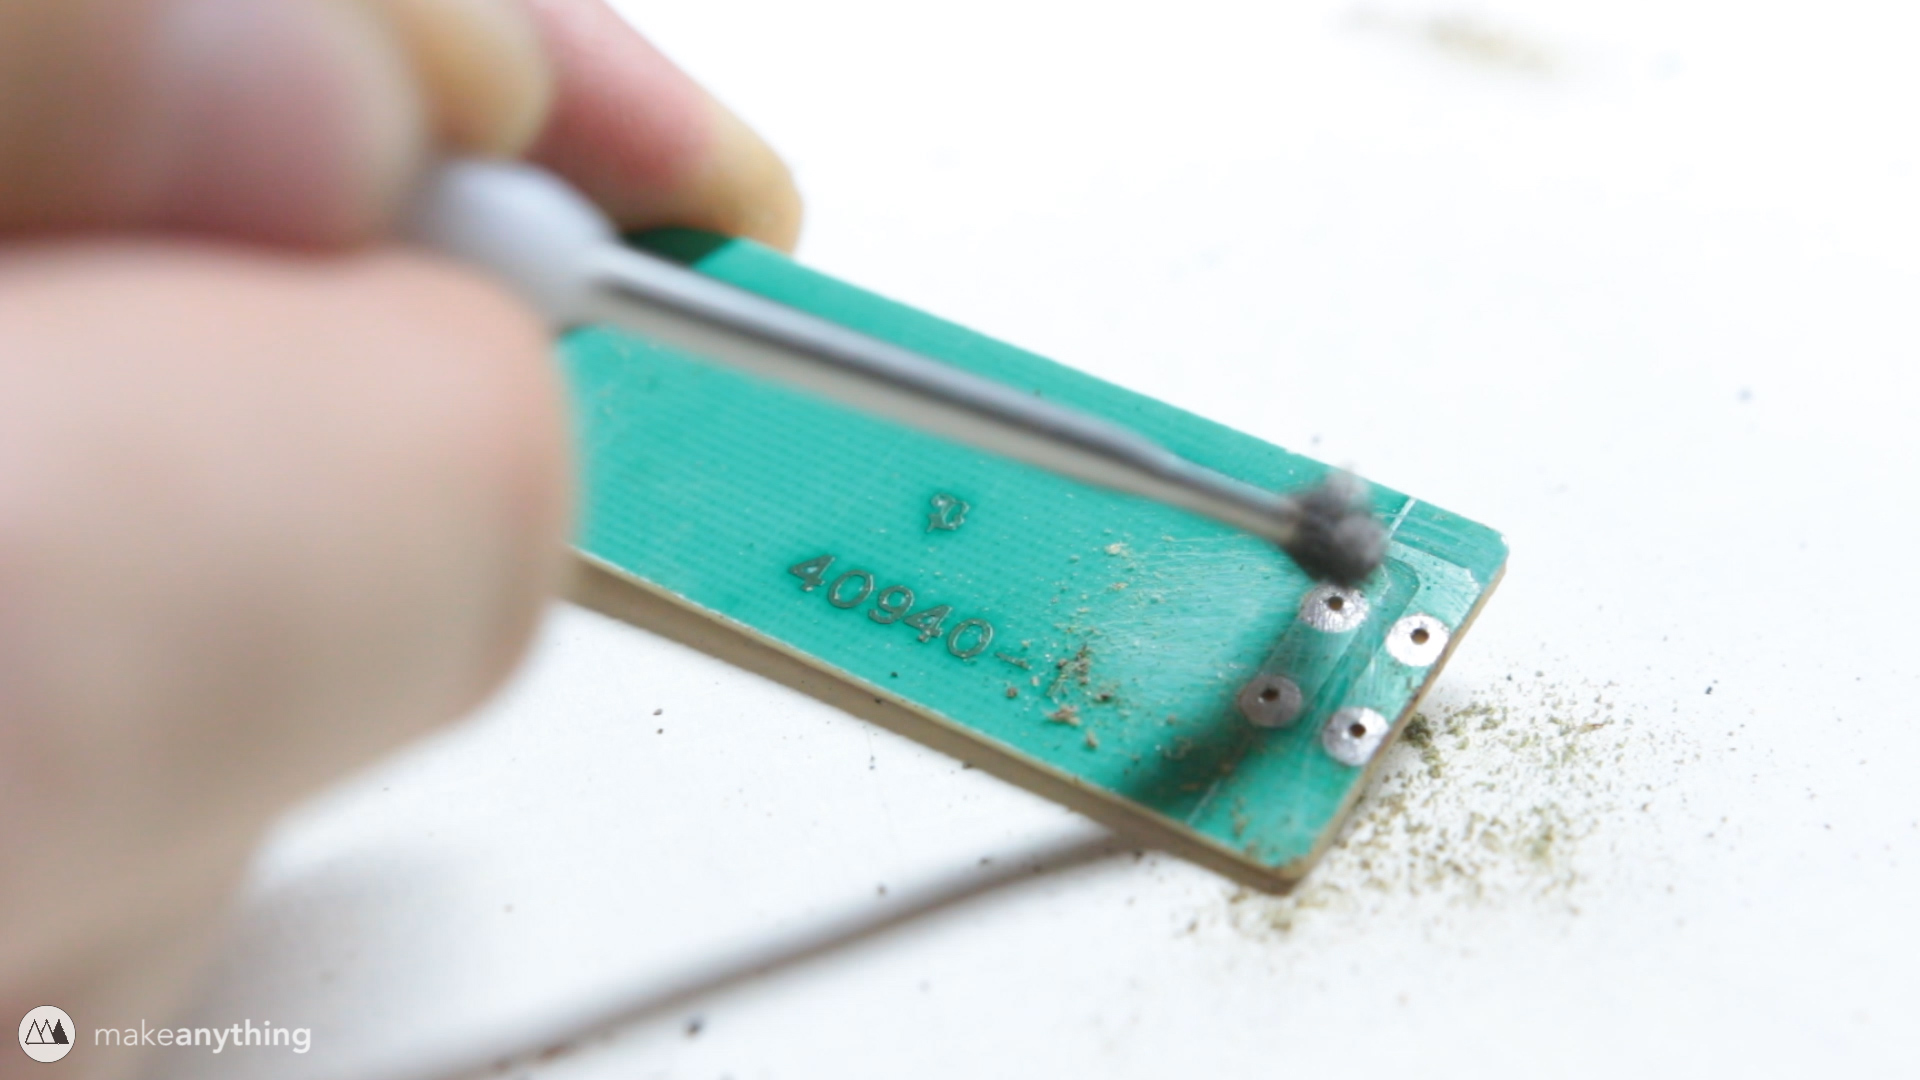
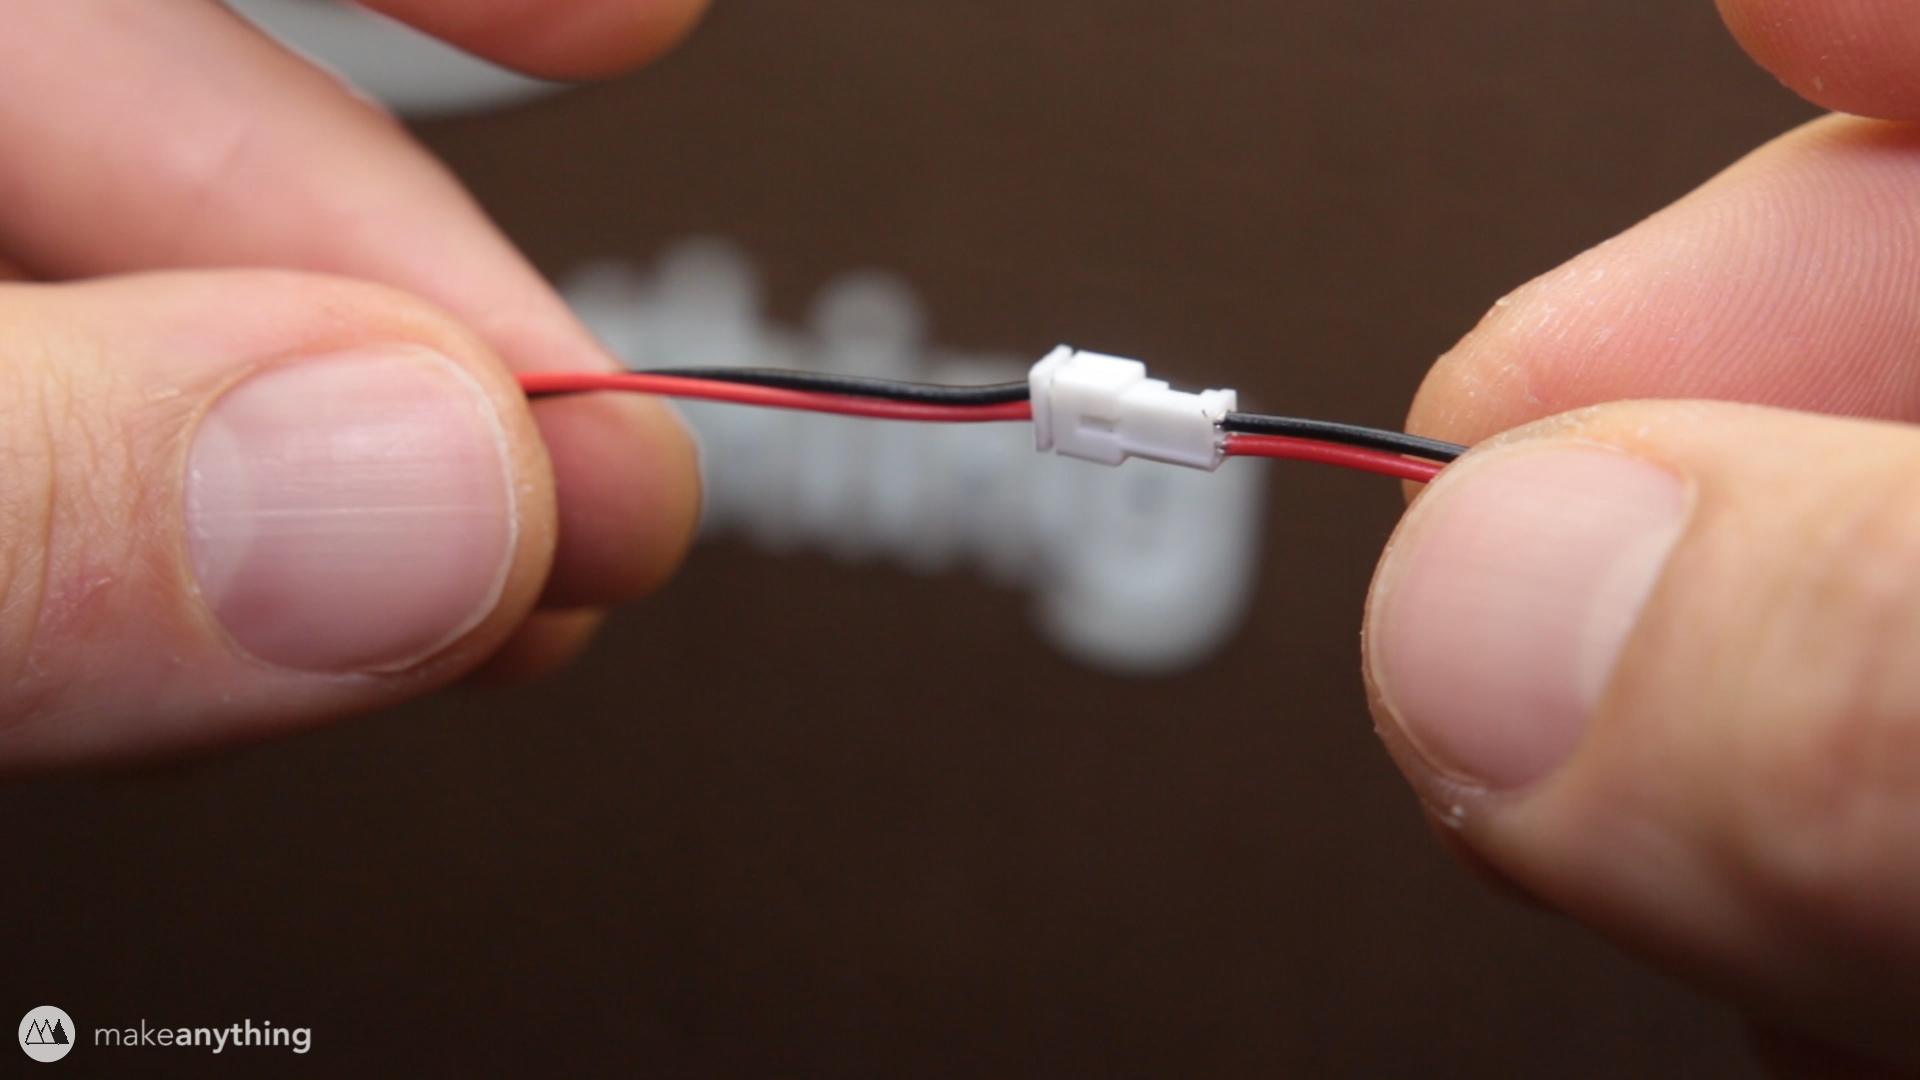
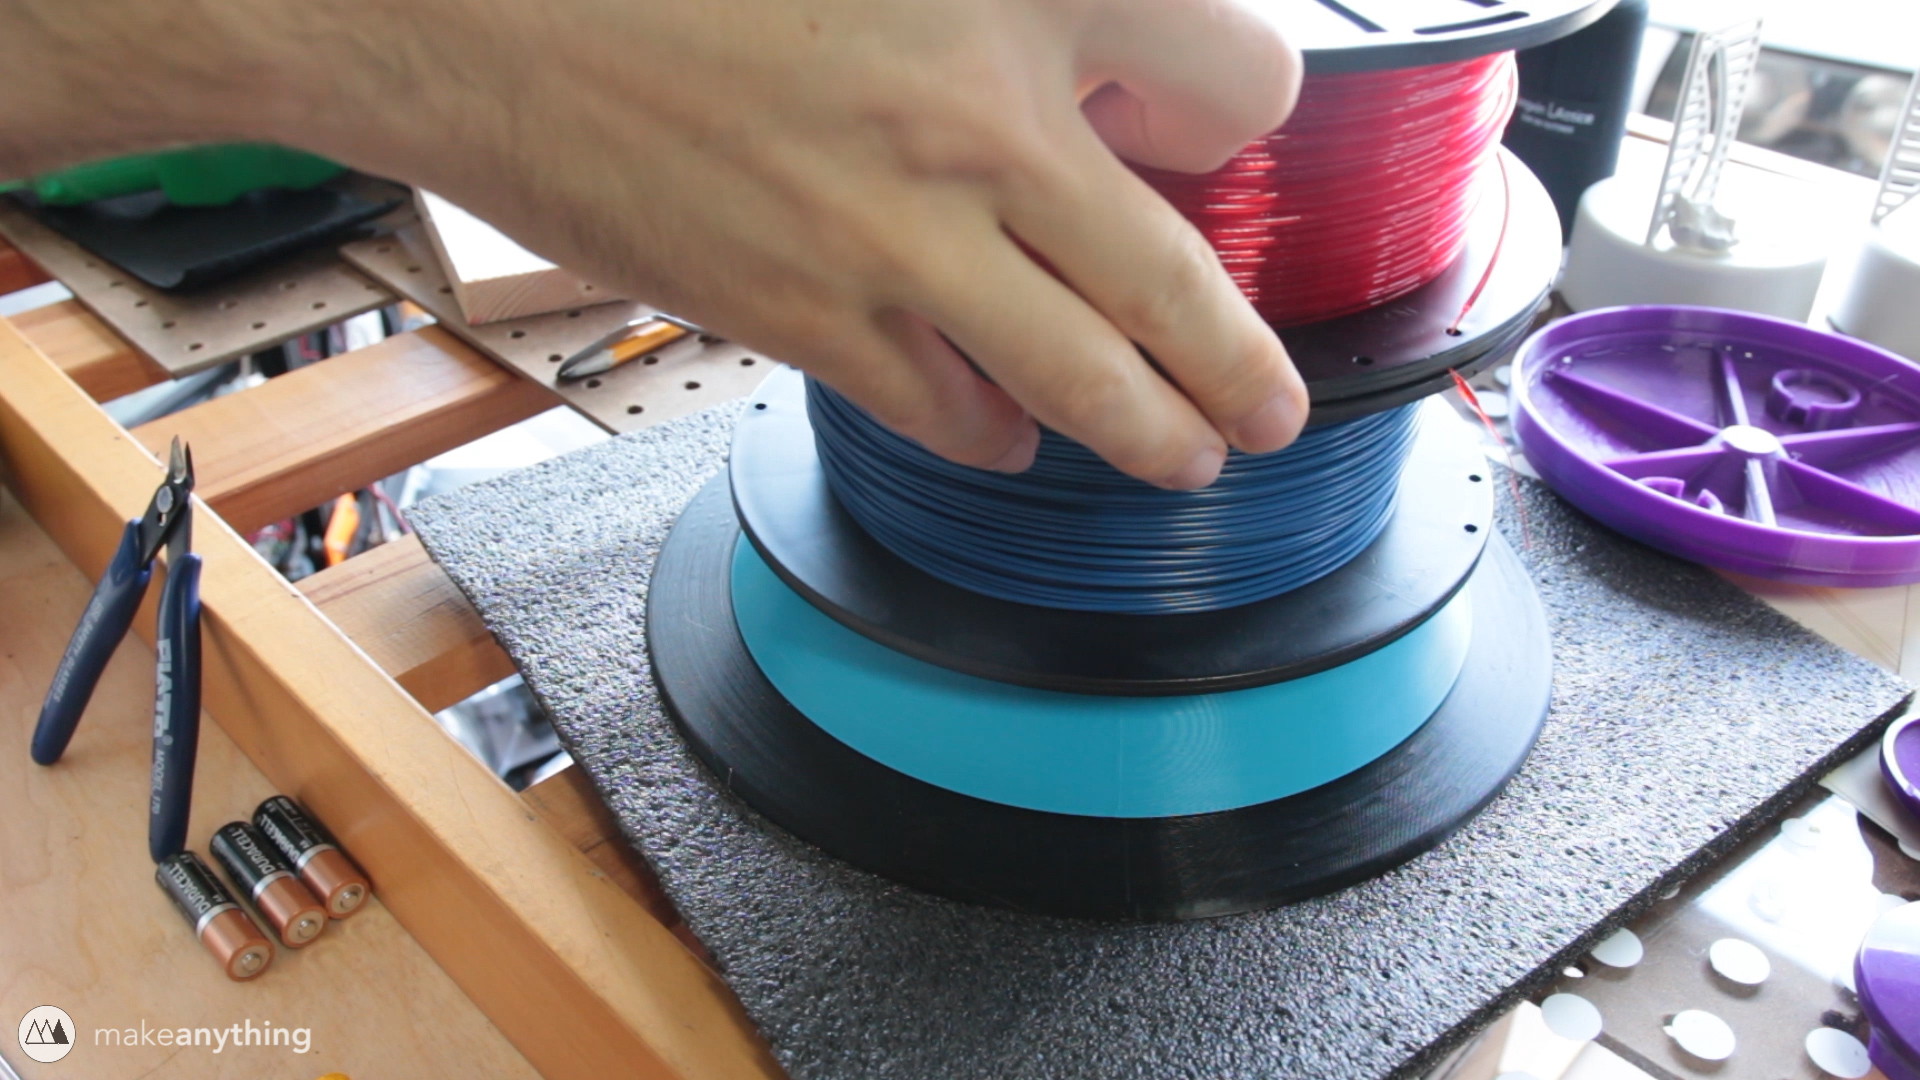
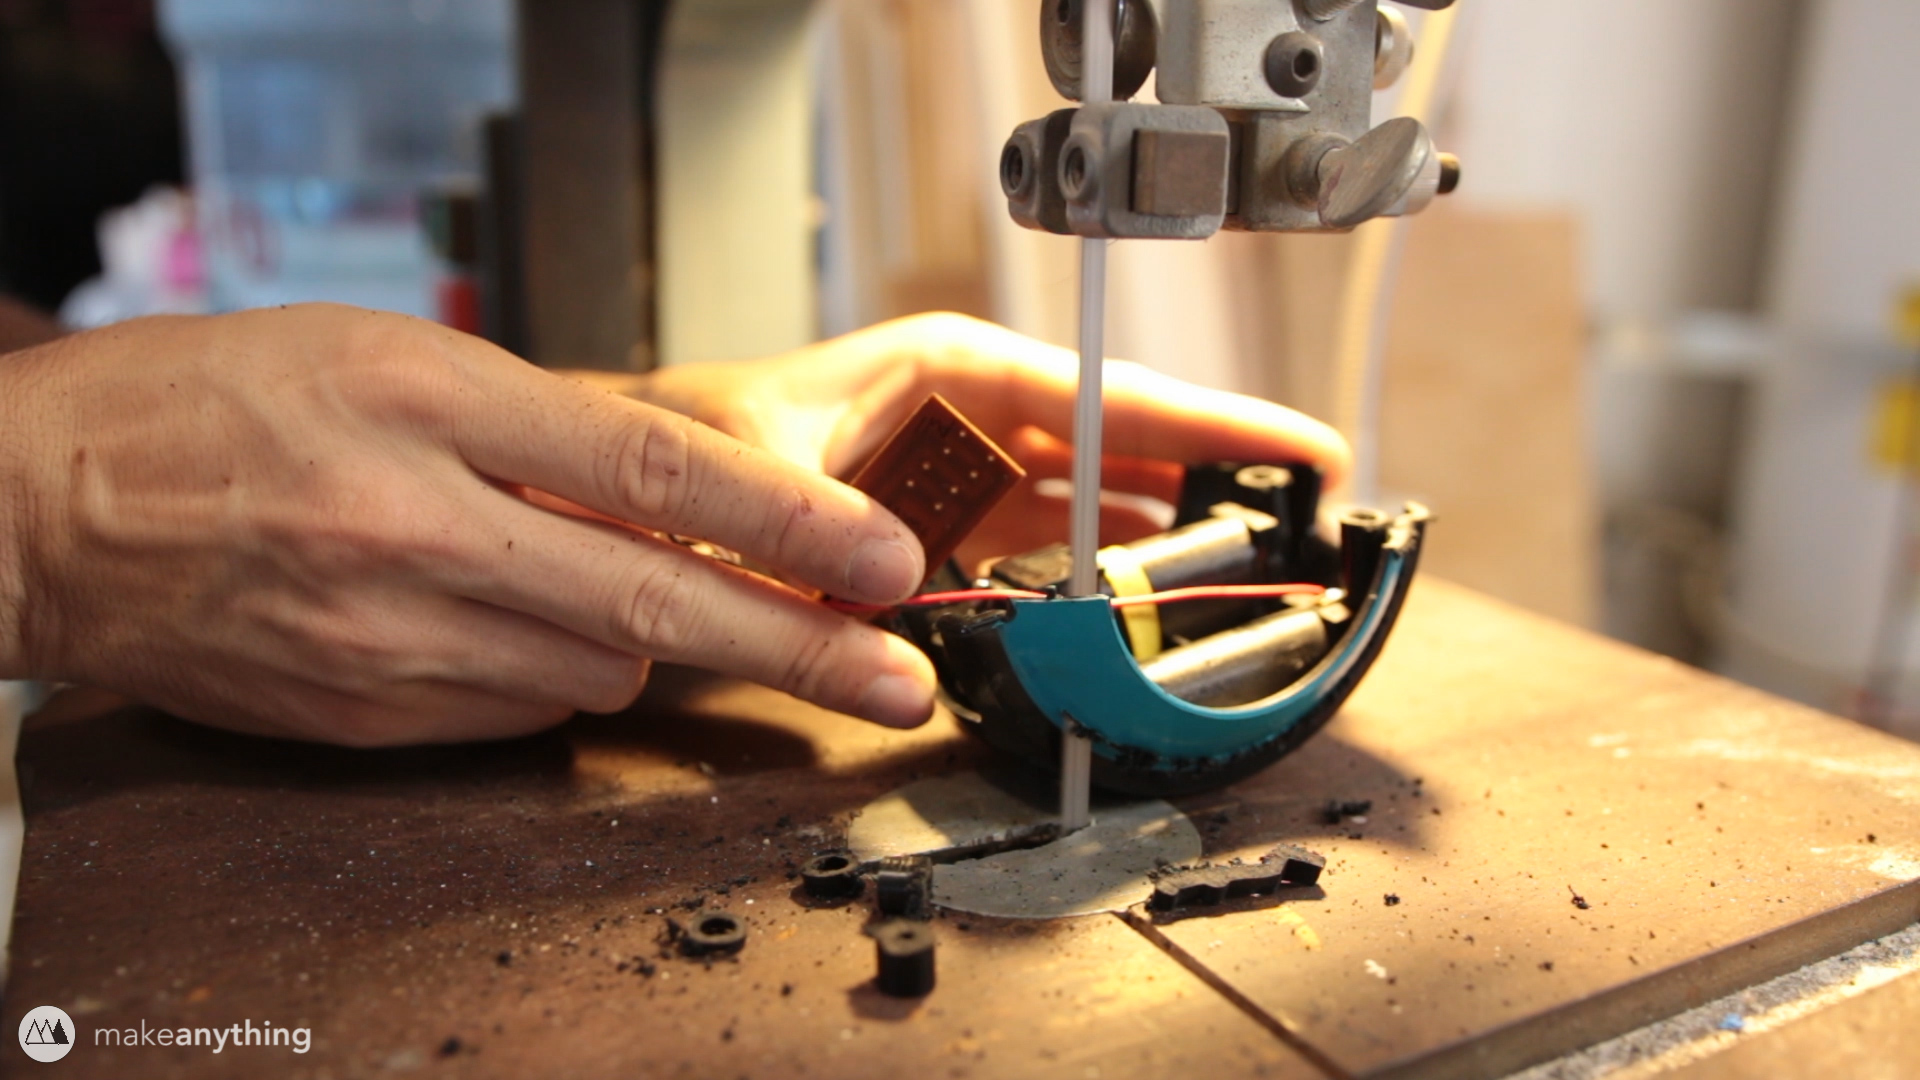
With the mechanism working well, I started dealing with the electronics. Since I had the circuit board from the Bop It Extreme, my plan was to simply rewire it to work with my costume. I labeled the different buttons with their corresponding actions and began desoldering them. I used a desoldering braid which wicks away solder so the parts can be cleanly separated. That and a quick go over with a small wire brush left the circuit board clean and ready for rewiring. I soldered the buttons into place on my 3D printed case, connecting them to these 2-pin micro connectors, so I would be able to plug each component in and out for easier transportation, assembly, etc.
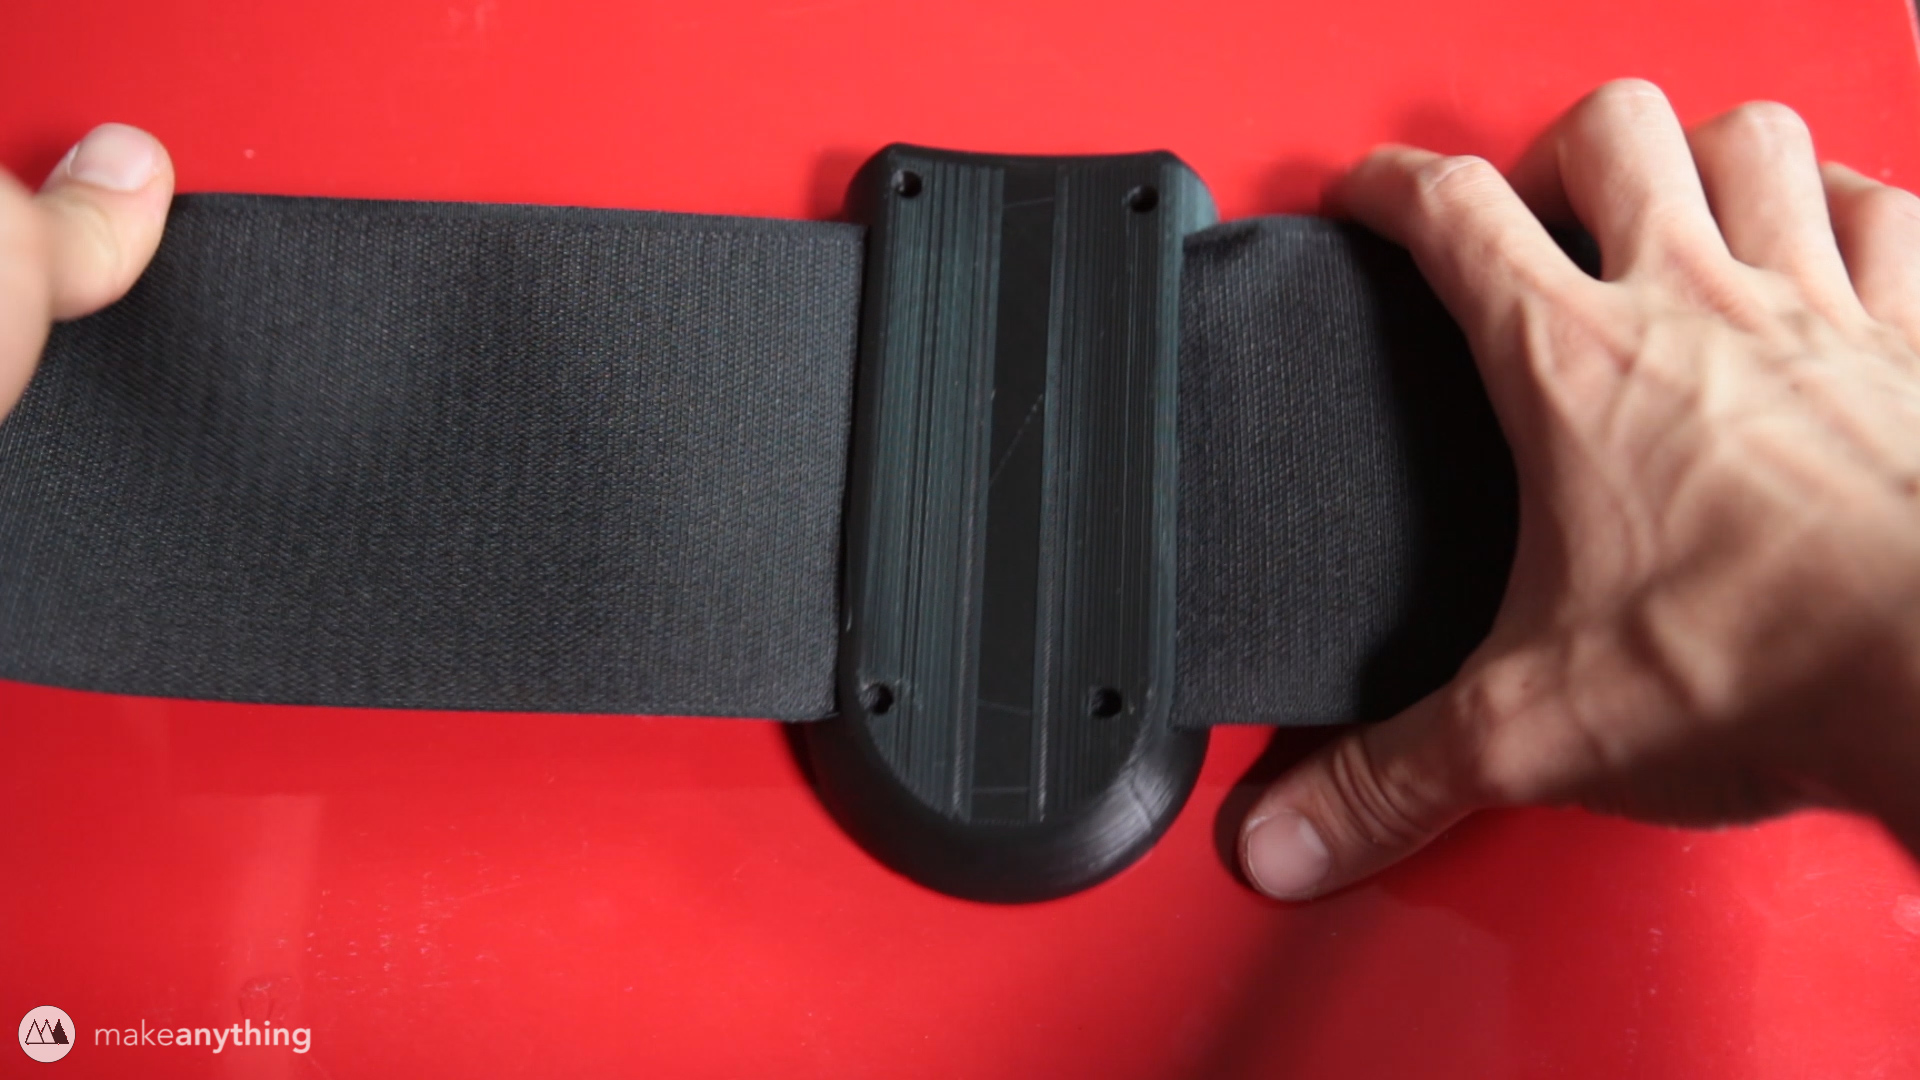
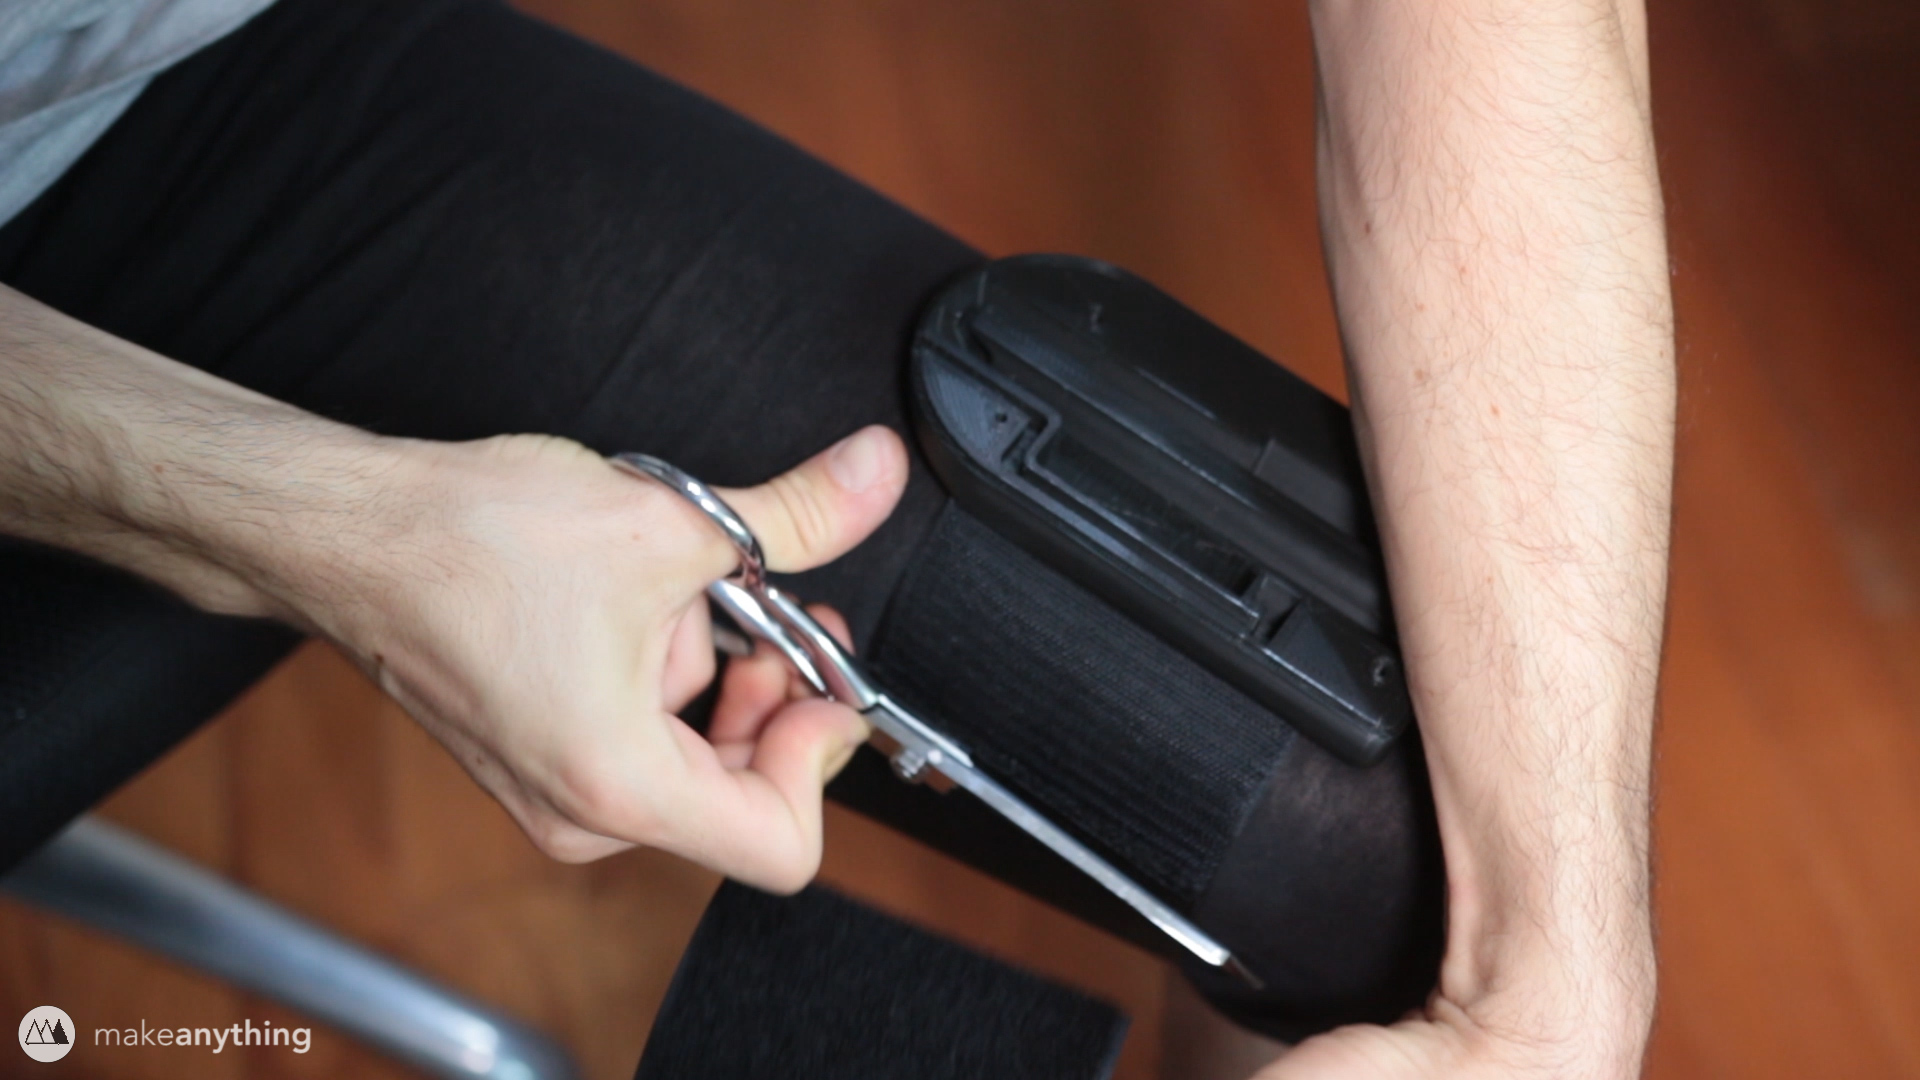
In order to strap the various components to my limbs, I used this super strong 10 cm wide velcro and cut it to size so it would overlap about 1.5″ on each end. I used this very simple method since I don’t plan on taking this on and off too many times, otherwise I would have used a method that allowed for easier attaching and removal. This way is a bit awkward but it was super easy to make and it works well enough!
I ended up having to use a thin spacer between the knob and case so the button wouldn’t accidentally get pressed. I also hot glued a block of foam to the bottom of the case to prevent the twist knob from rubbing against my elbow. You can also see the patch of velcro I glue to the cases to better hold the parts in place (the opposite side was sewed directly onto my shirt + tights)
Pull It!
Don’t worry, a lot of the steps were repeated so these next sections will be shorter!
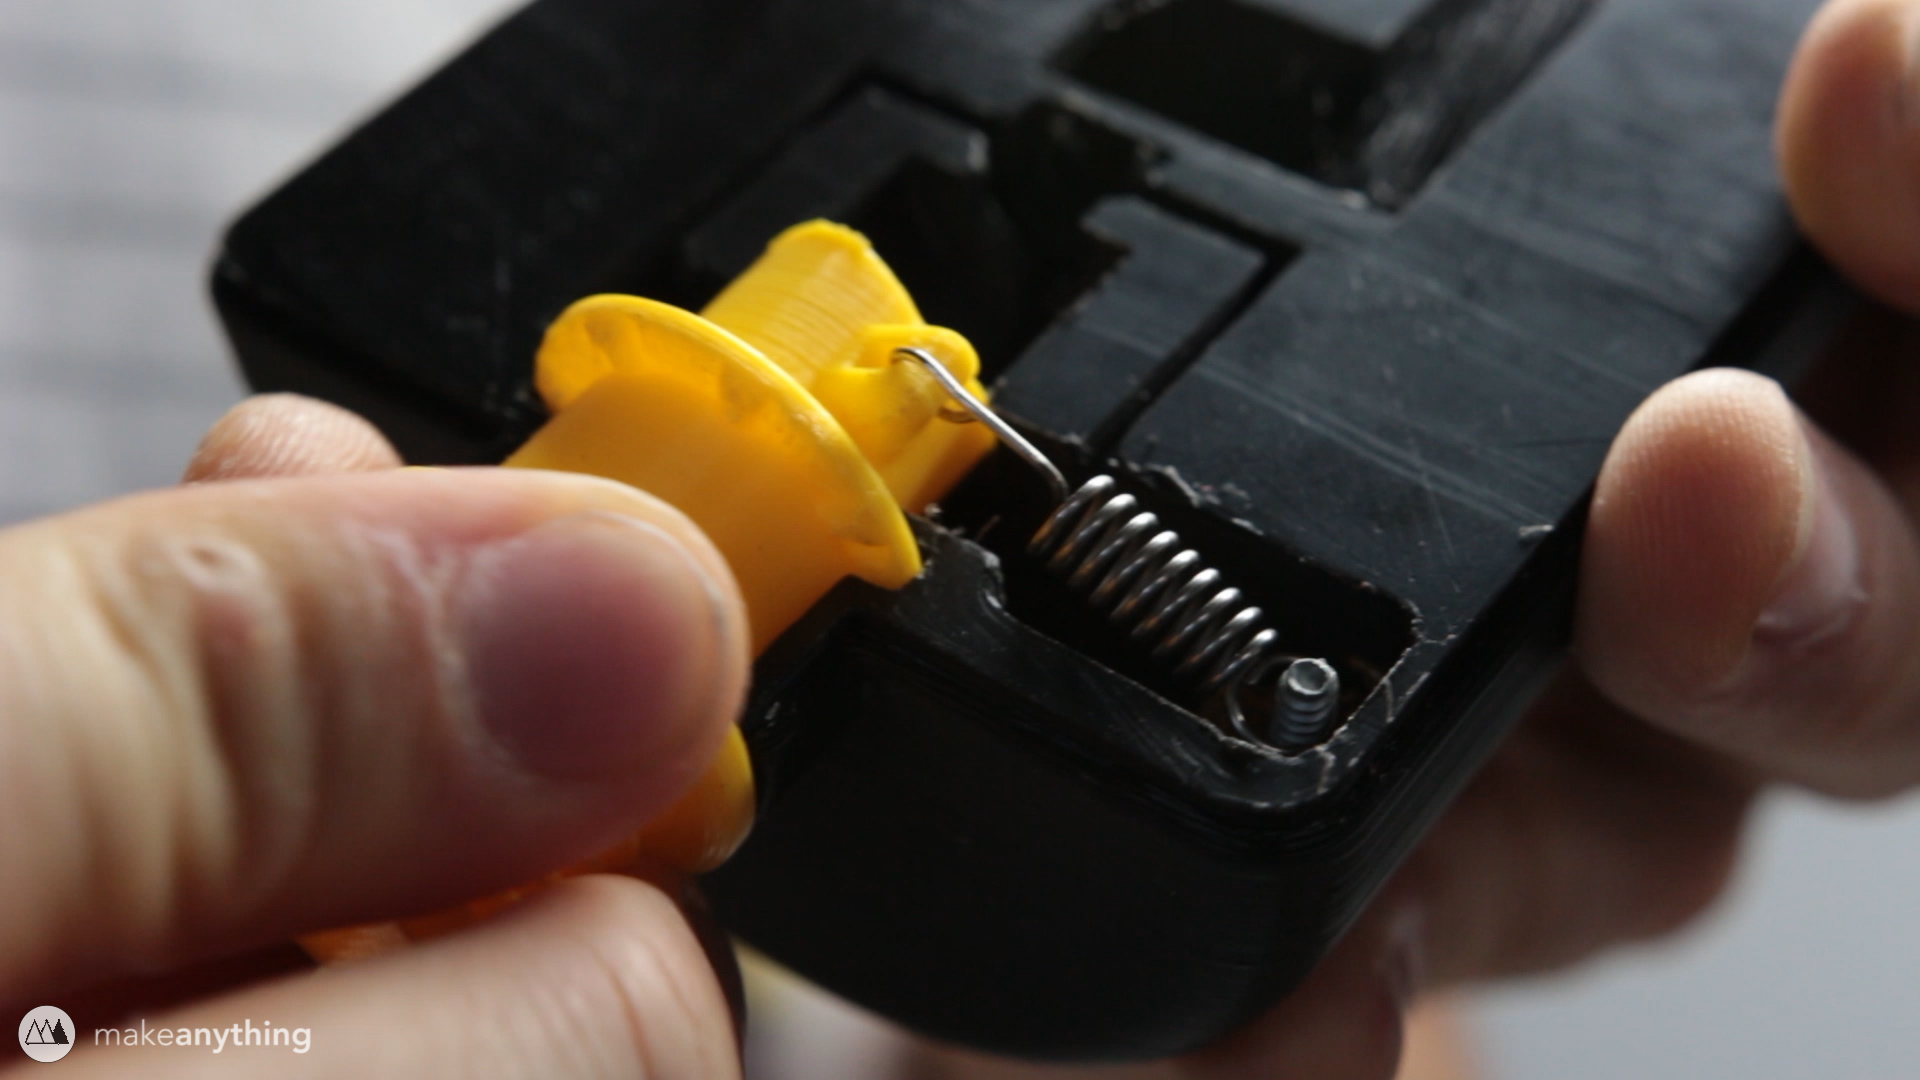
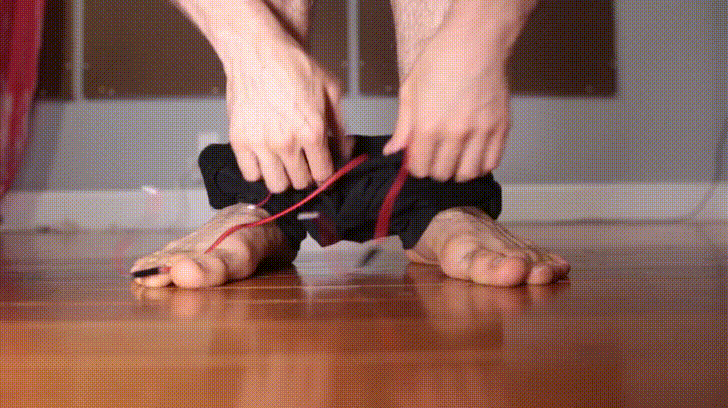
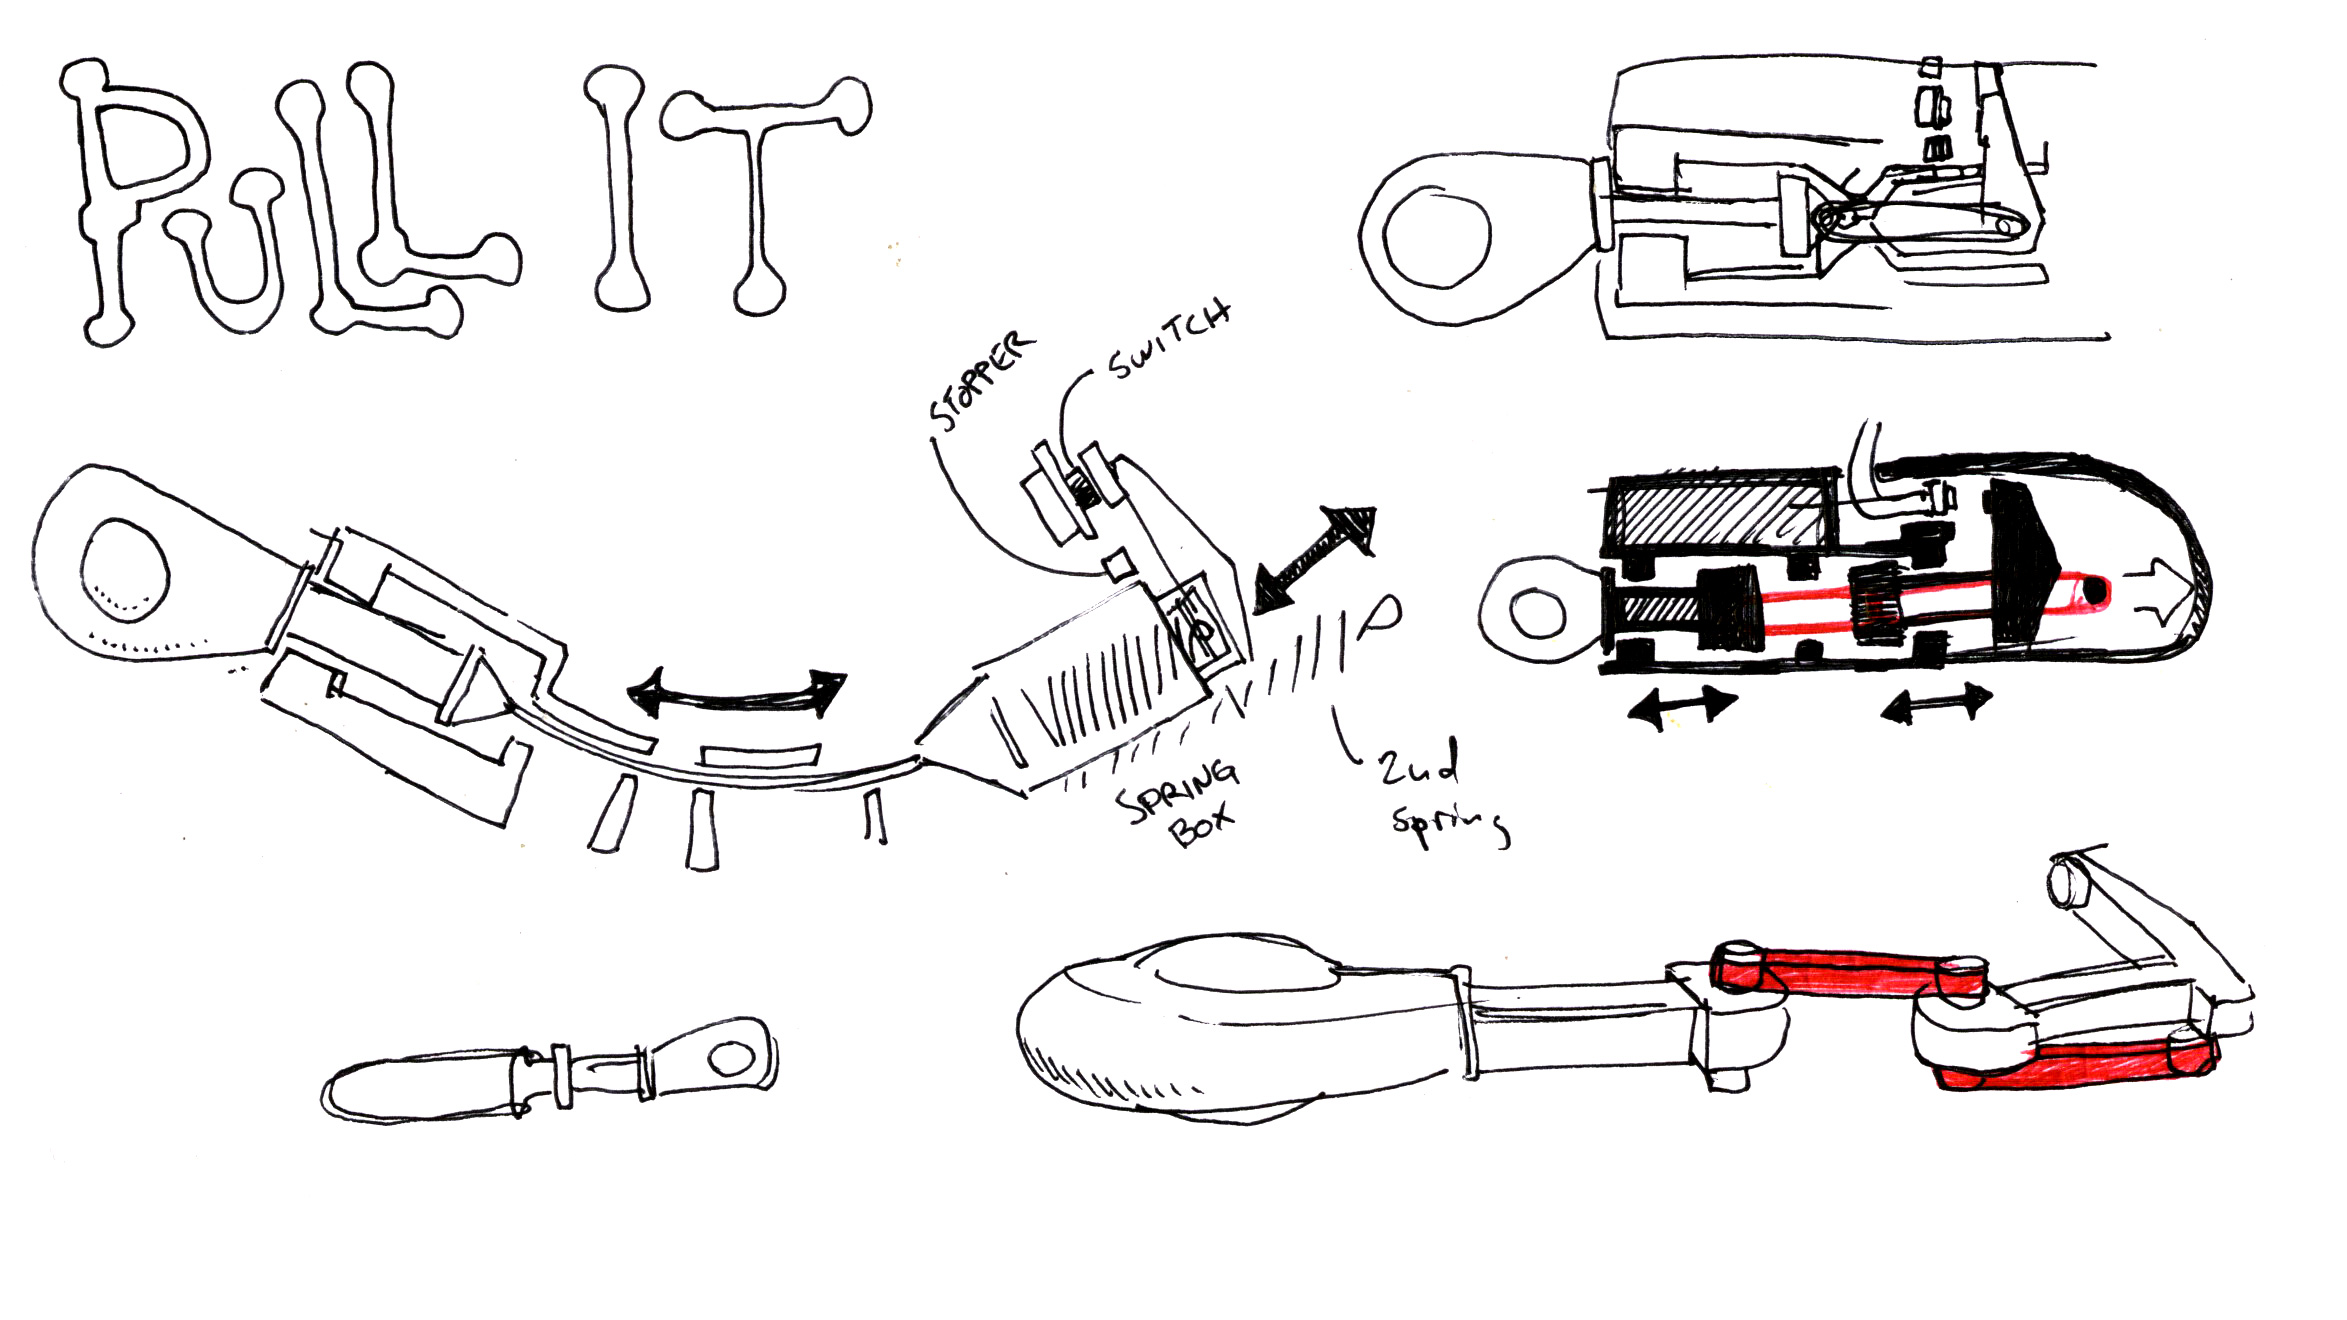
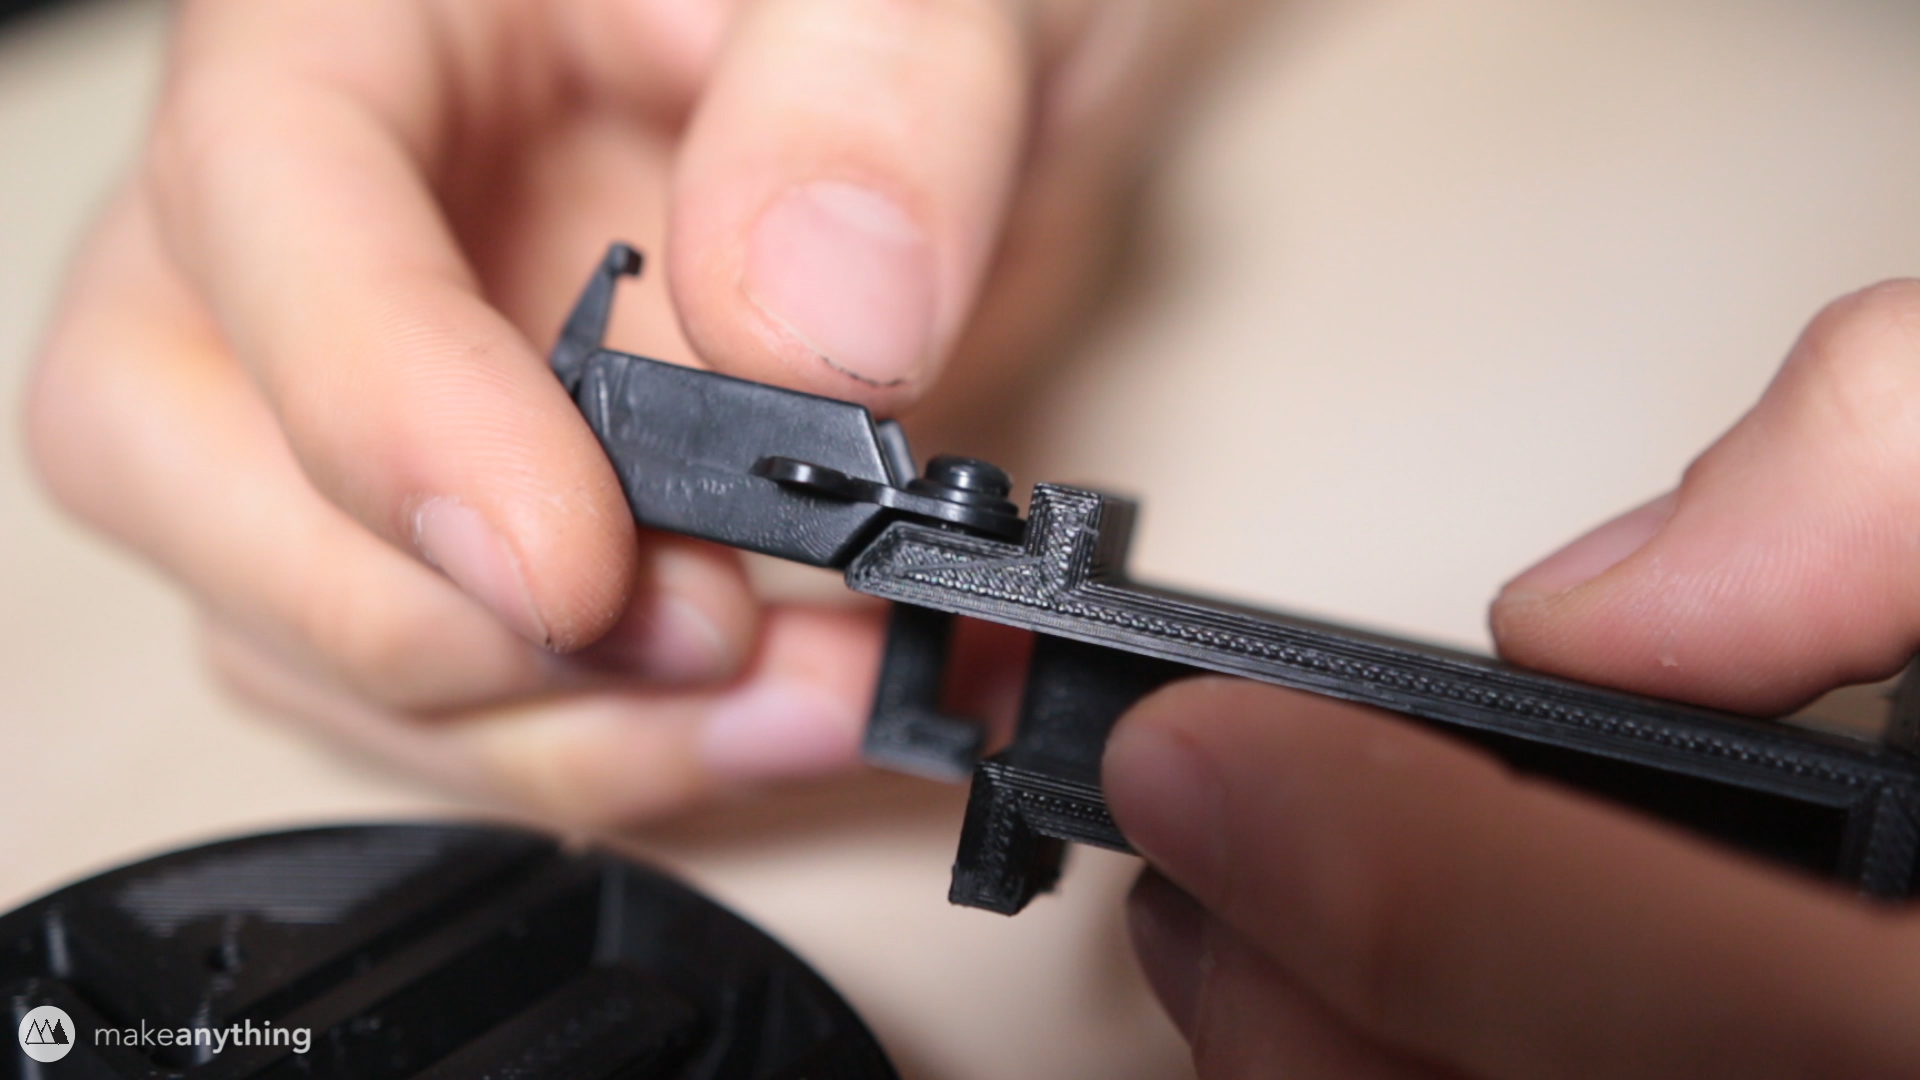
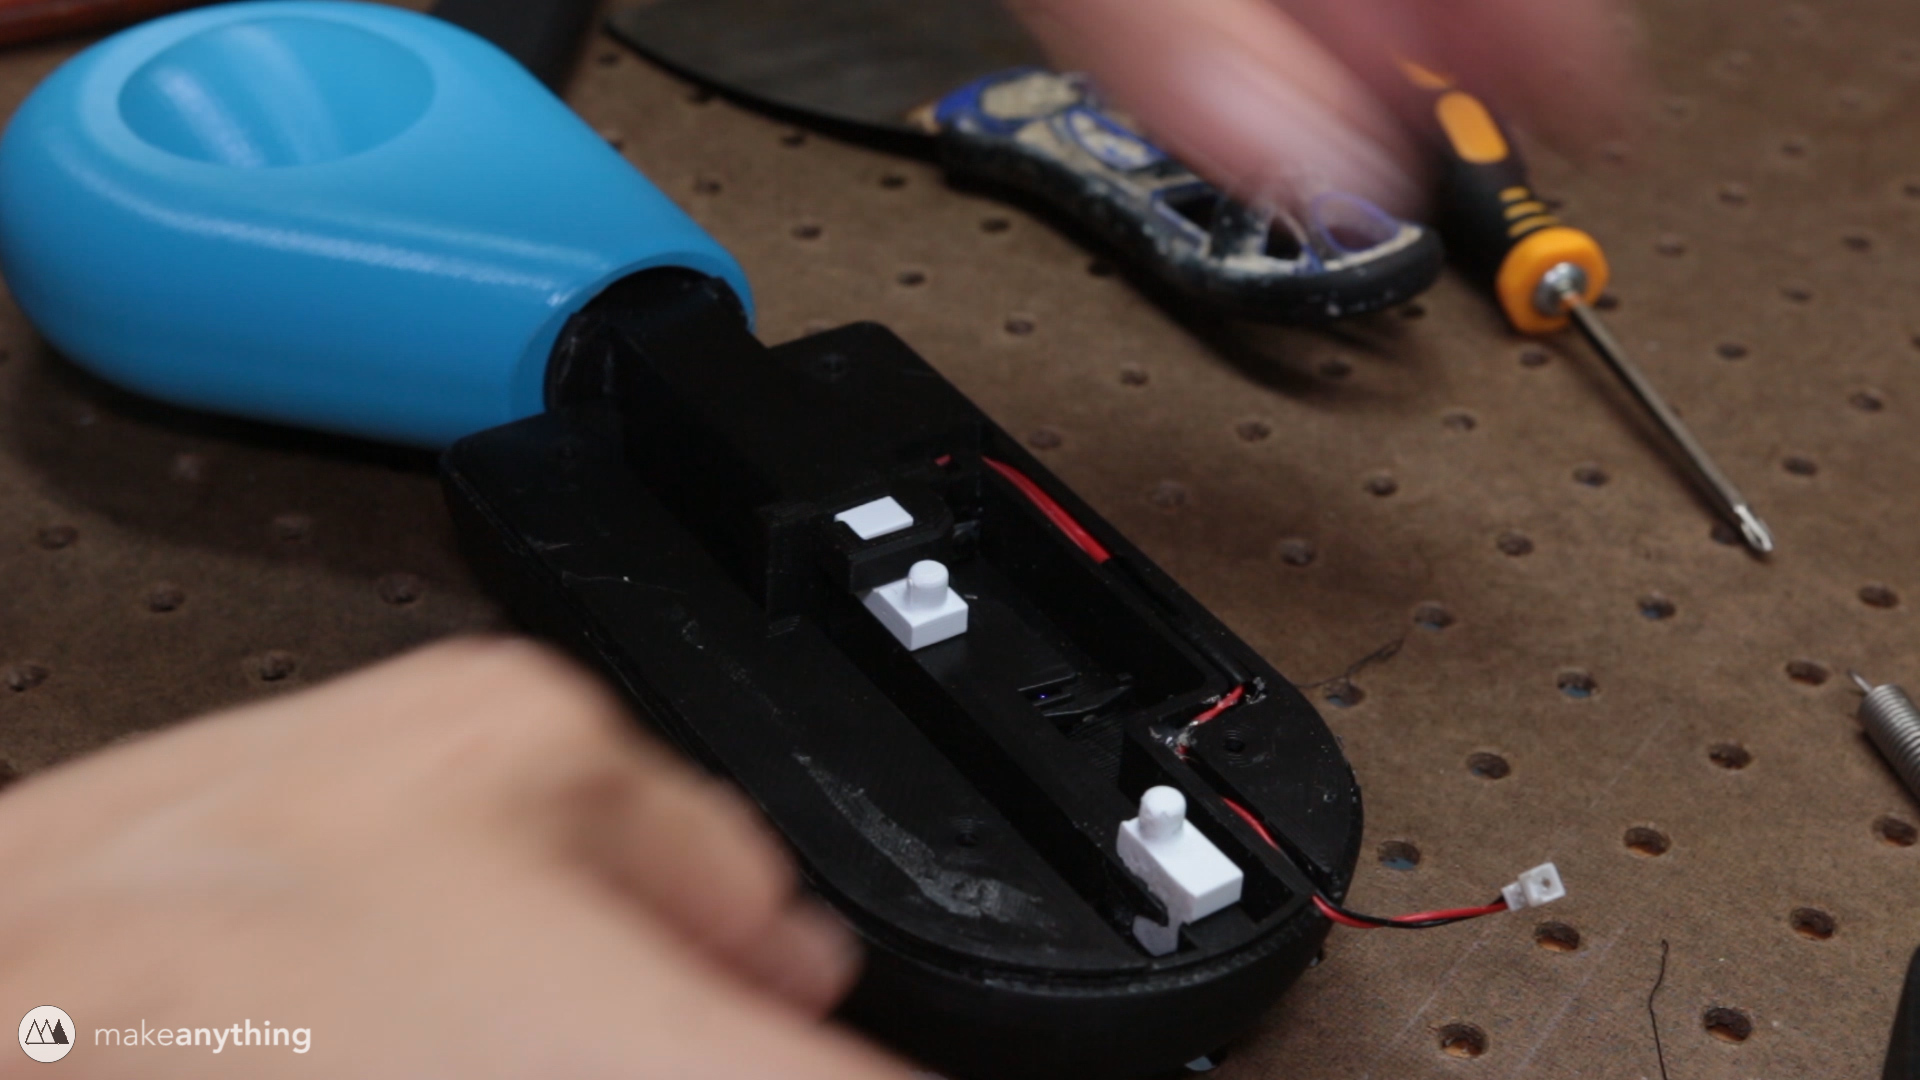
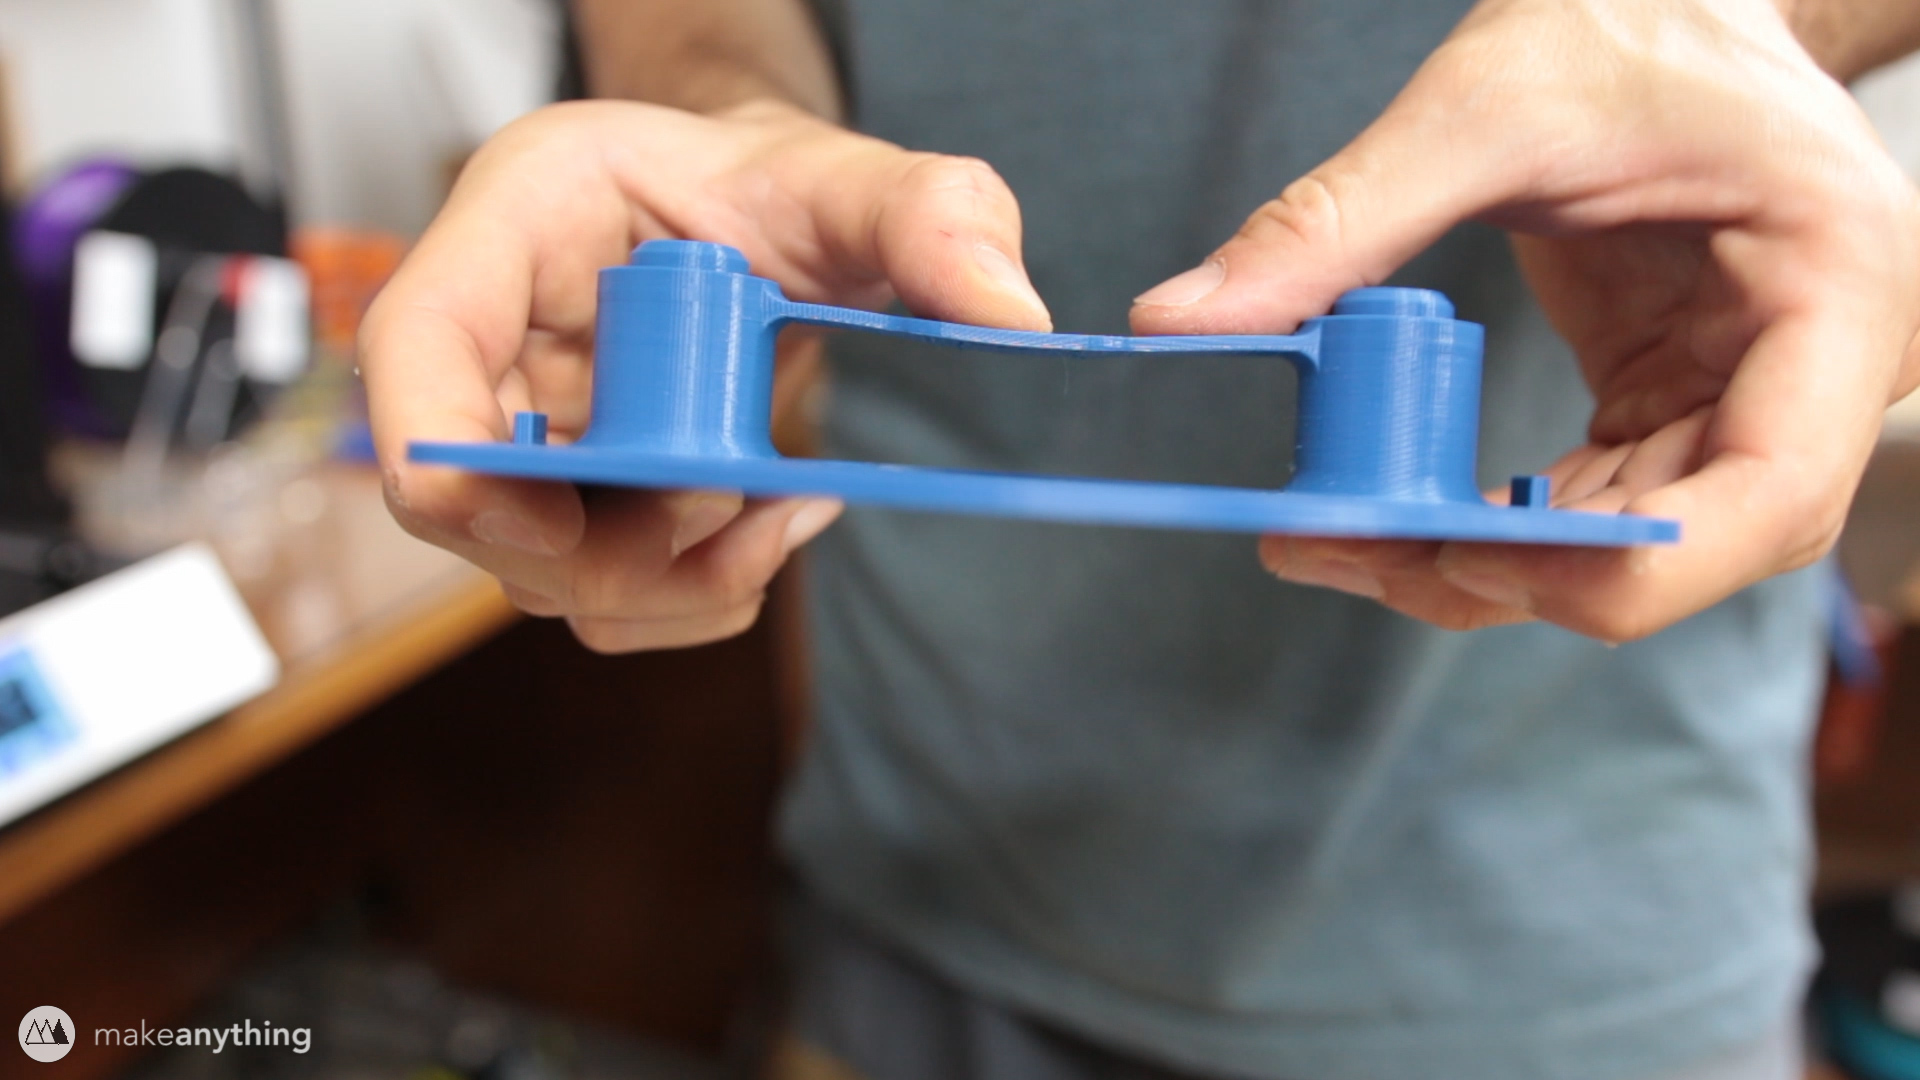
Next up was the Pull It. On the original toy, the handle is connected to a flexible ribbon that connects to a “spring box”, which presses the button but gives way so the button doesn’t experience forces that could break it. A second spring connects that box to the body, pulling the handle back up after the player pulls it down.
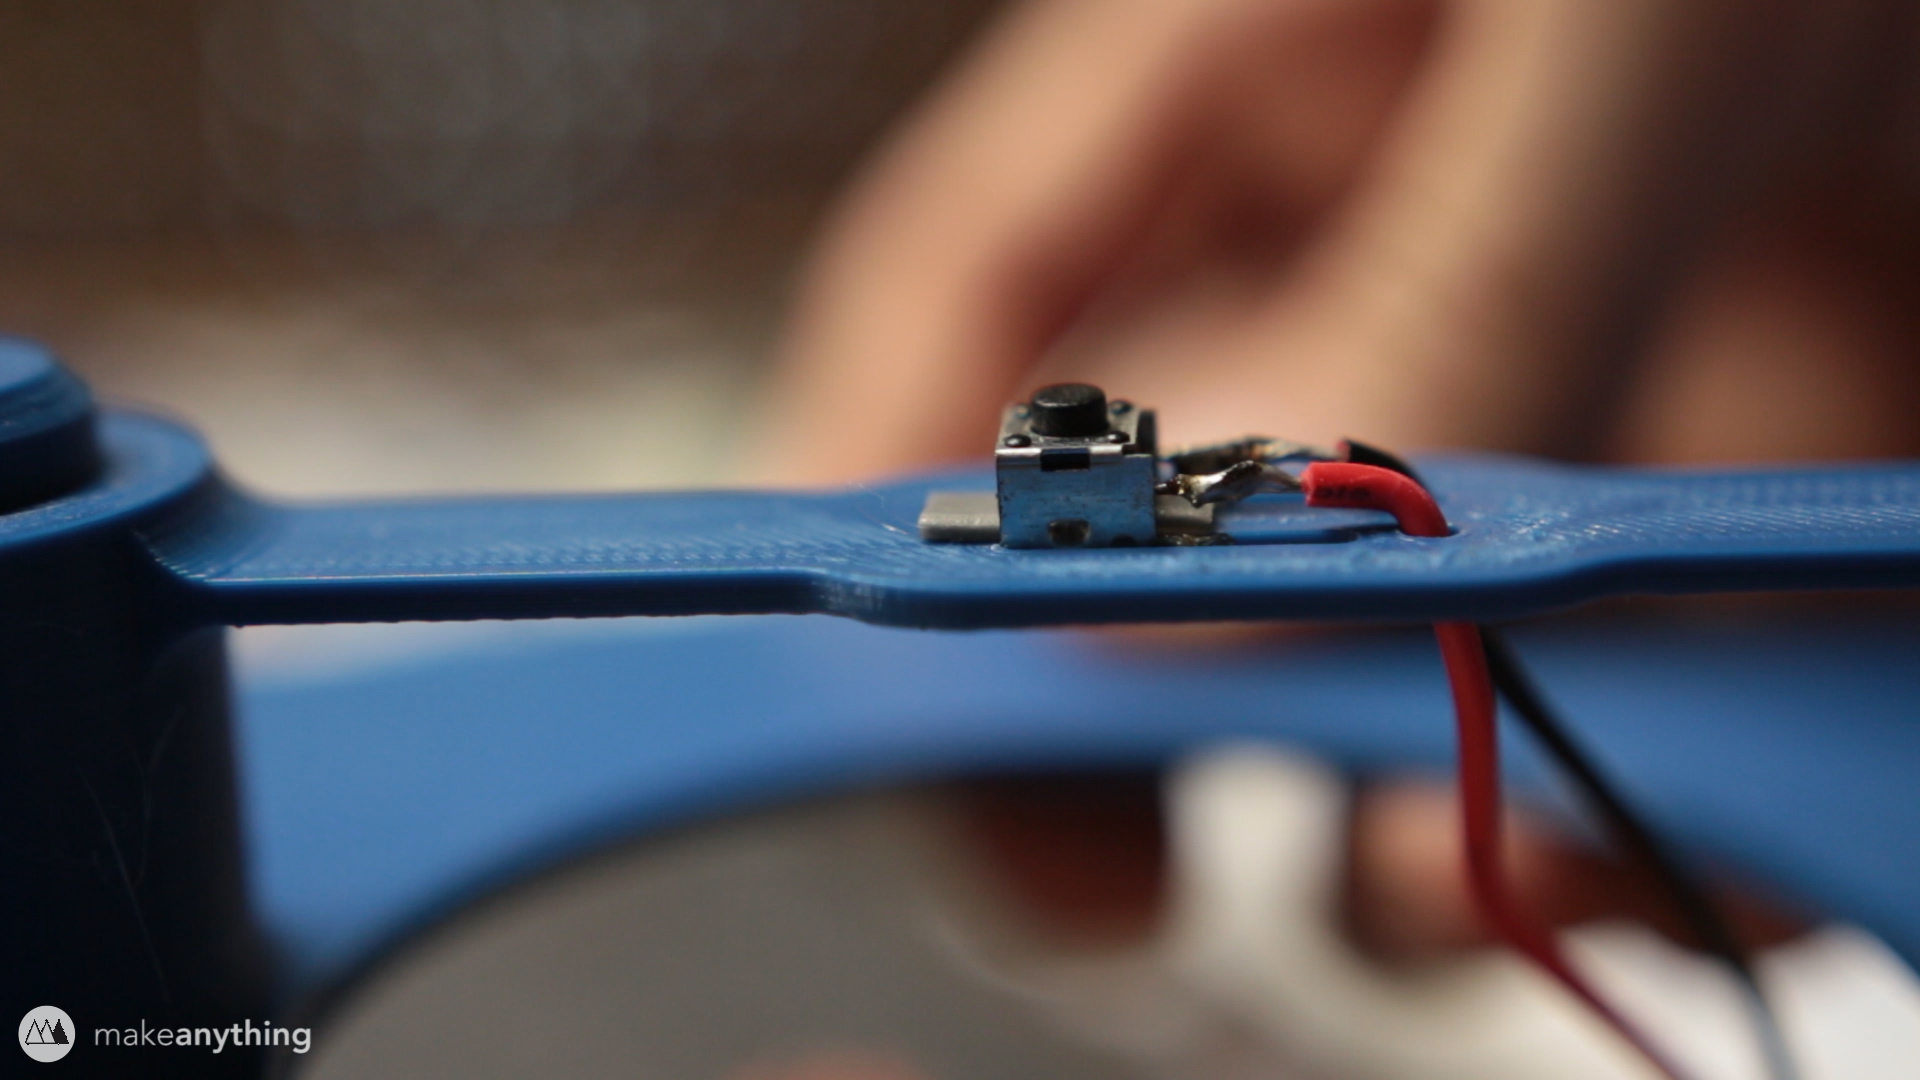
Like the Twist It case, I modeled a groove into this case to house the button and lead the wiring out the back. Then I hot glued the handle to the mechanism so it wouldn’t unscrew during use. I also glued some pieces of felt to the part of the handle that hits the case when it gets pulled back so it wouldn’t be so noisy and to prevent potential damage from repeated hits.
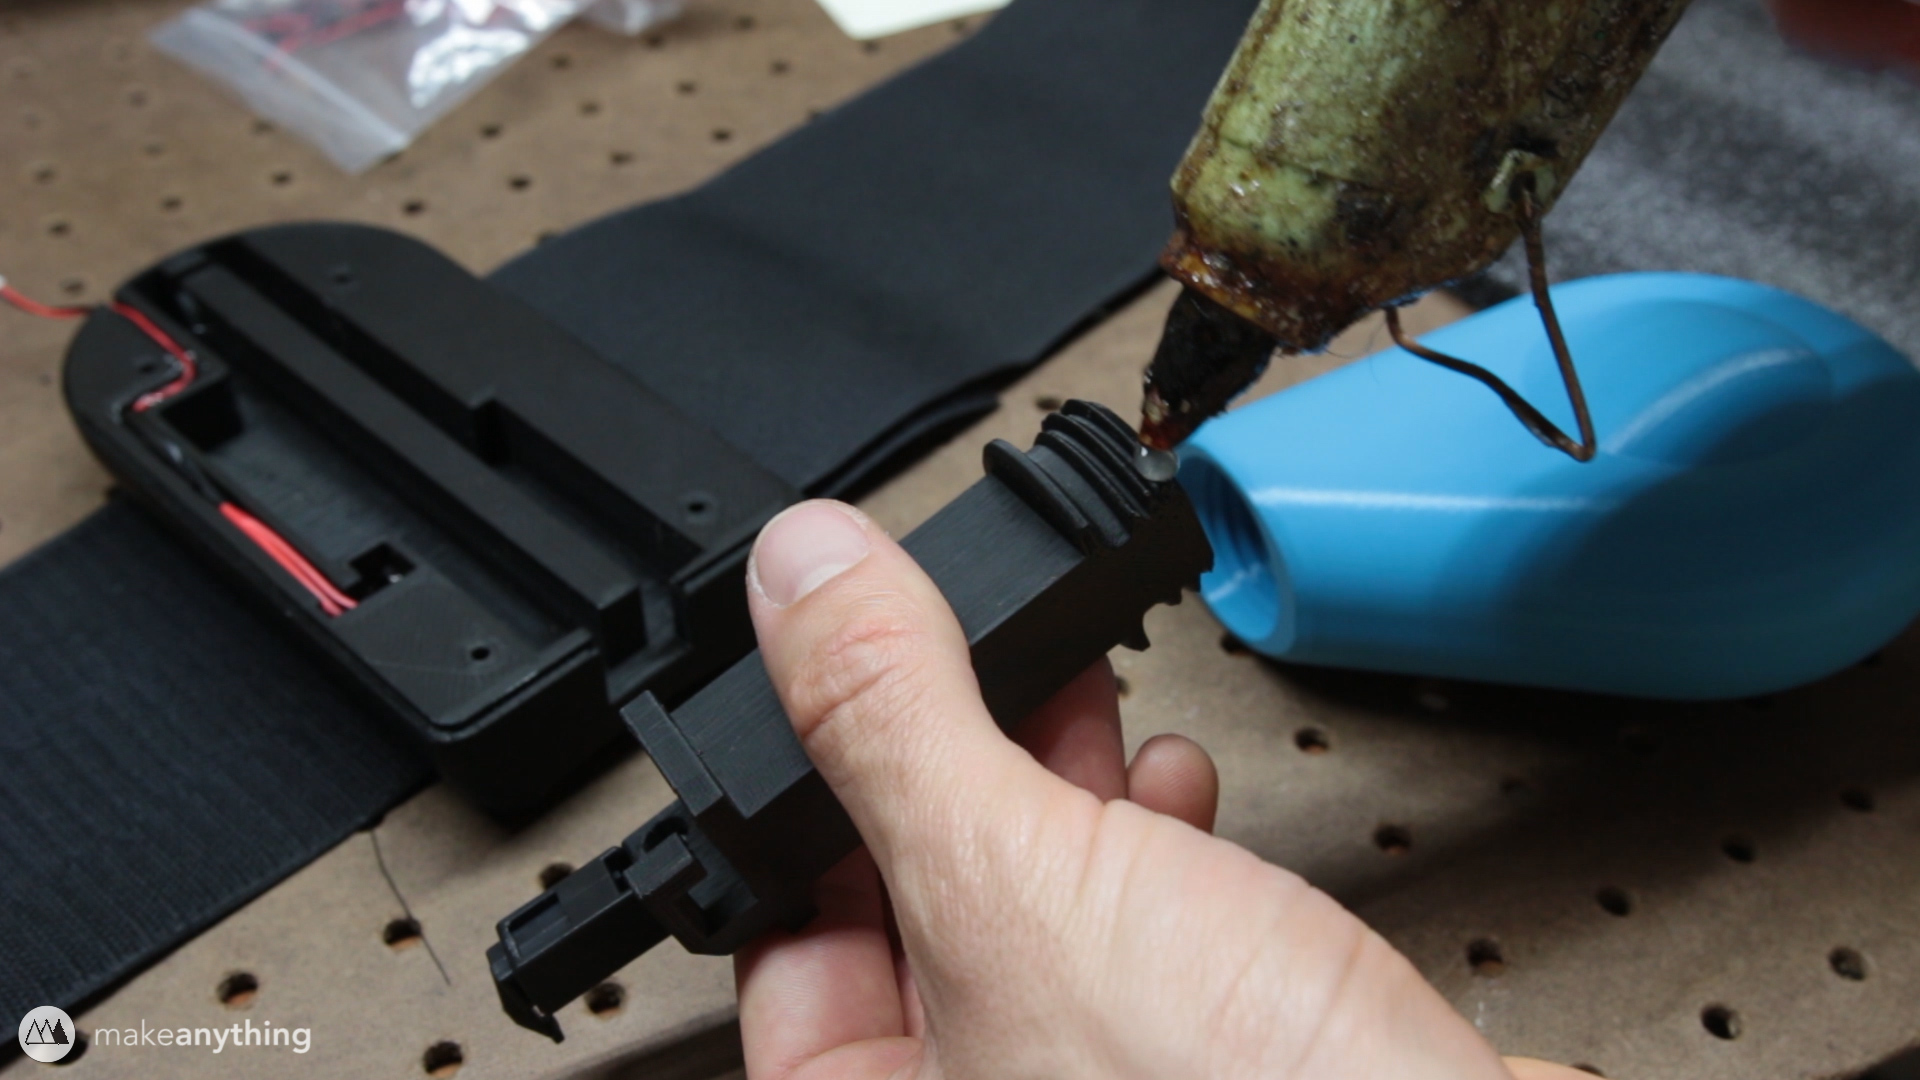
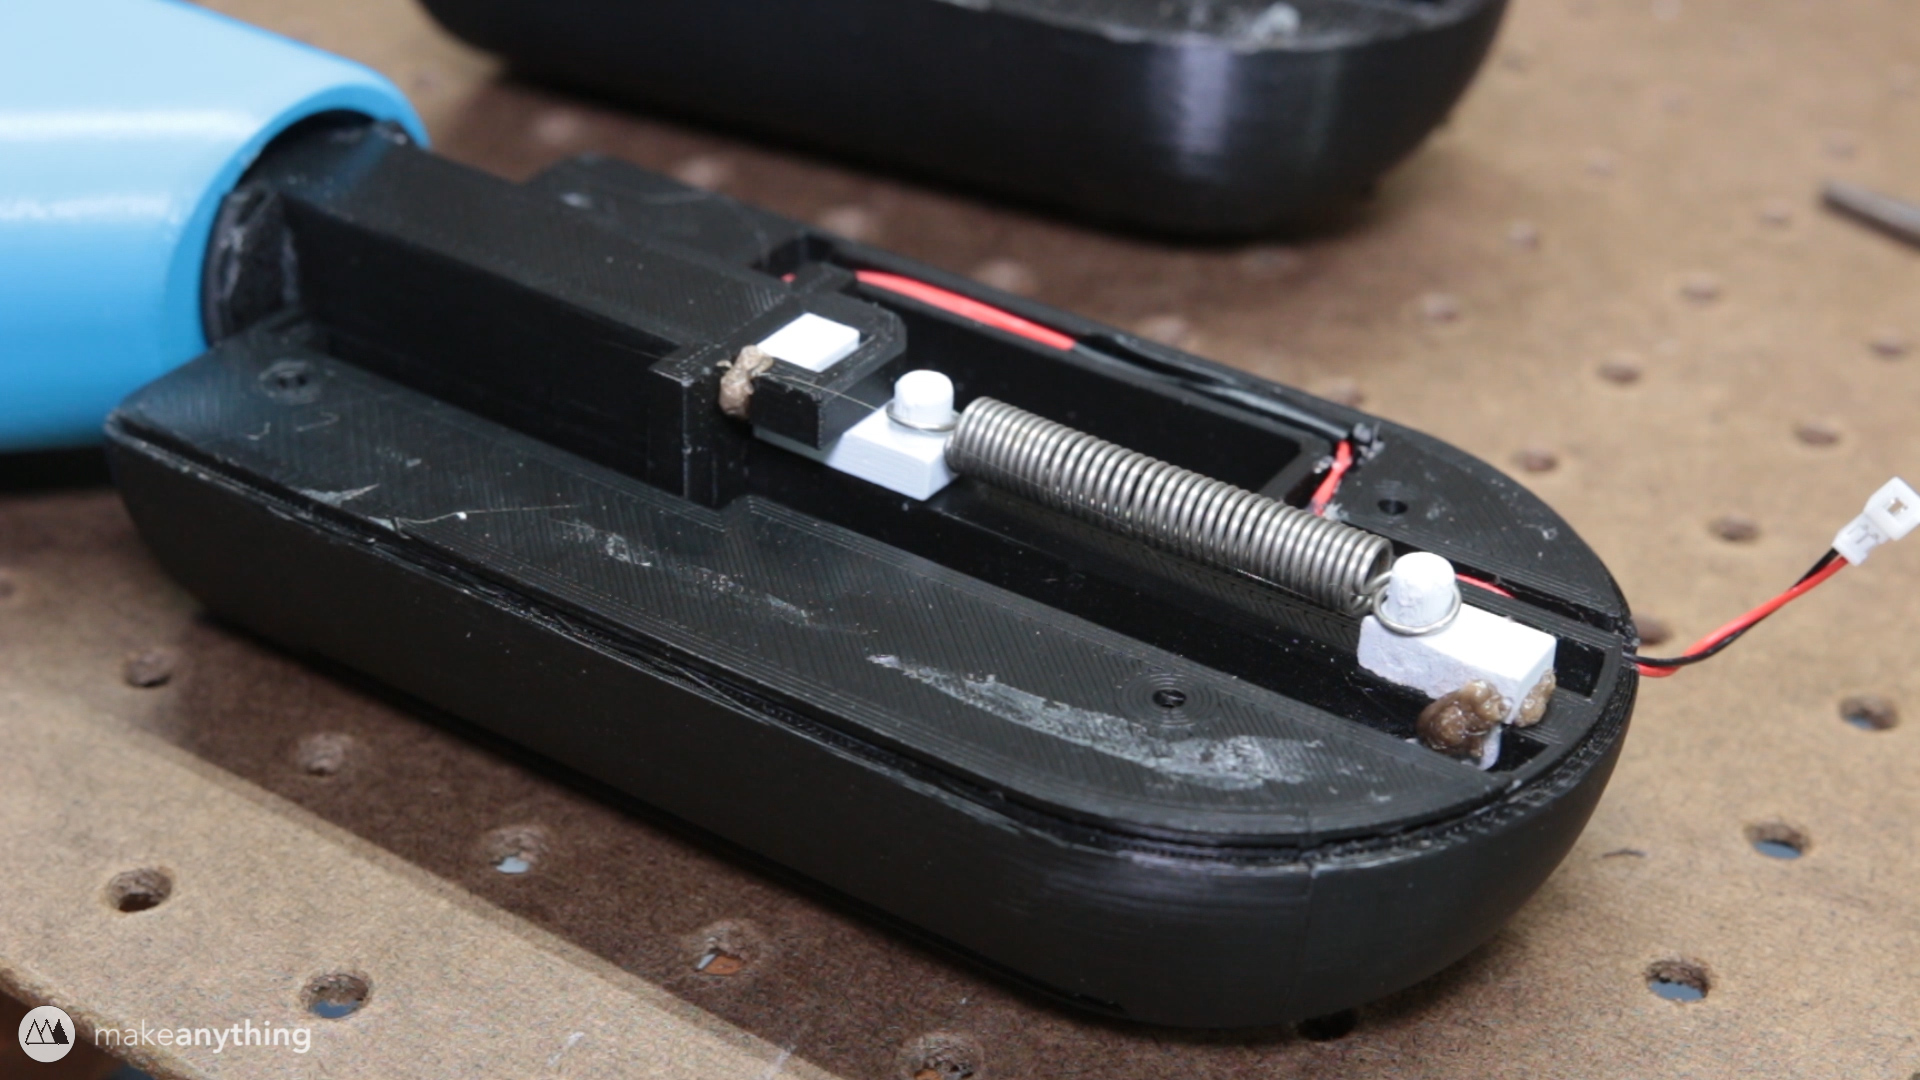
Here you can see all the parts installed, along with a rubber band to pull the handle back to its resting position. I used the elastic band instead of a spring because they’re cheap and easily sourced, but that turned out to be a flawed plan. The band snapped after only a few uses and I had to pry the case open to replace it.
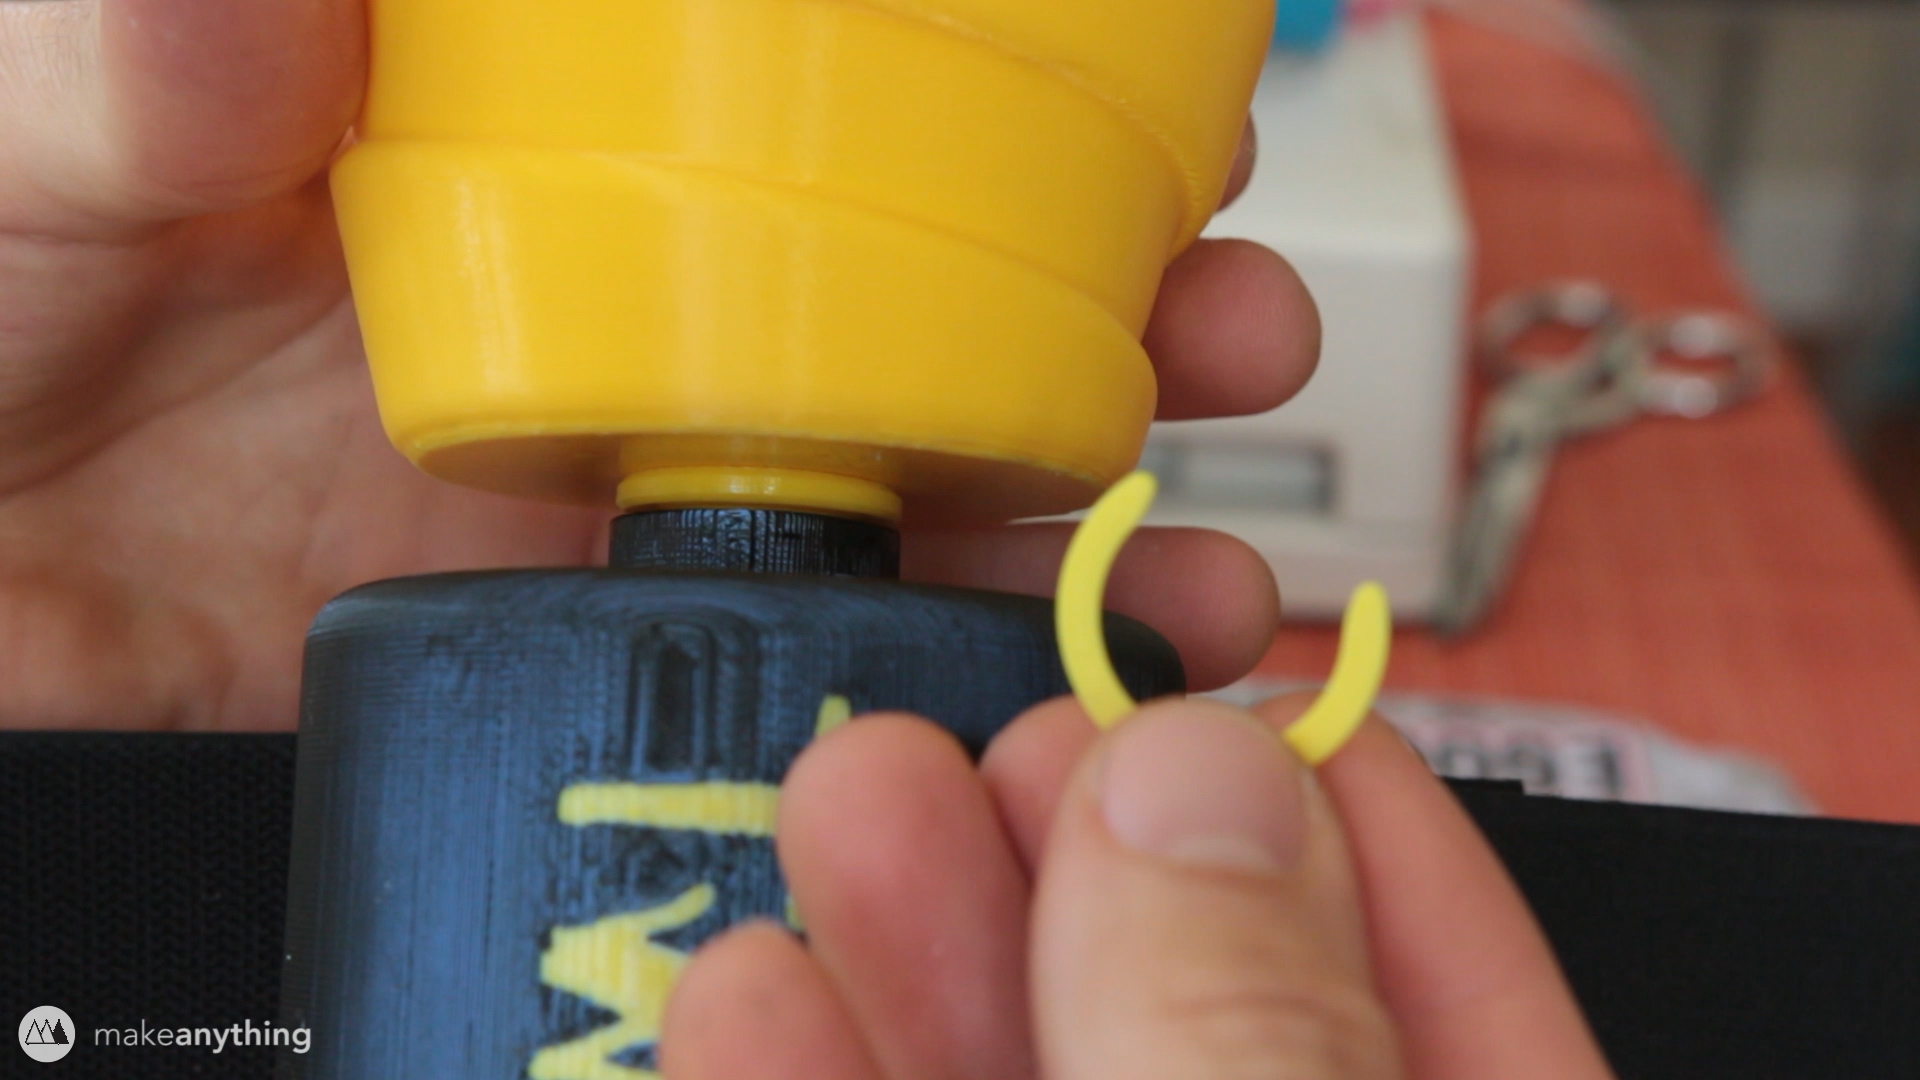
Instead of risking another snapped band, I printed some little adapters for my mechanism and used a spring instead. I ‘welded’ those parts into place with my 3D pen. This solution was nice since I didn’t need to reprint any parts!
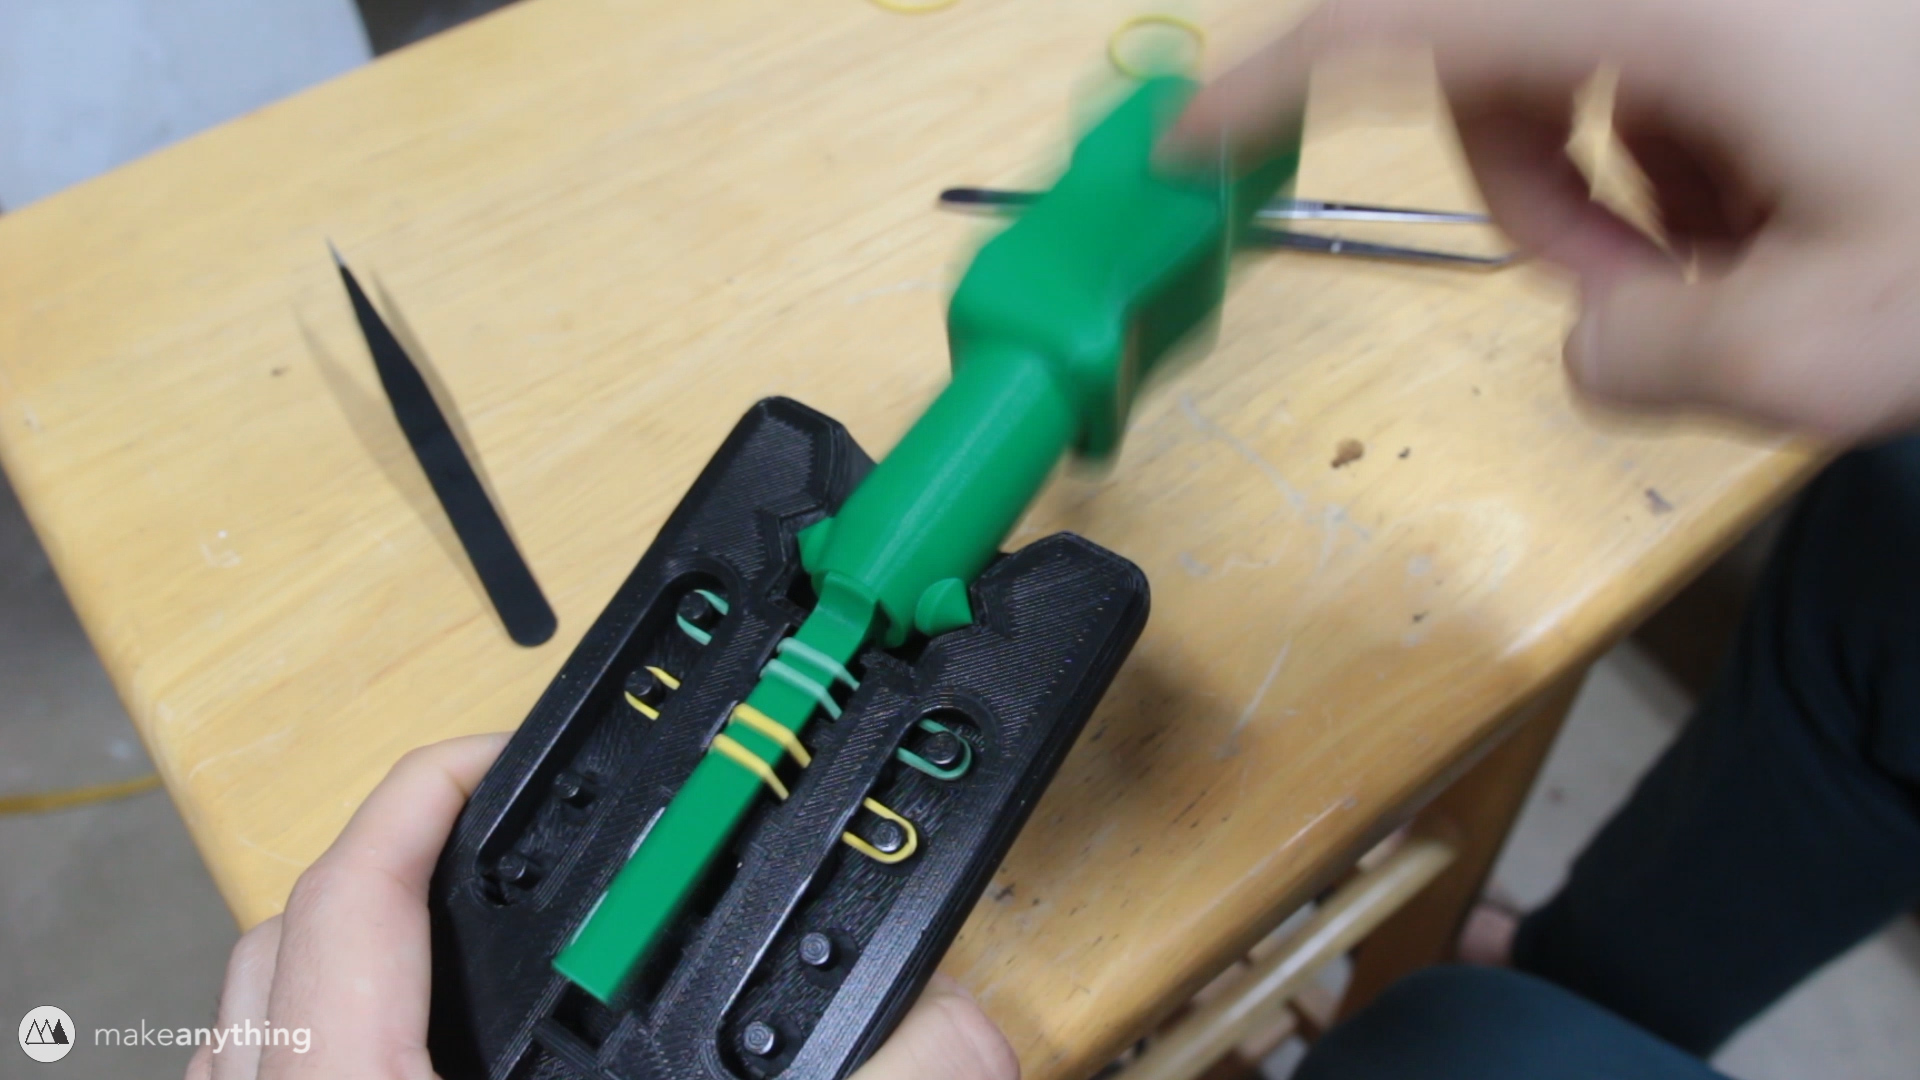
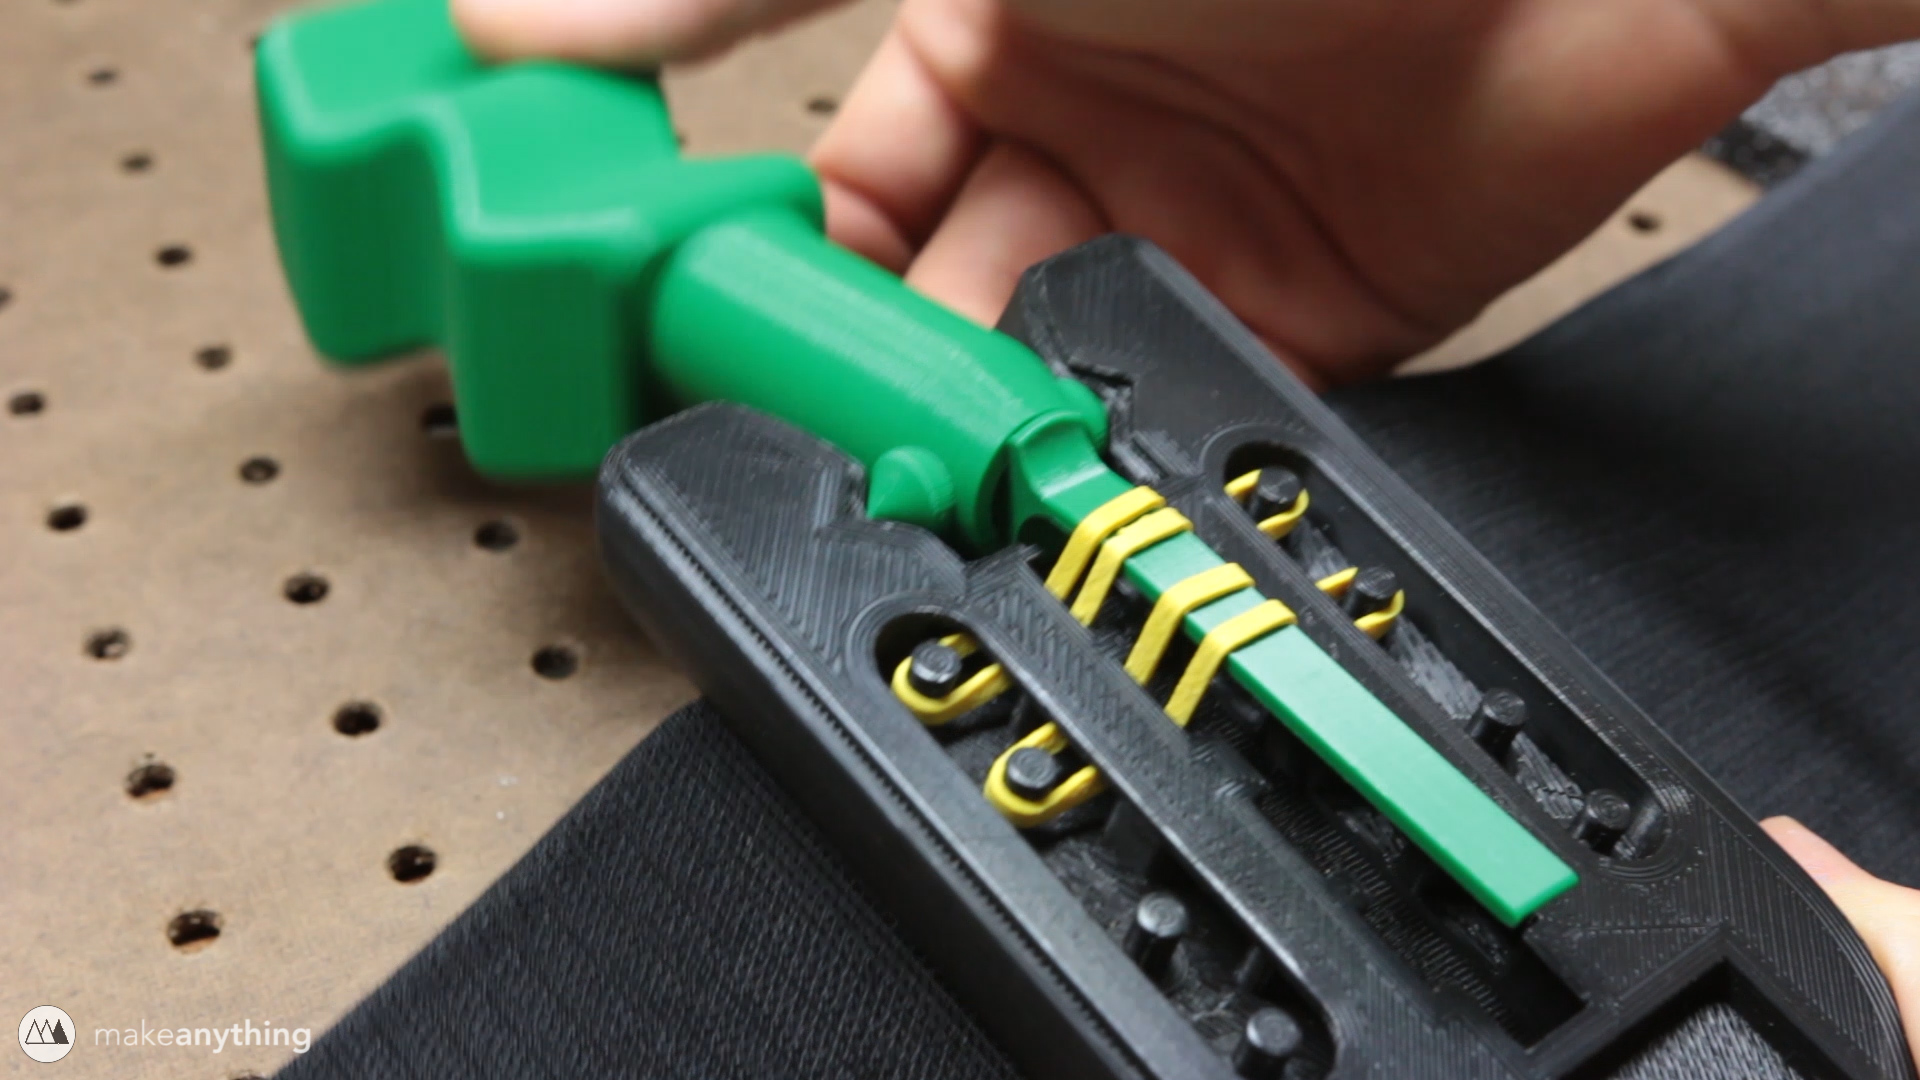
Flick It!
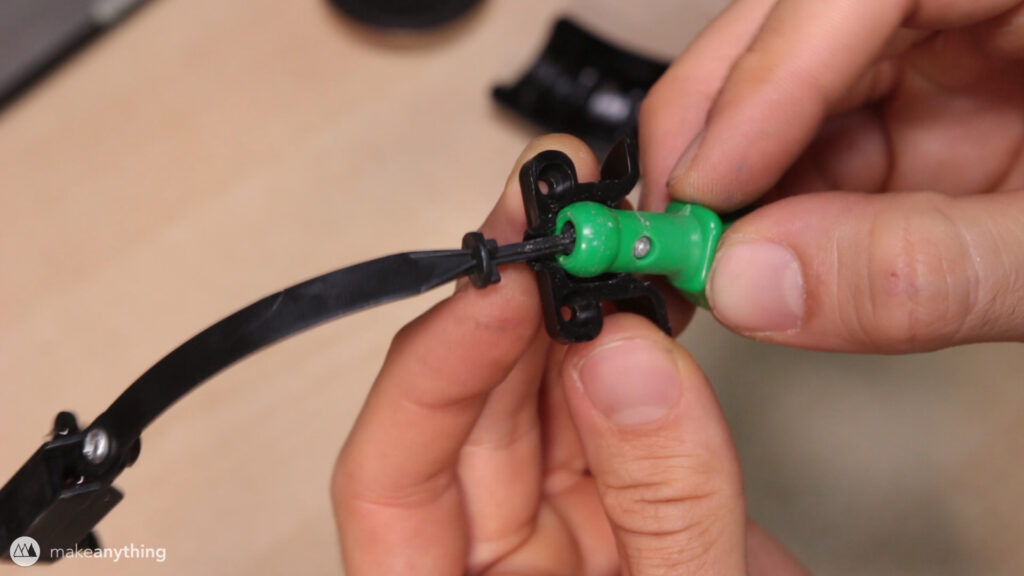
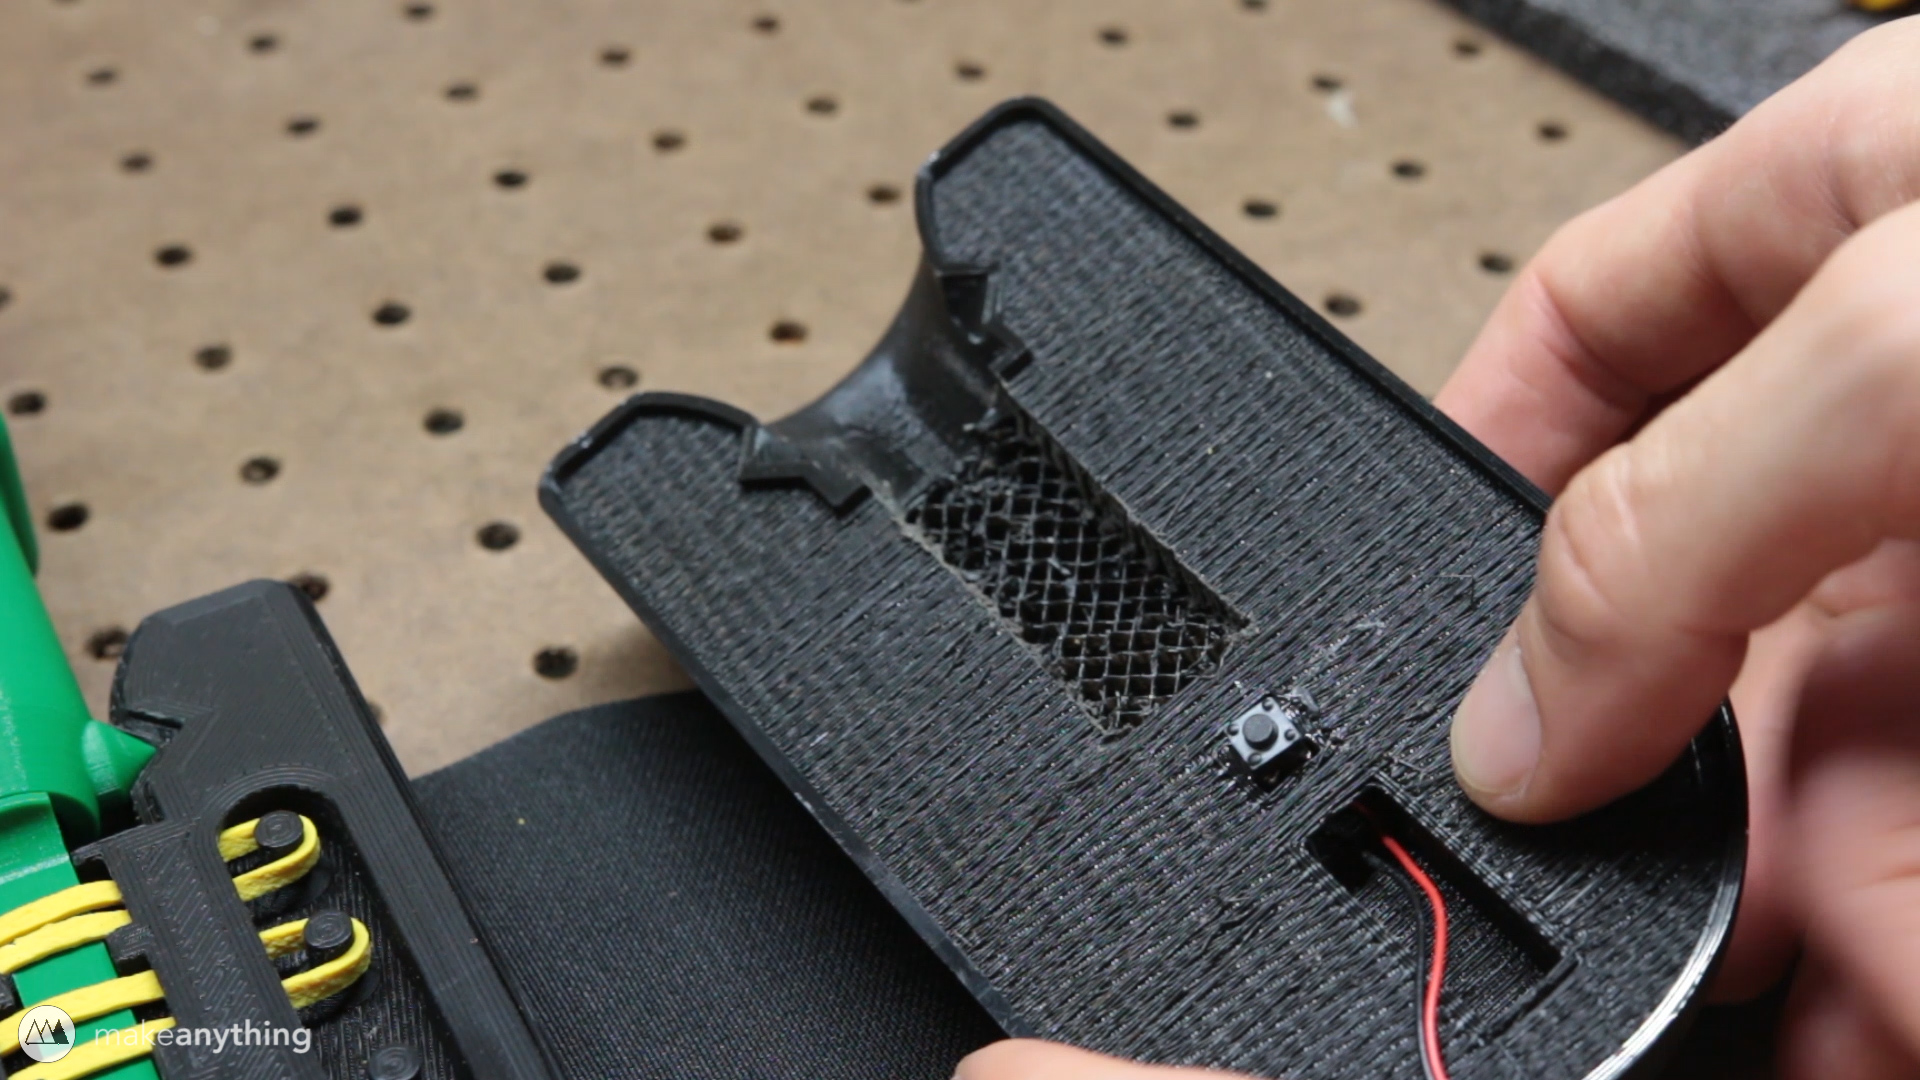
The Flick It mechanism on the Bop It Extreme shares the spring box and ribbon cable that the Pull It uses, but it has a special housing for the flicker that “pulls” the ribbon when the flicker is pushed in any direction. This is a pretty complex little piece and the flicker experiences a lot of friction that would probably wear down the PLA material that I print with, so I chose to redesign the mechanism with something a little more simple and suited for 3D printing.
I had to carve out some of my top case to allow the flicker to push back far enough, but otherwise my design worked flawlessly! That rubber bands hold the flicker down well enough so my dancing won’t trigger the button, but it is easily pressed when done with intention, and the springy feel provided from the rubber bands is very satisfying.
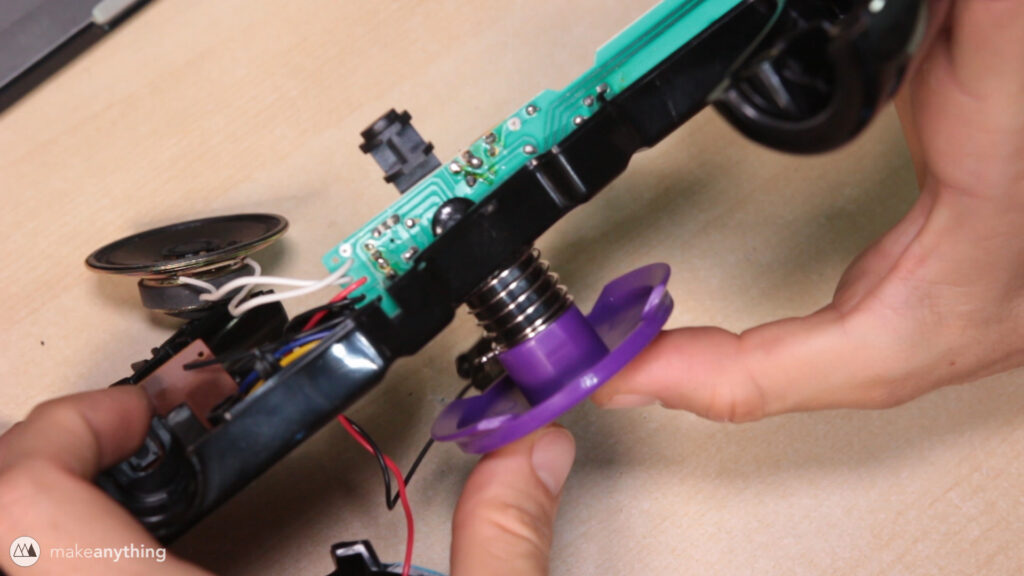
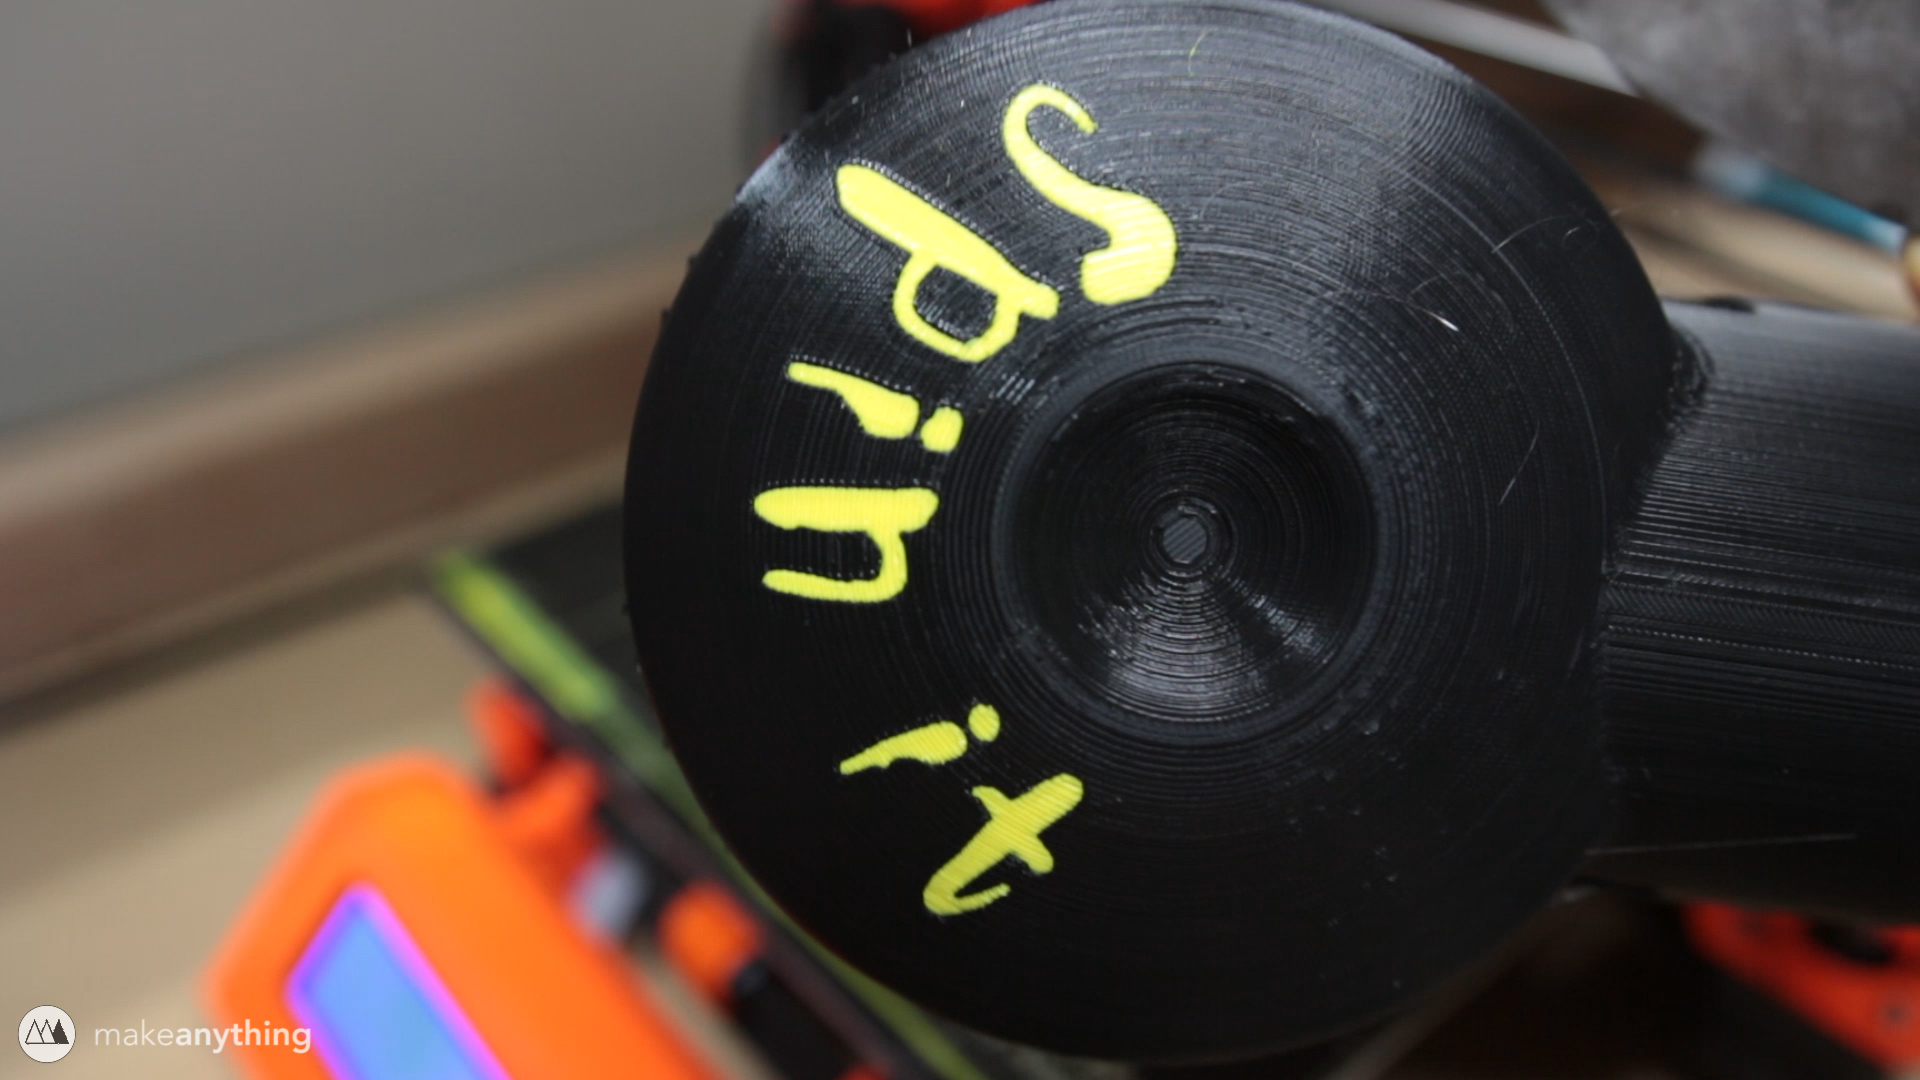
Spin It!

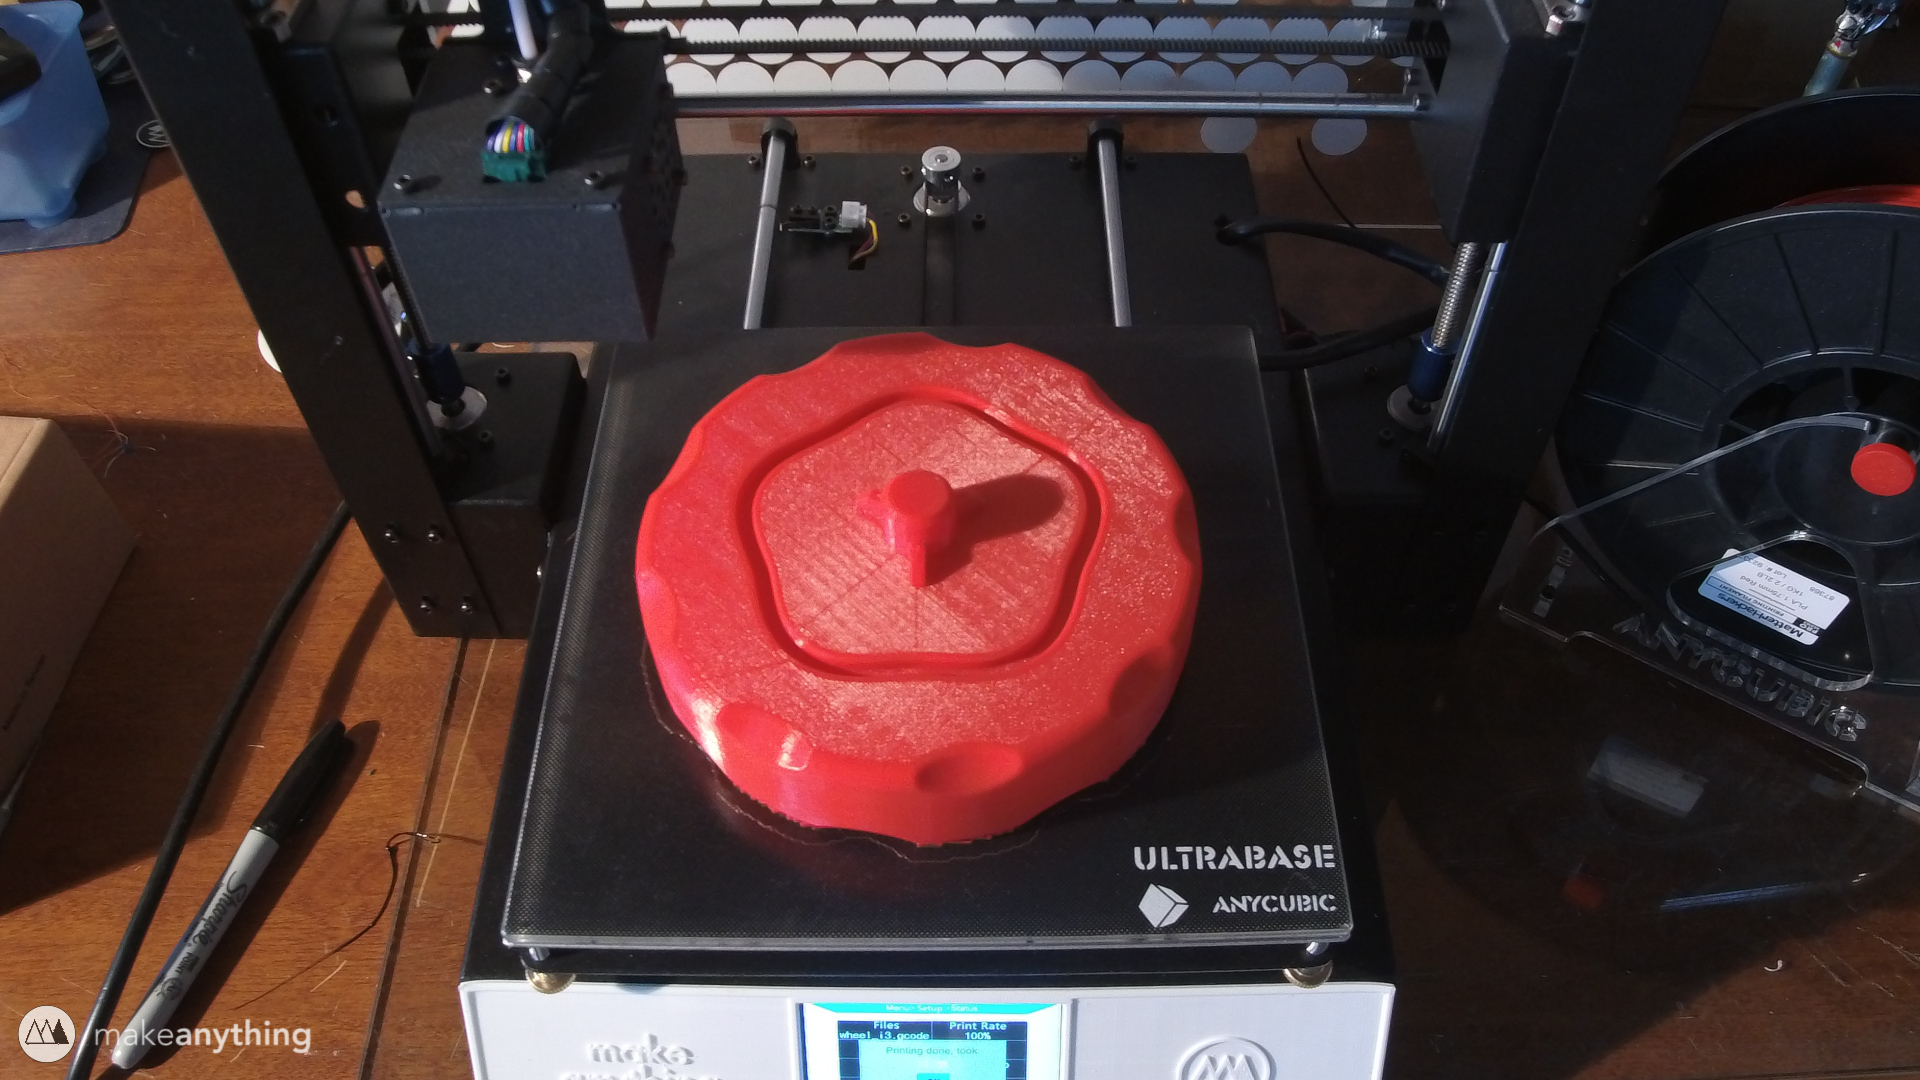
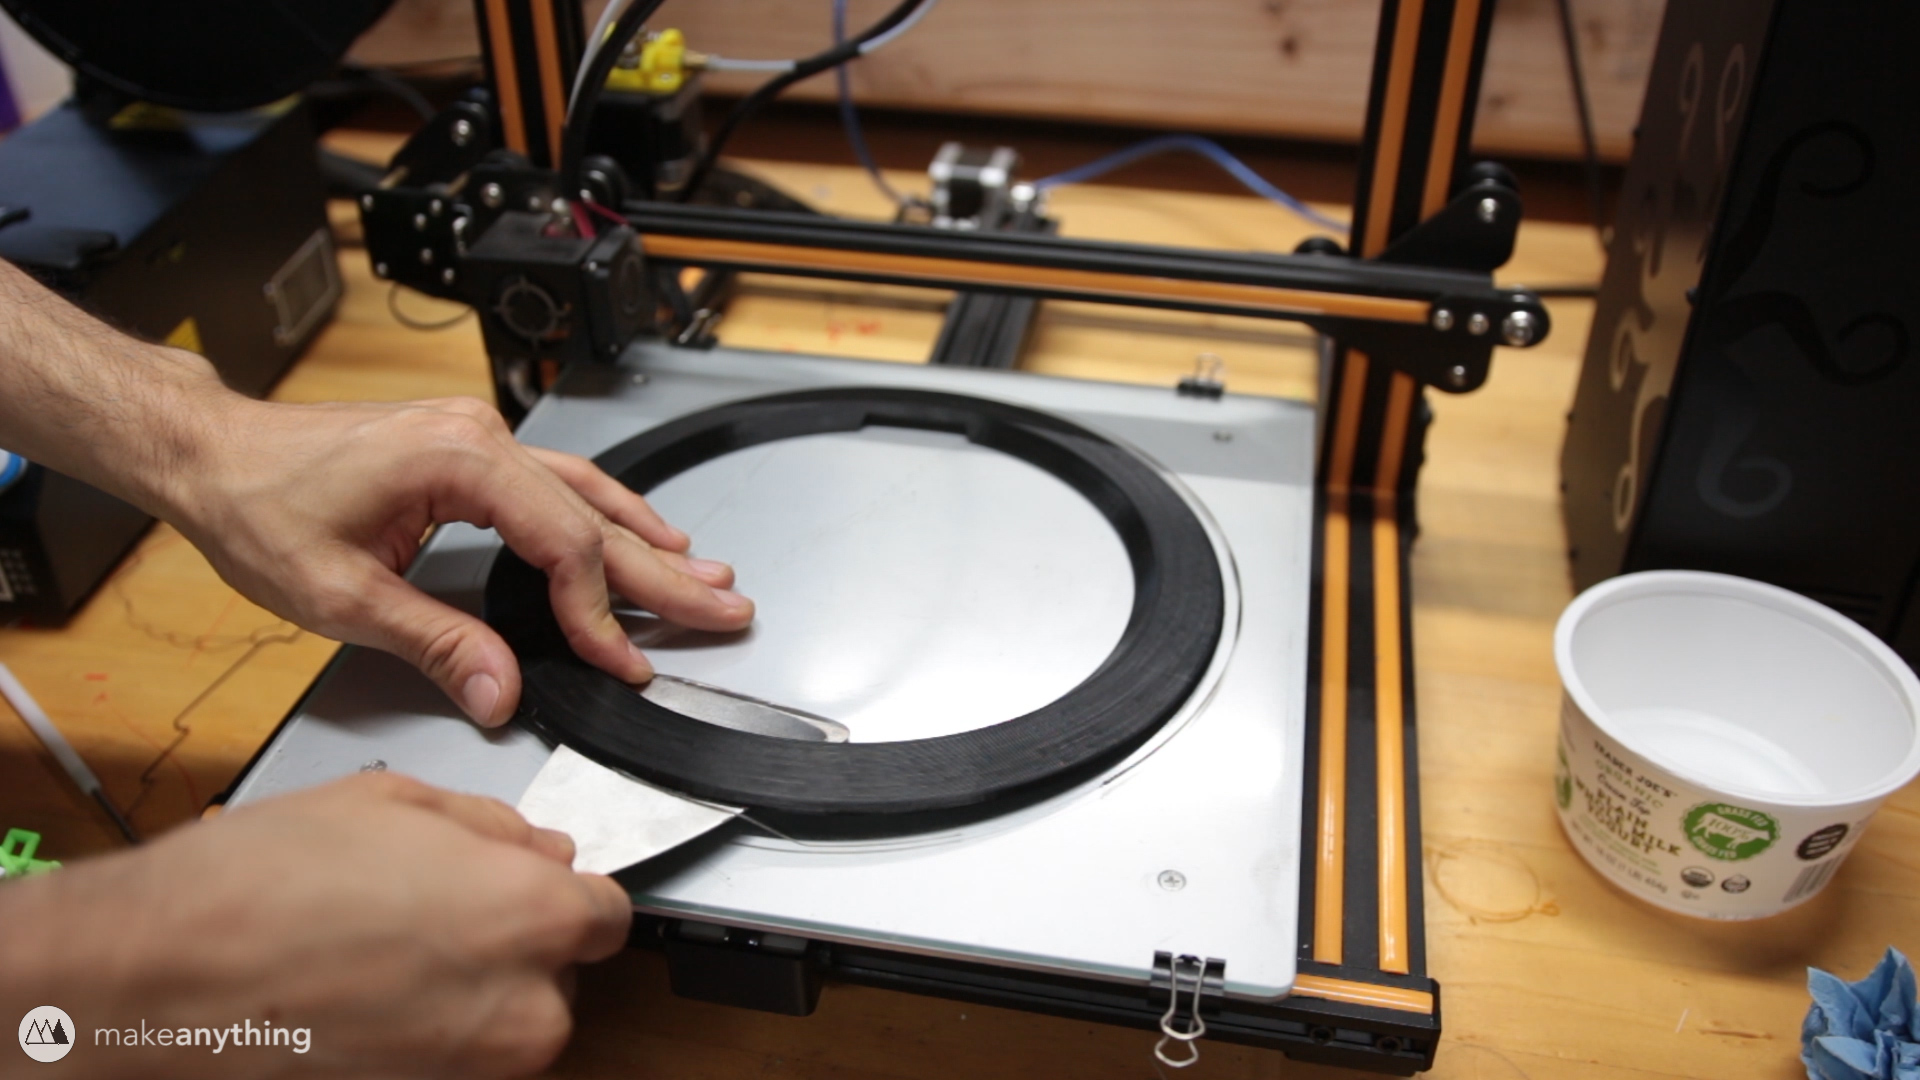
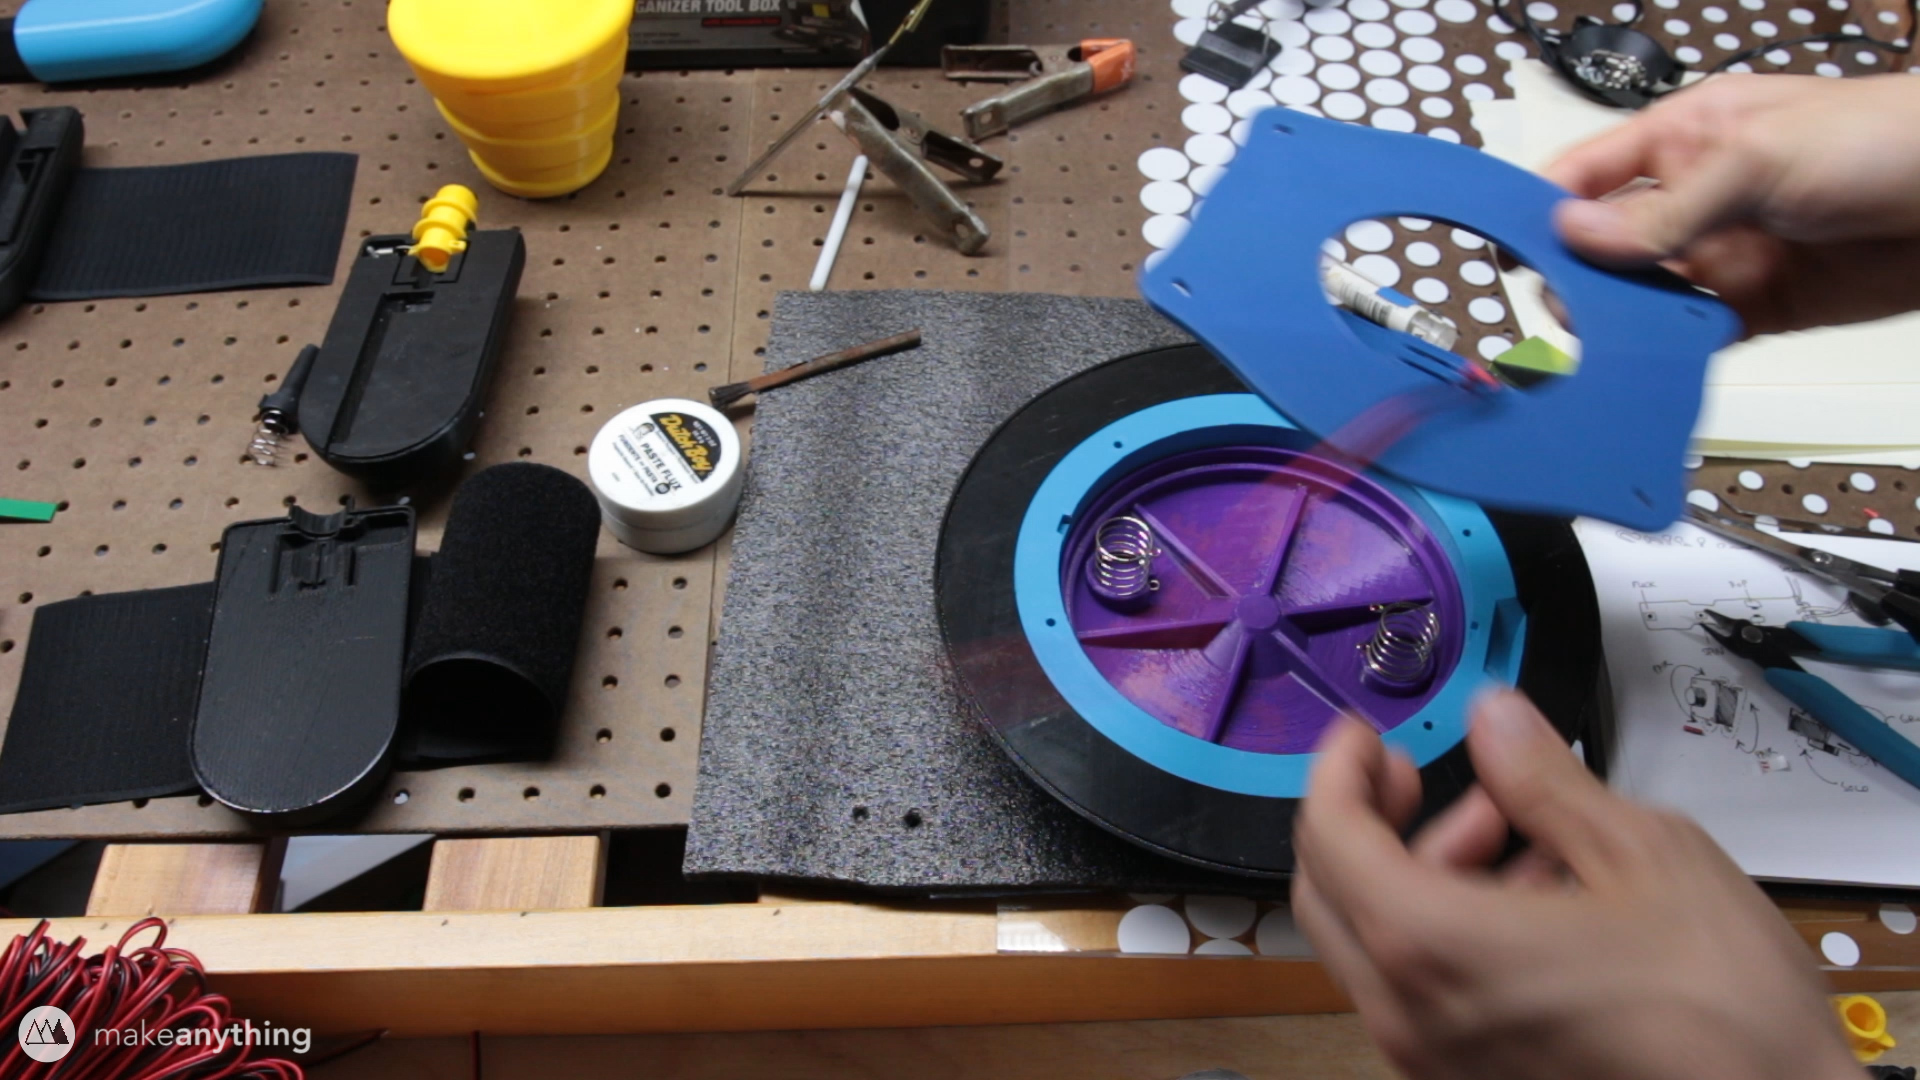
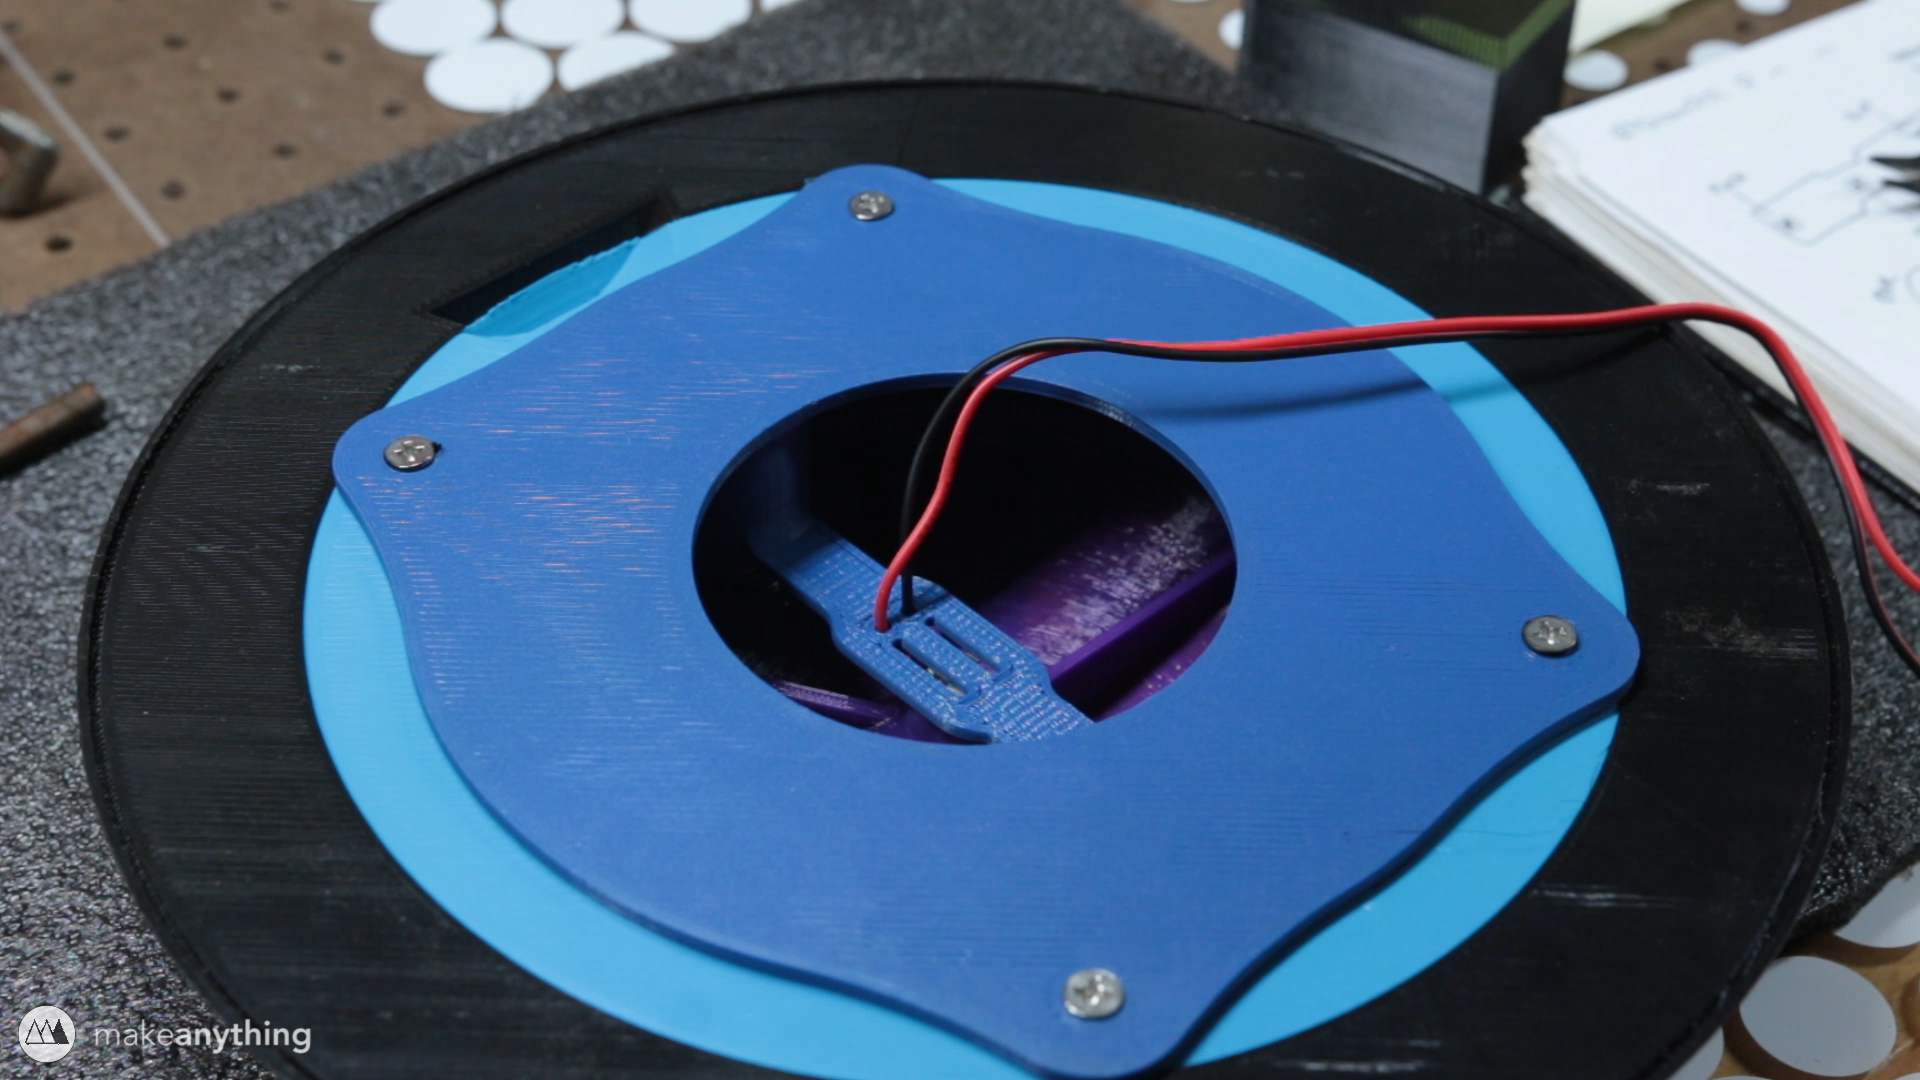
I was especially impressed by the mechanism for the Spin It action. It uses a lever that follows a groove molded into the wheel like a record player, causing the other end to rapidly push a button when spun. The game only accepts a proper spin by demanding several button presses in quick succession to be counted as valid.
While I did print all the mechanisms for my version of the spin it from scratch, the idea is the same as the original. I simply changed the shape of the groove so that the button would be pressed 5 times per rotation instead of 2, since the larger wheel tends to spin slower. I printed several arms to get the button pressing consistent, and now it works wonderfully.
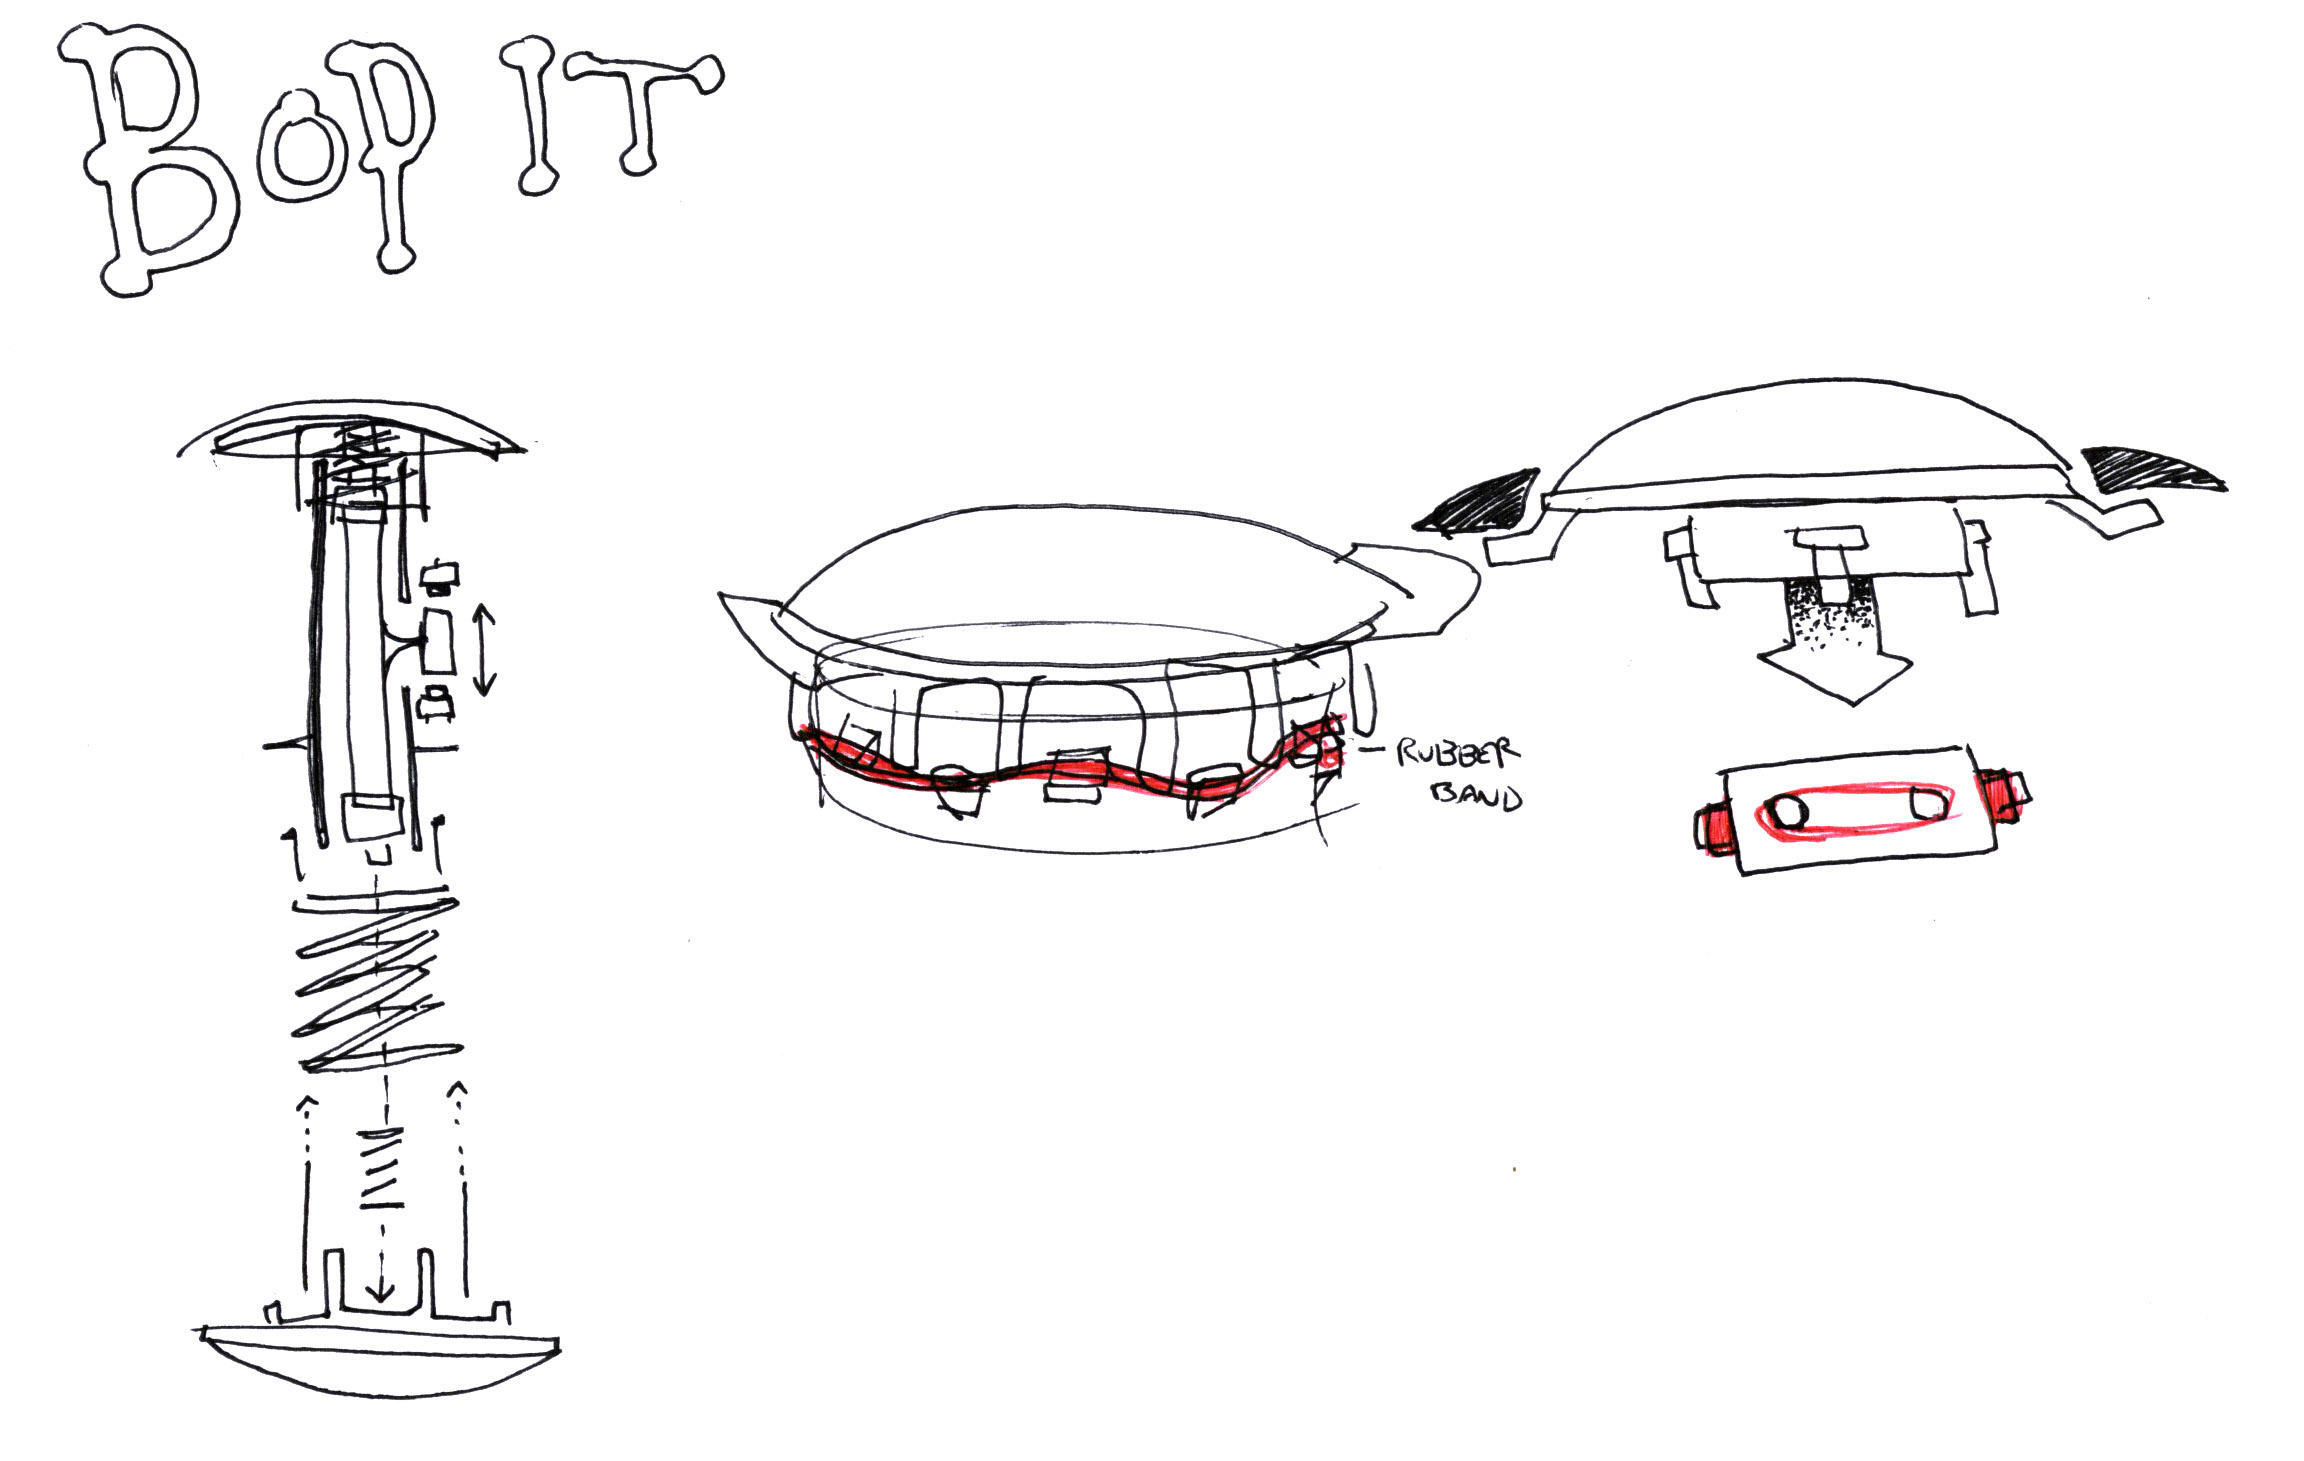
Bop It!
Last but not least is the Bop It button! This is the most straightforward mechanism since the action itself is a button press. The original does use a special arm that allows either of two buttons to the complete the action. The circuit board actually has two buttons and either one being pressed counts as a Bop.
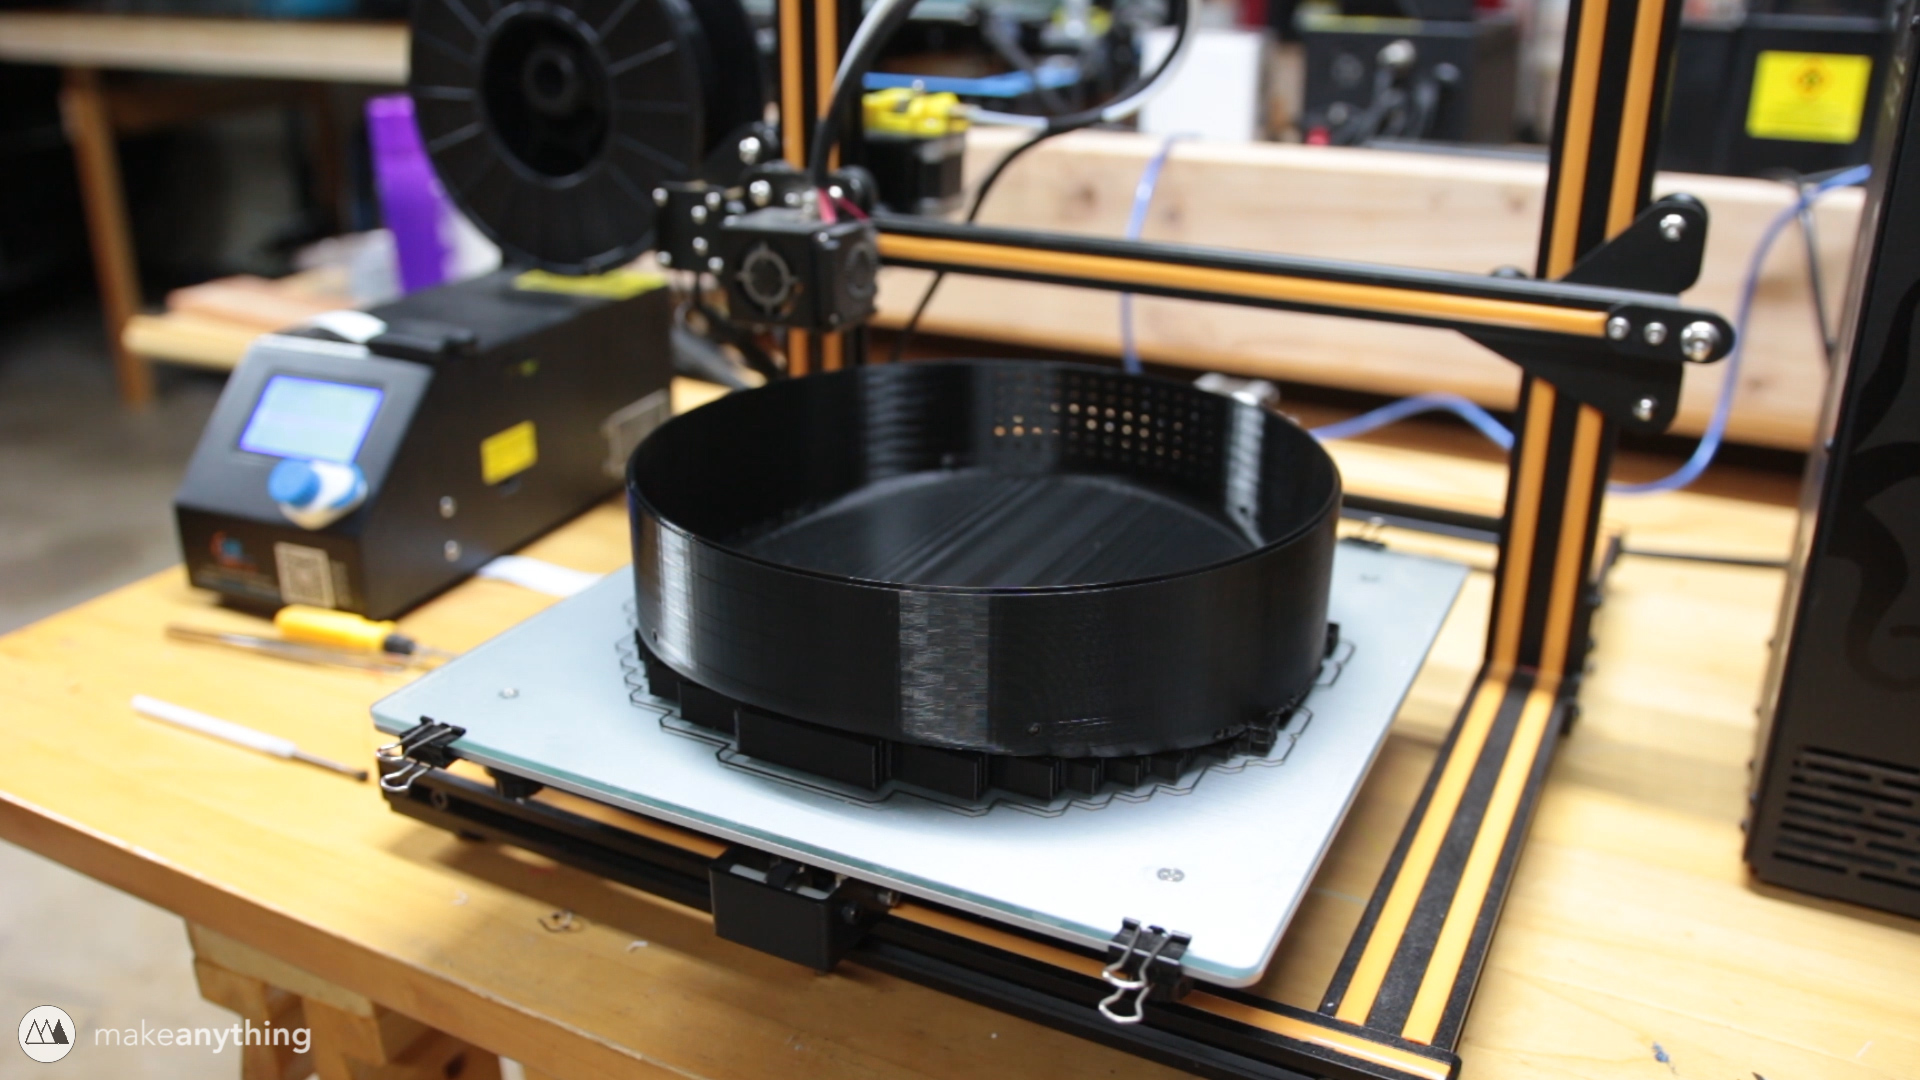
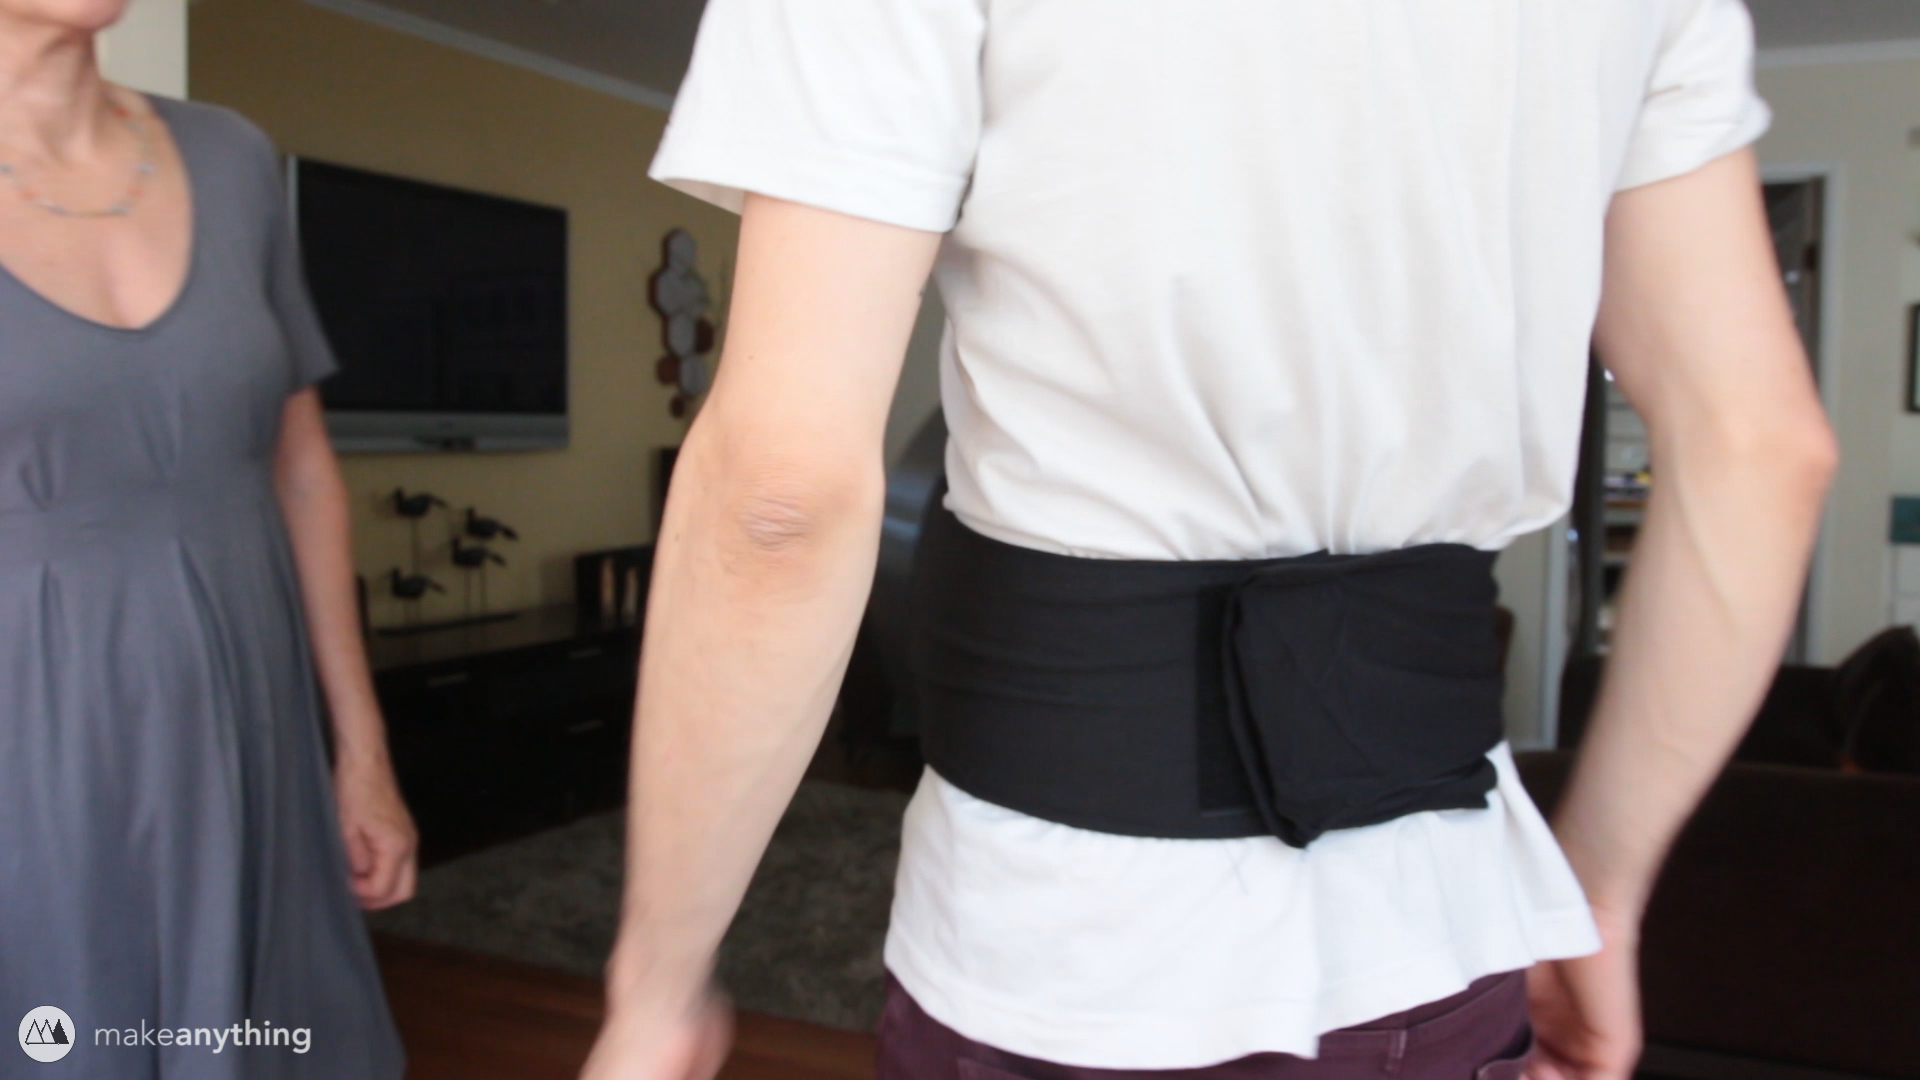
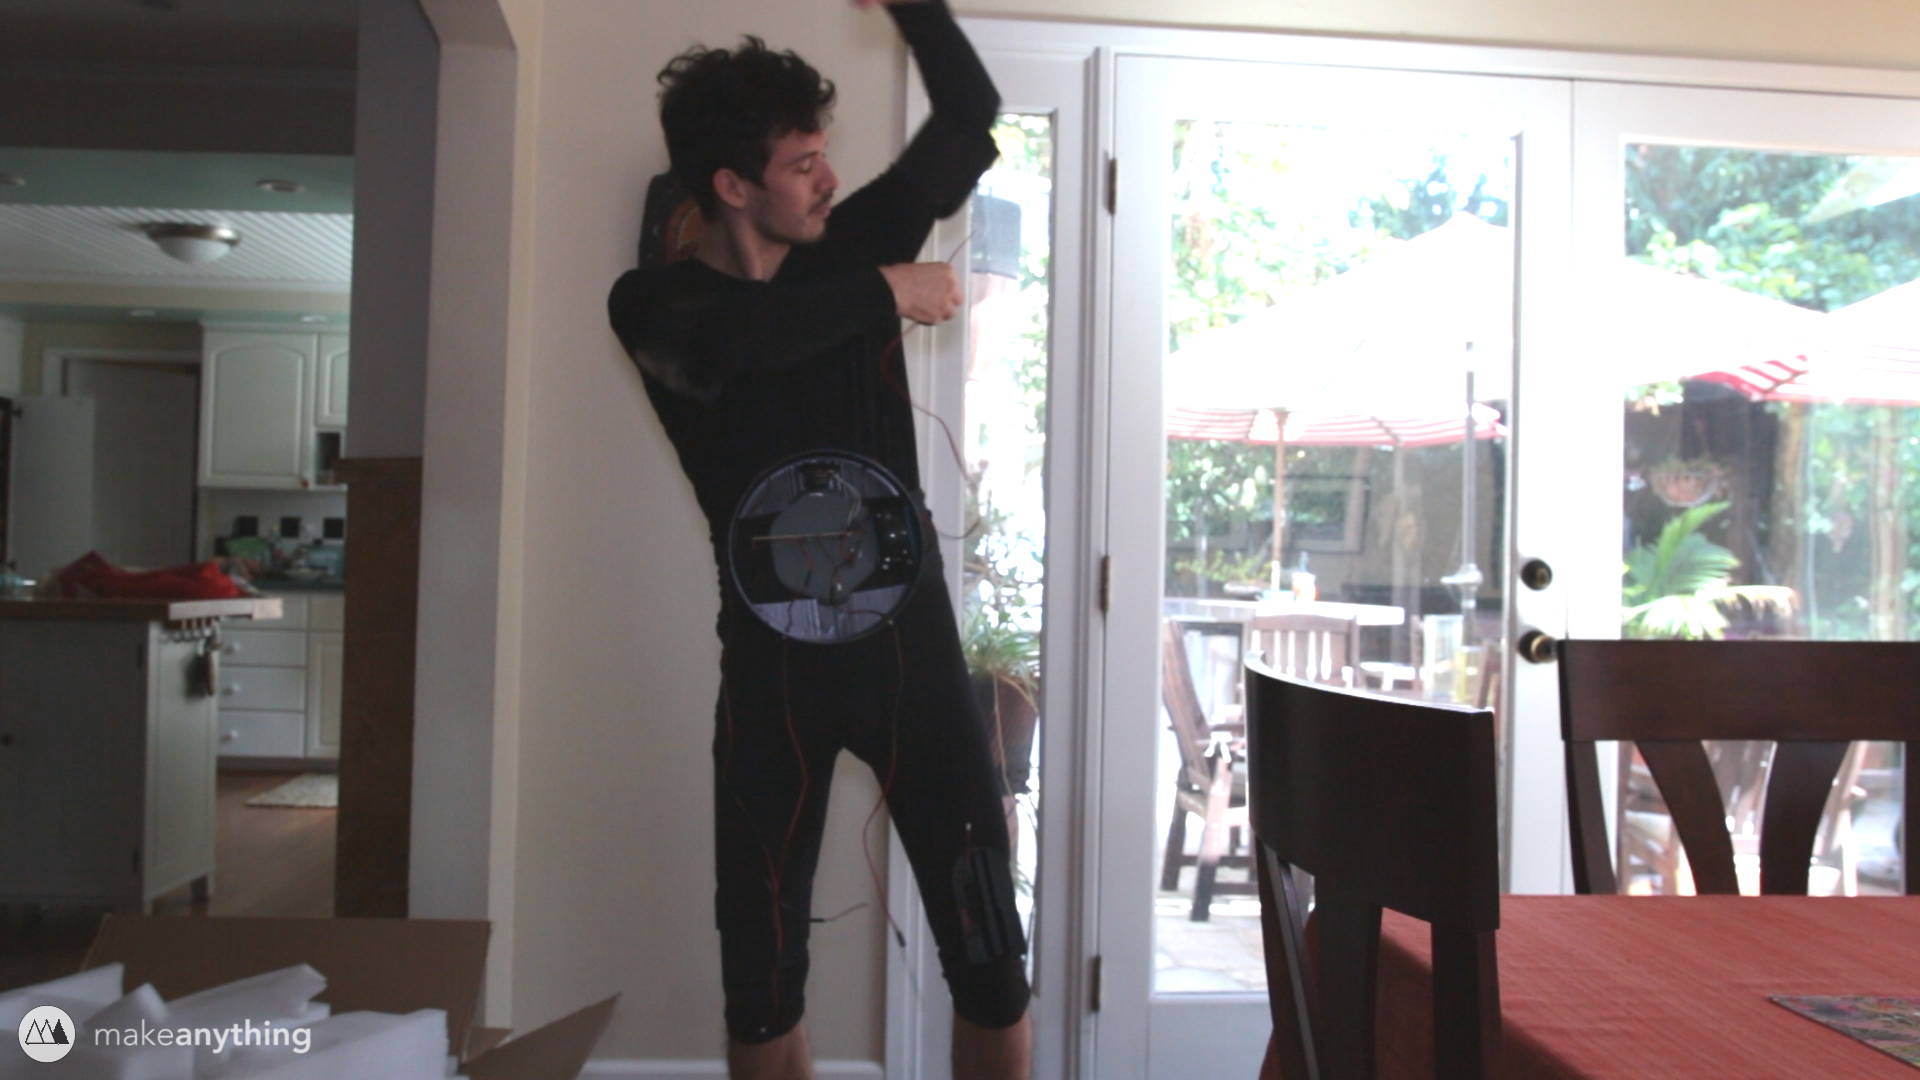
My Bop It button is designed to be worn around my waist. It will hold not only the Bop It button, but also the speaker, battery pack, and circuit board to which all the other parts will be connected with those two-pin connectors… it’s pretty much the brain of this operation. I printed the body in several parts to be glued together since it’s so large and complex.
I used E6000 to glue the parts together and weighed them down with filament spools for good adhesion.
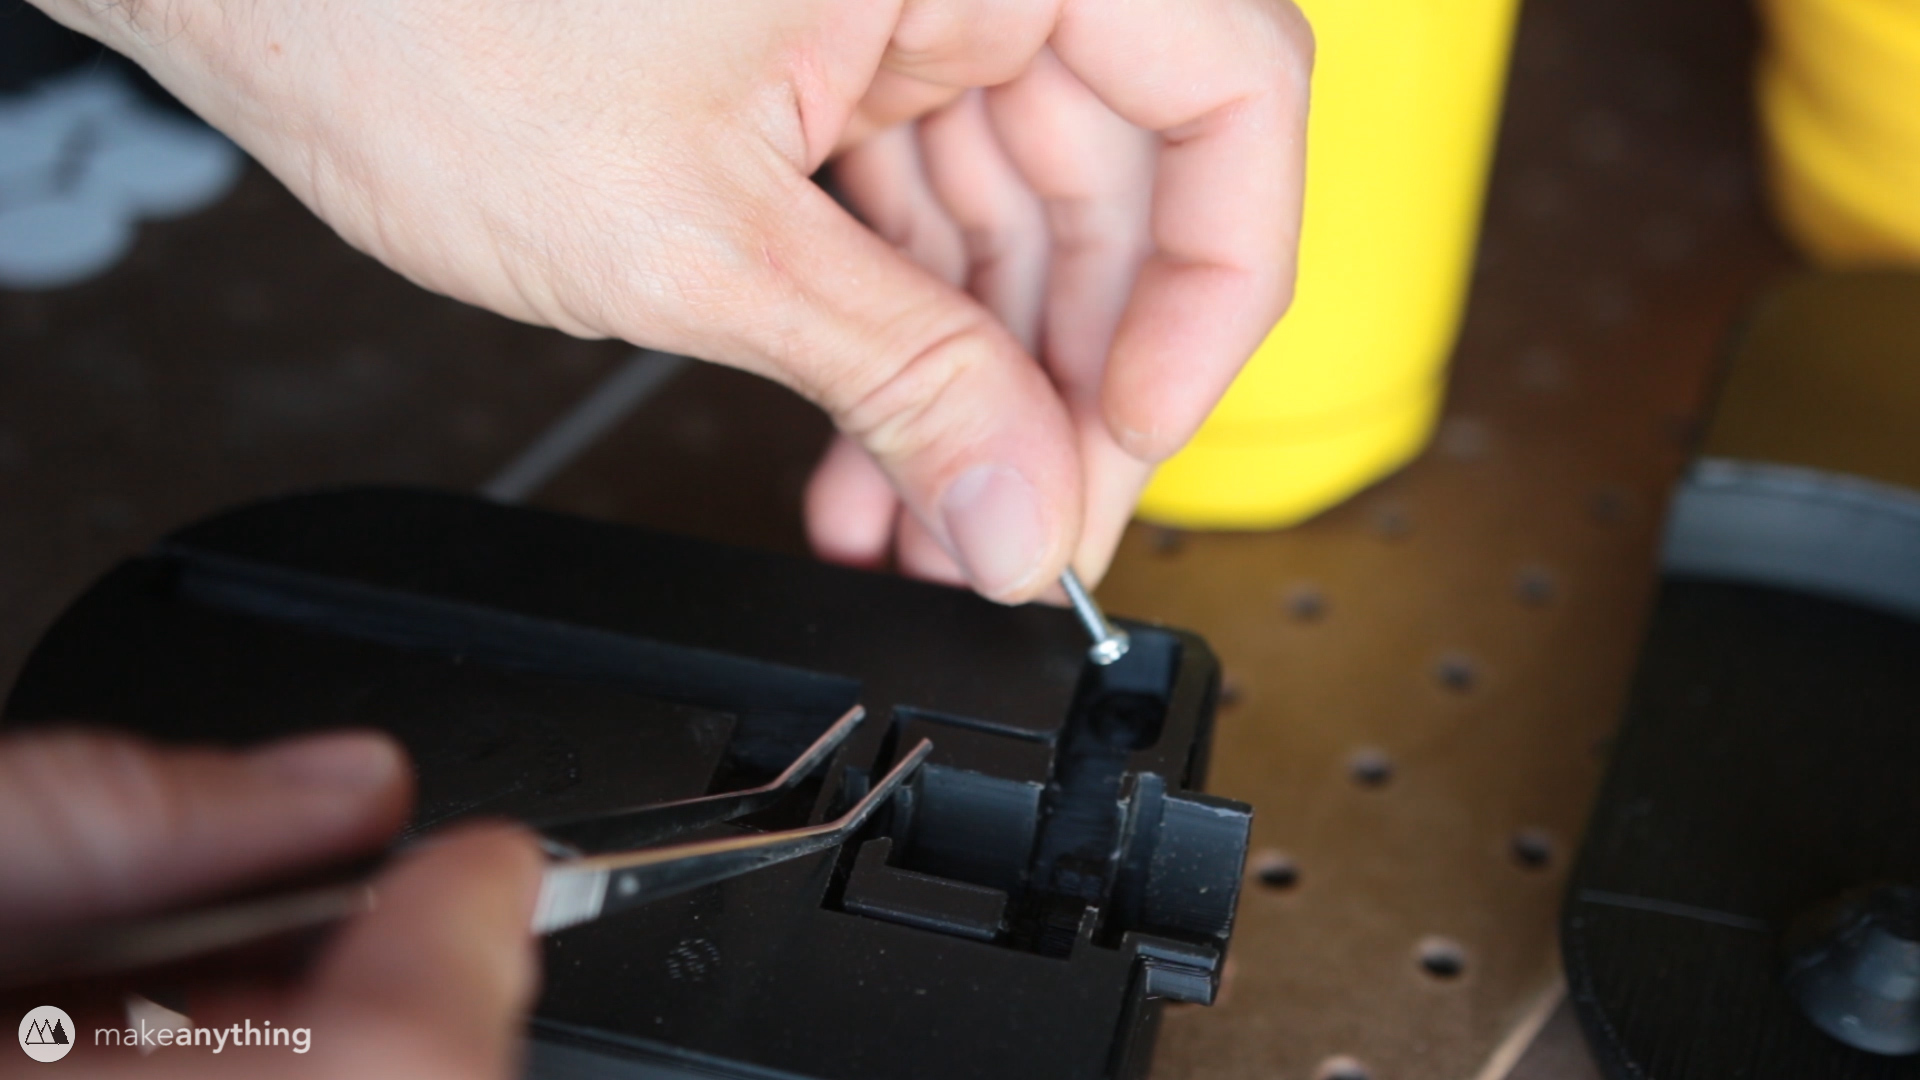
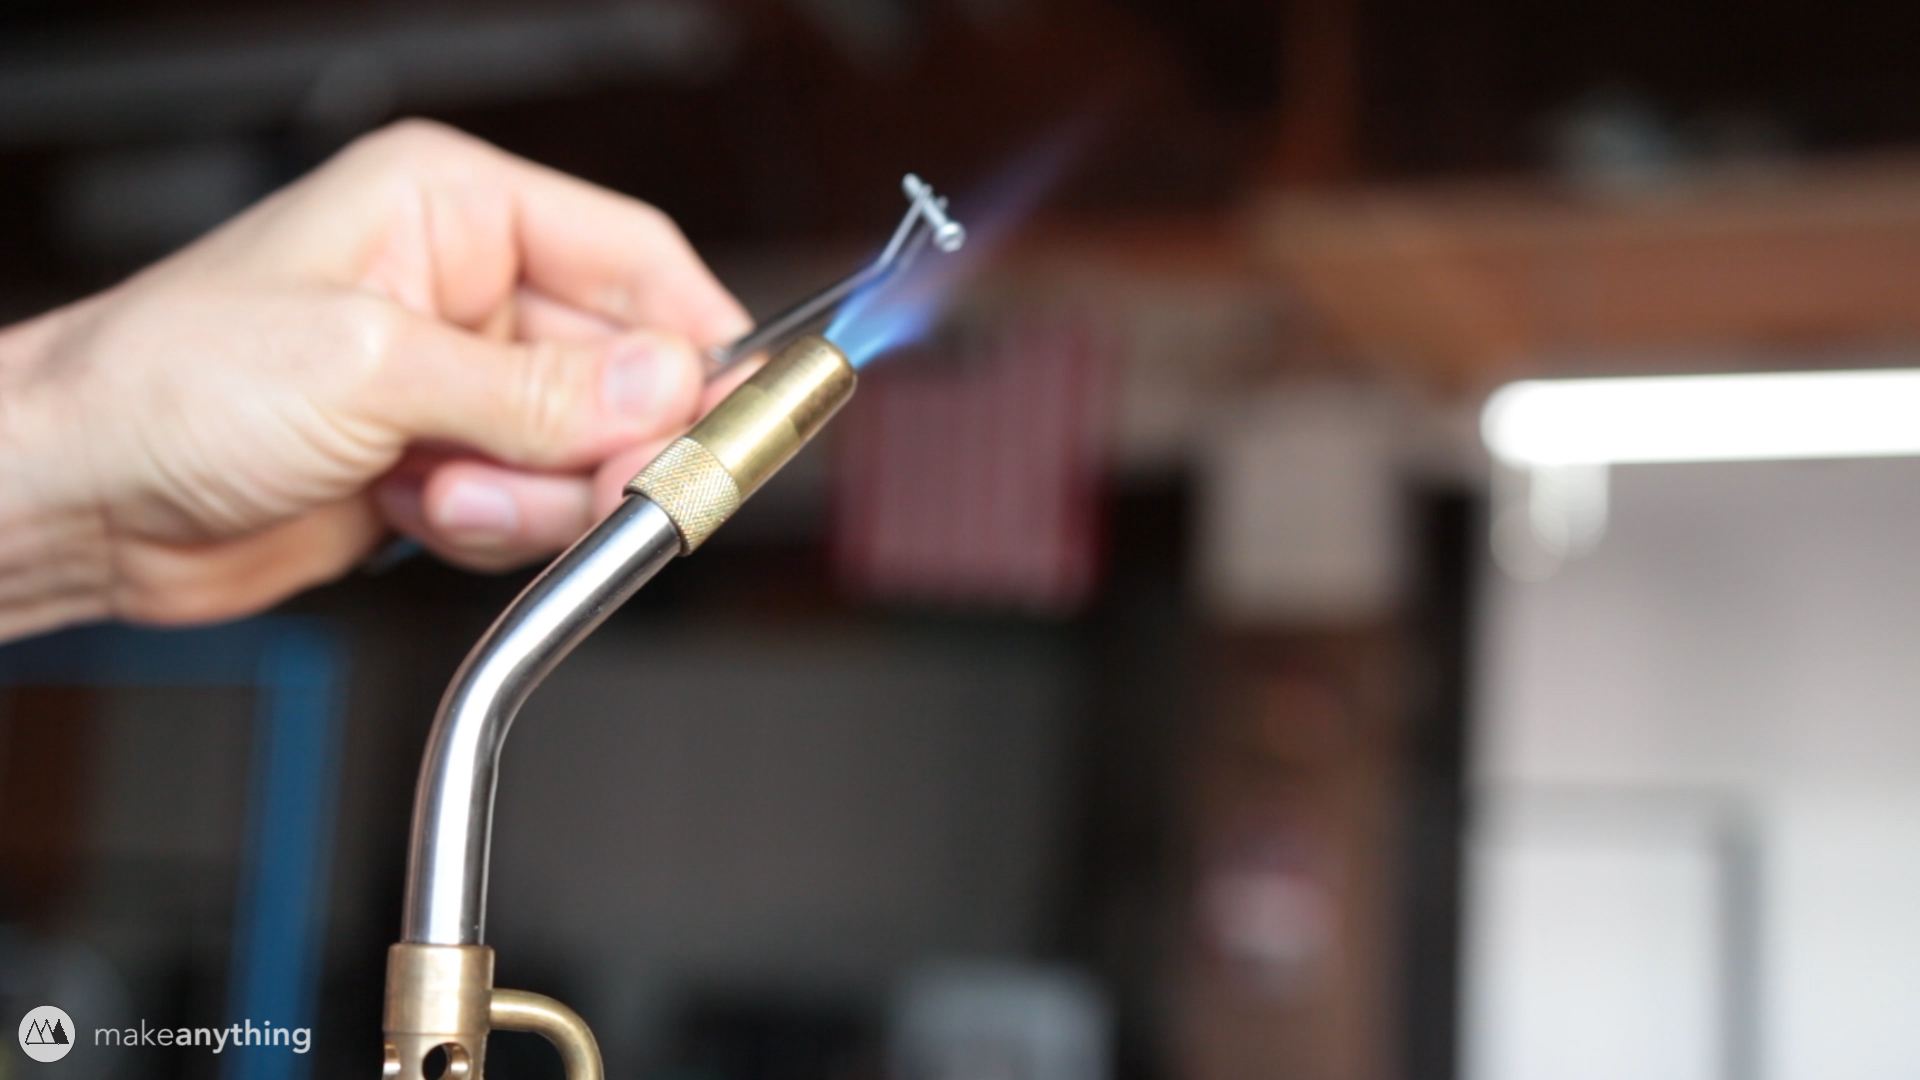
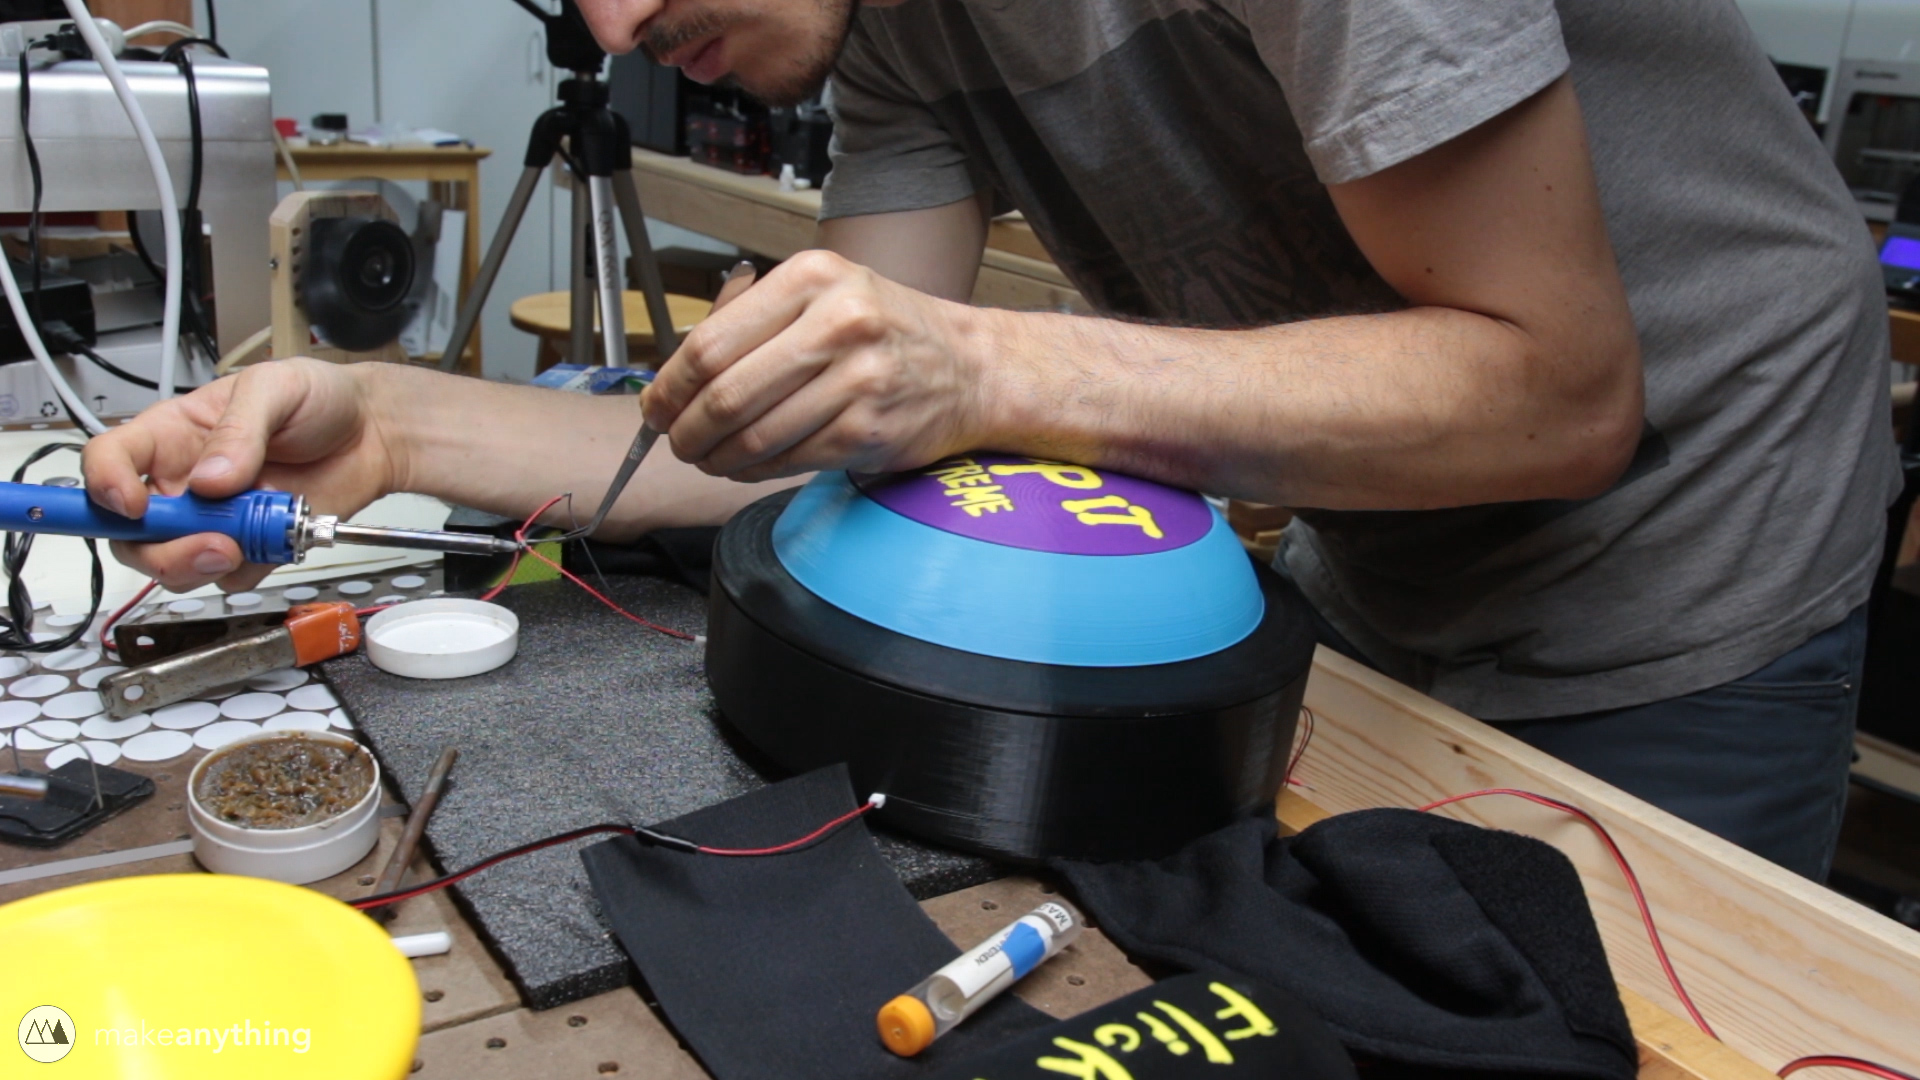
I built the button holder on a bridge of sorts so that it could flex if pressed too hard, rather than risking a broken button. I used the original springs from the Bop It button on my button, but since I don’t have two buttons I was able to use both springs on the front, perfect for my upscaled version! I held the mechanism together with four M5 screws, which I heated up with a lighter before screwing in. This allowed them to soften the plastic and form their own threads.
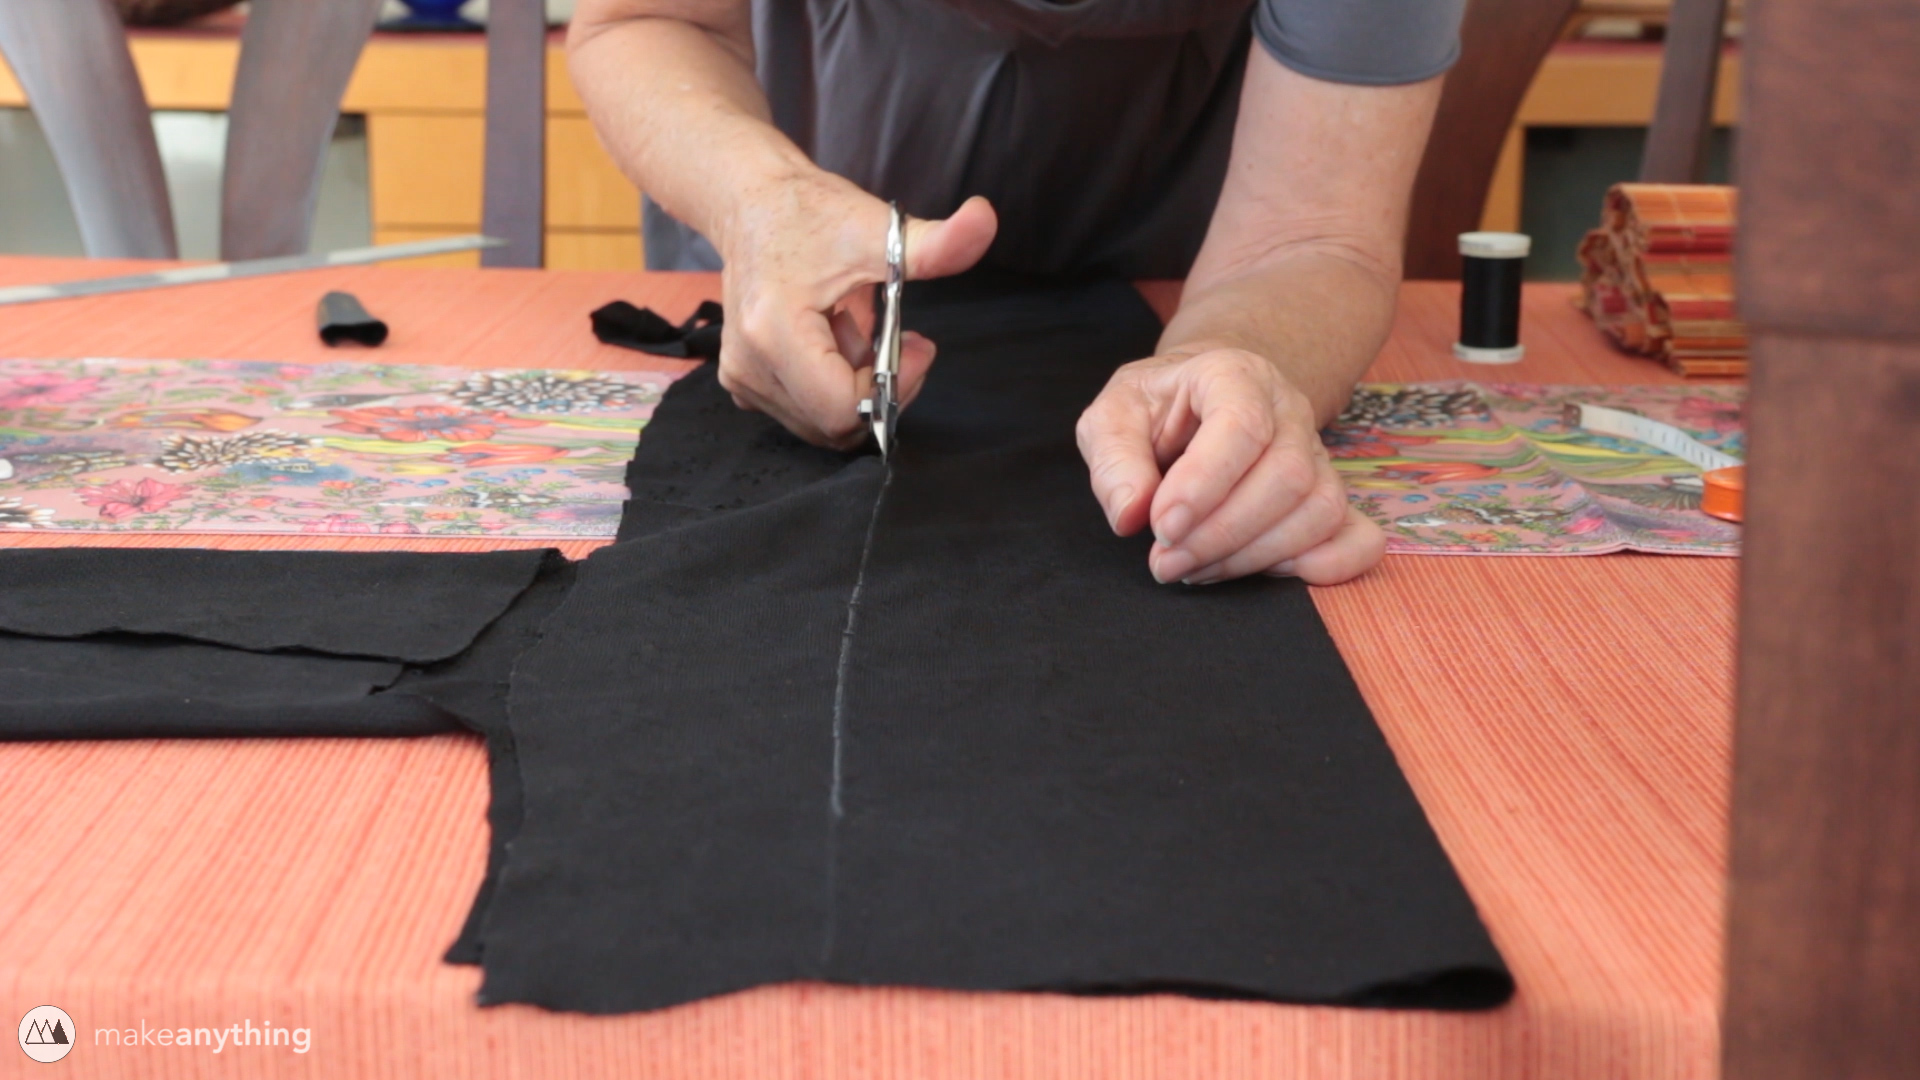
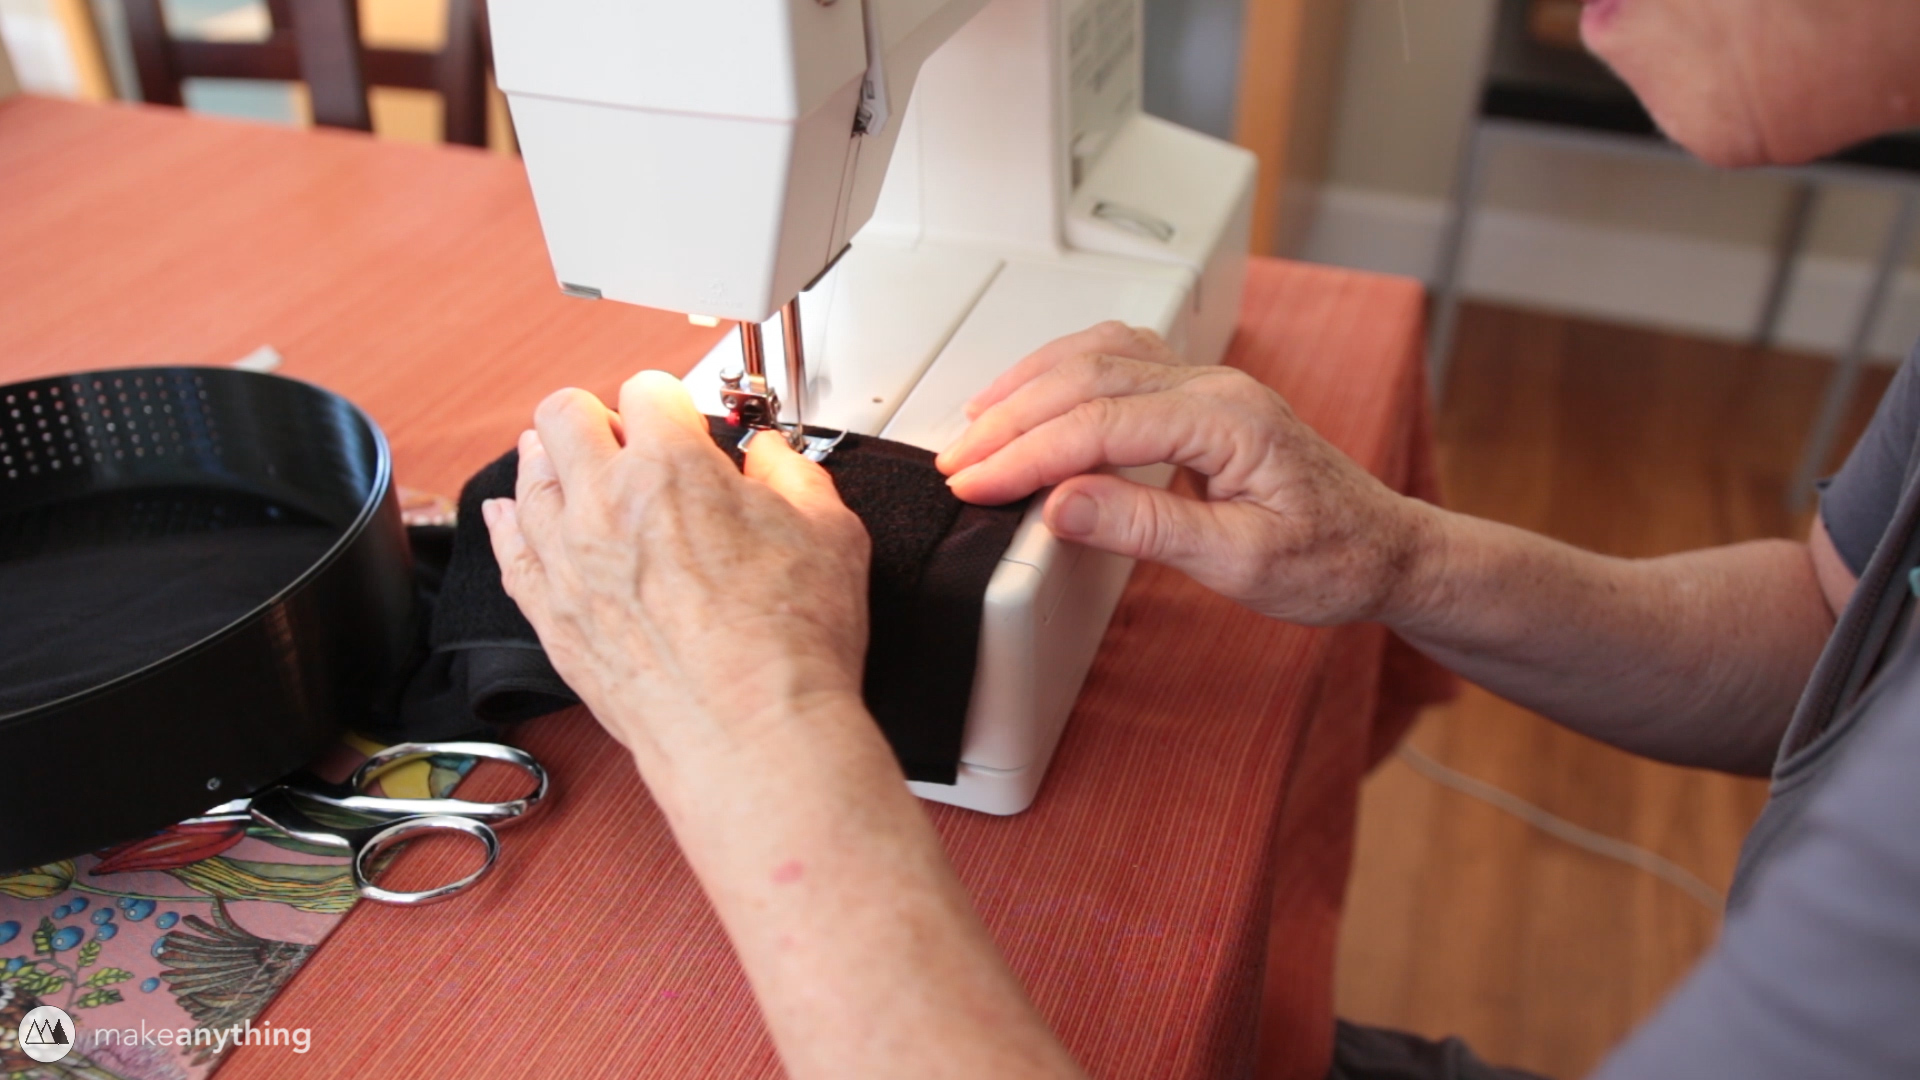
For the strap, my dear mother helped out, sewing a band that matches my waist size and using the same velcro from earlier to fasten it at my back.
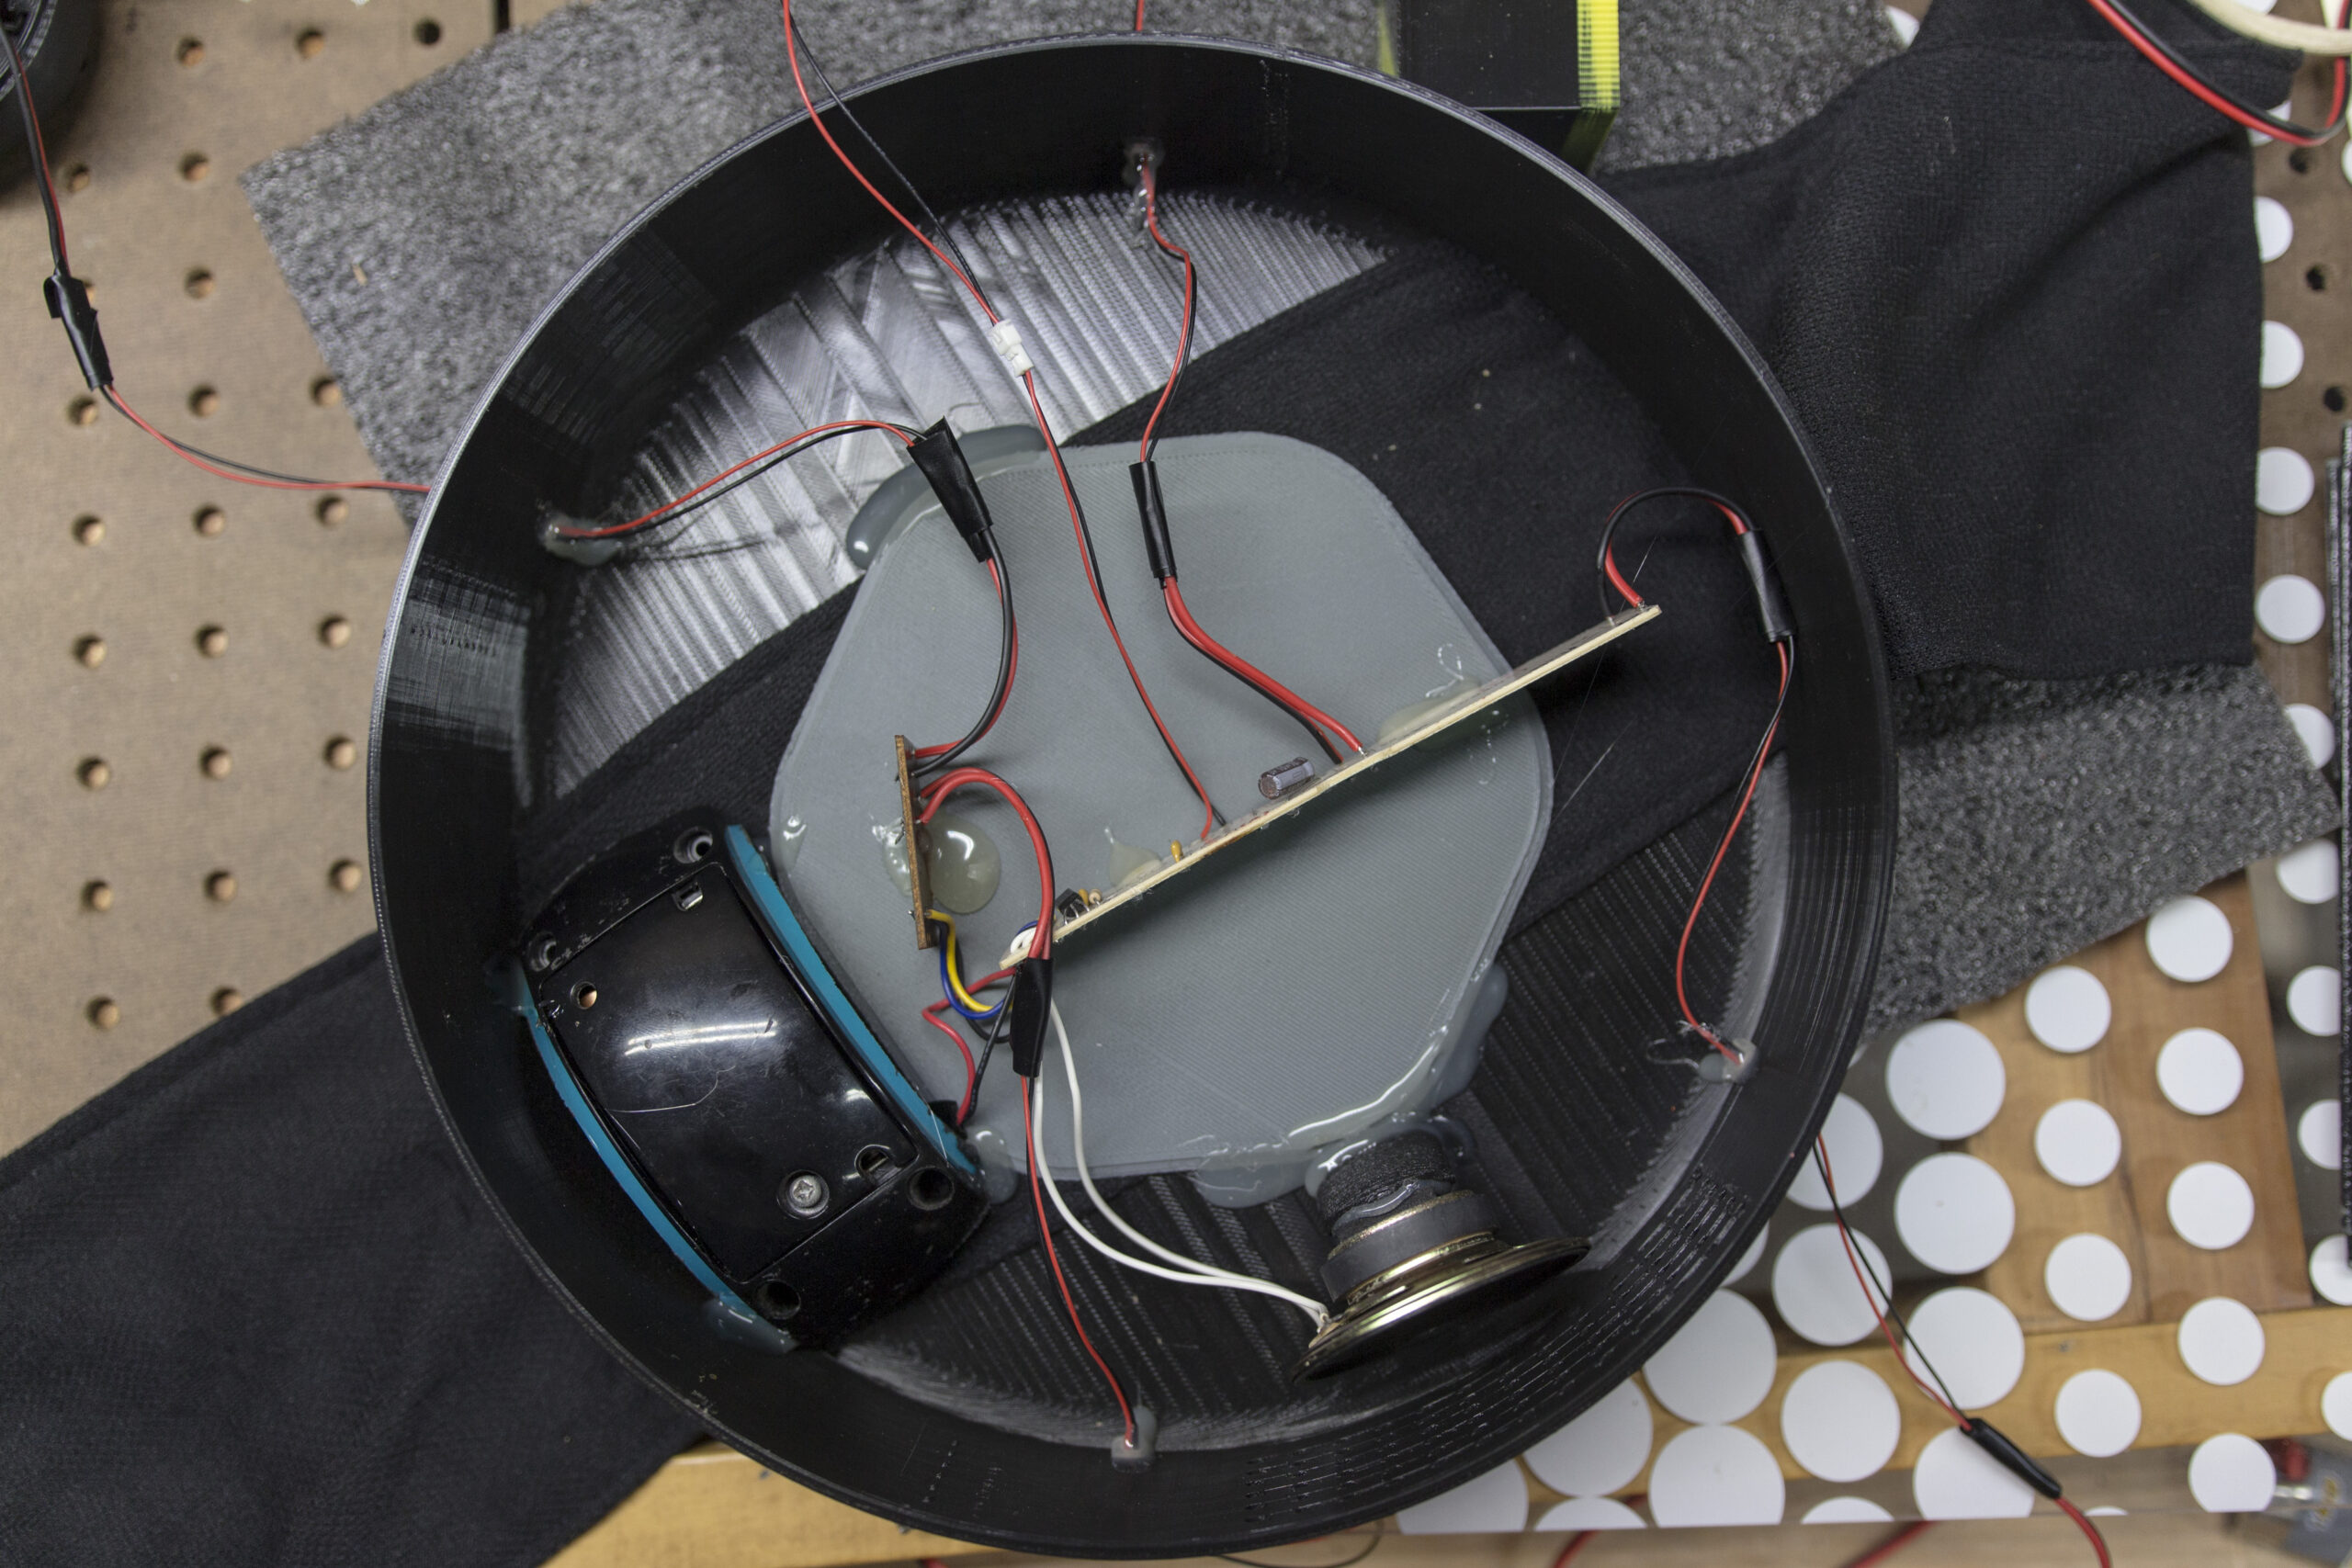
Once the strap was in place, I could complete the inside of my Bop It button. I used my bandsaw to cut away as much plastic from the battery pack as possible, then I hot glued it inside the Bop It case, along with the speaker and circuit boards.
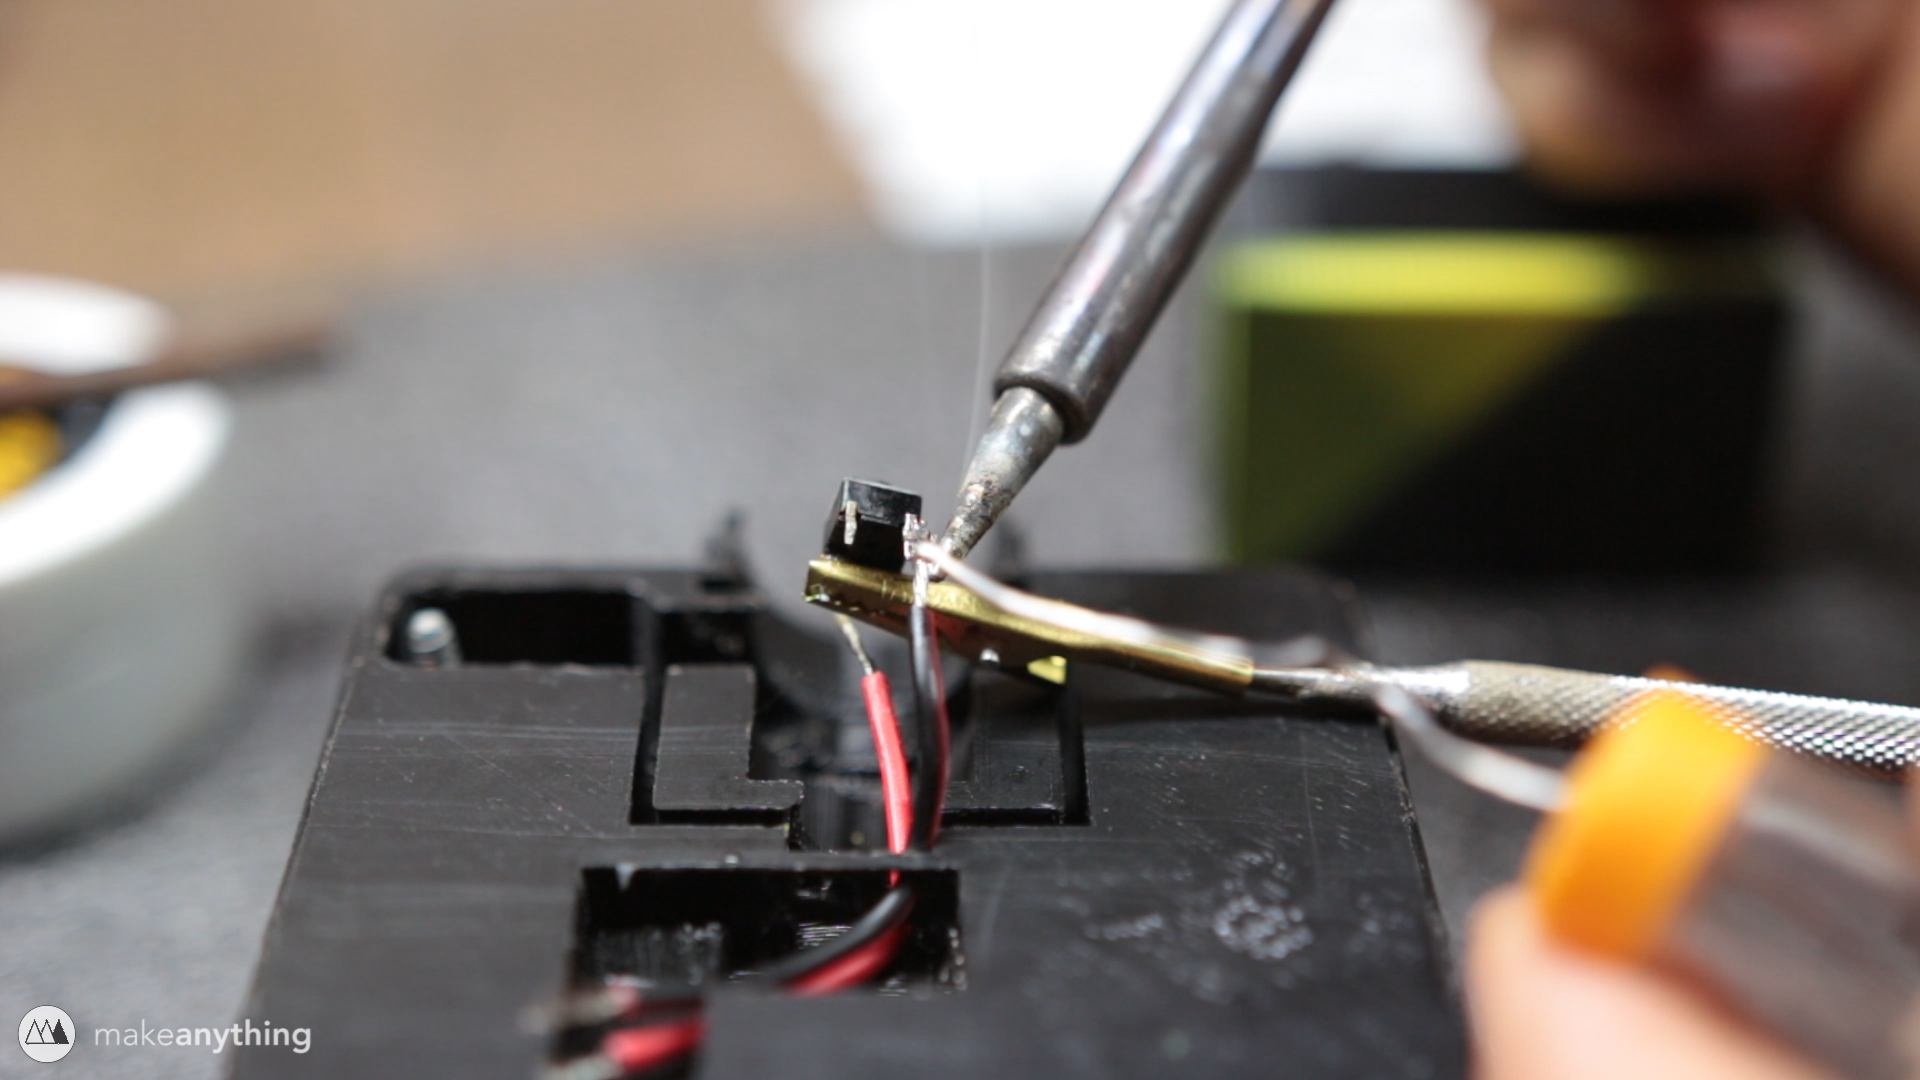
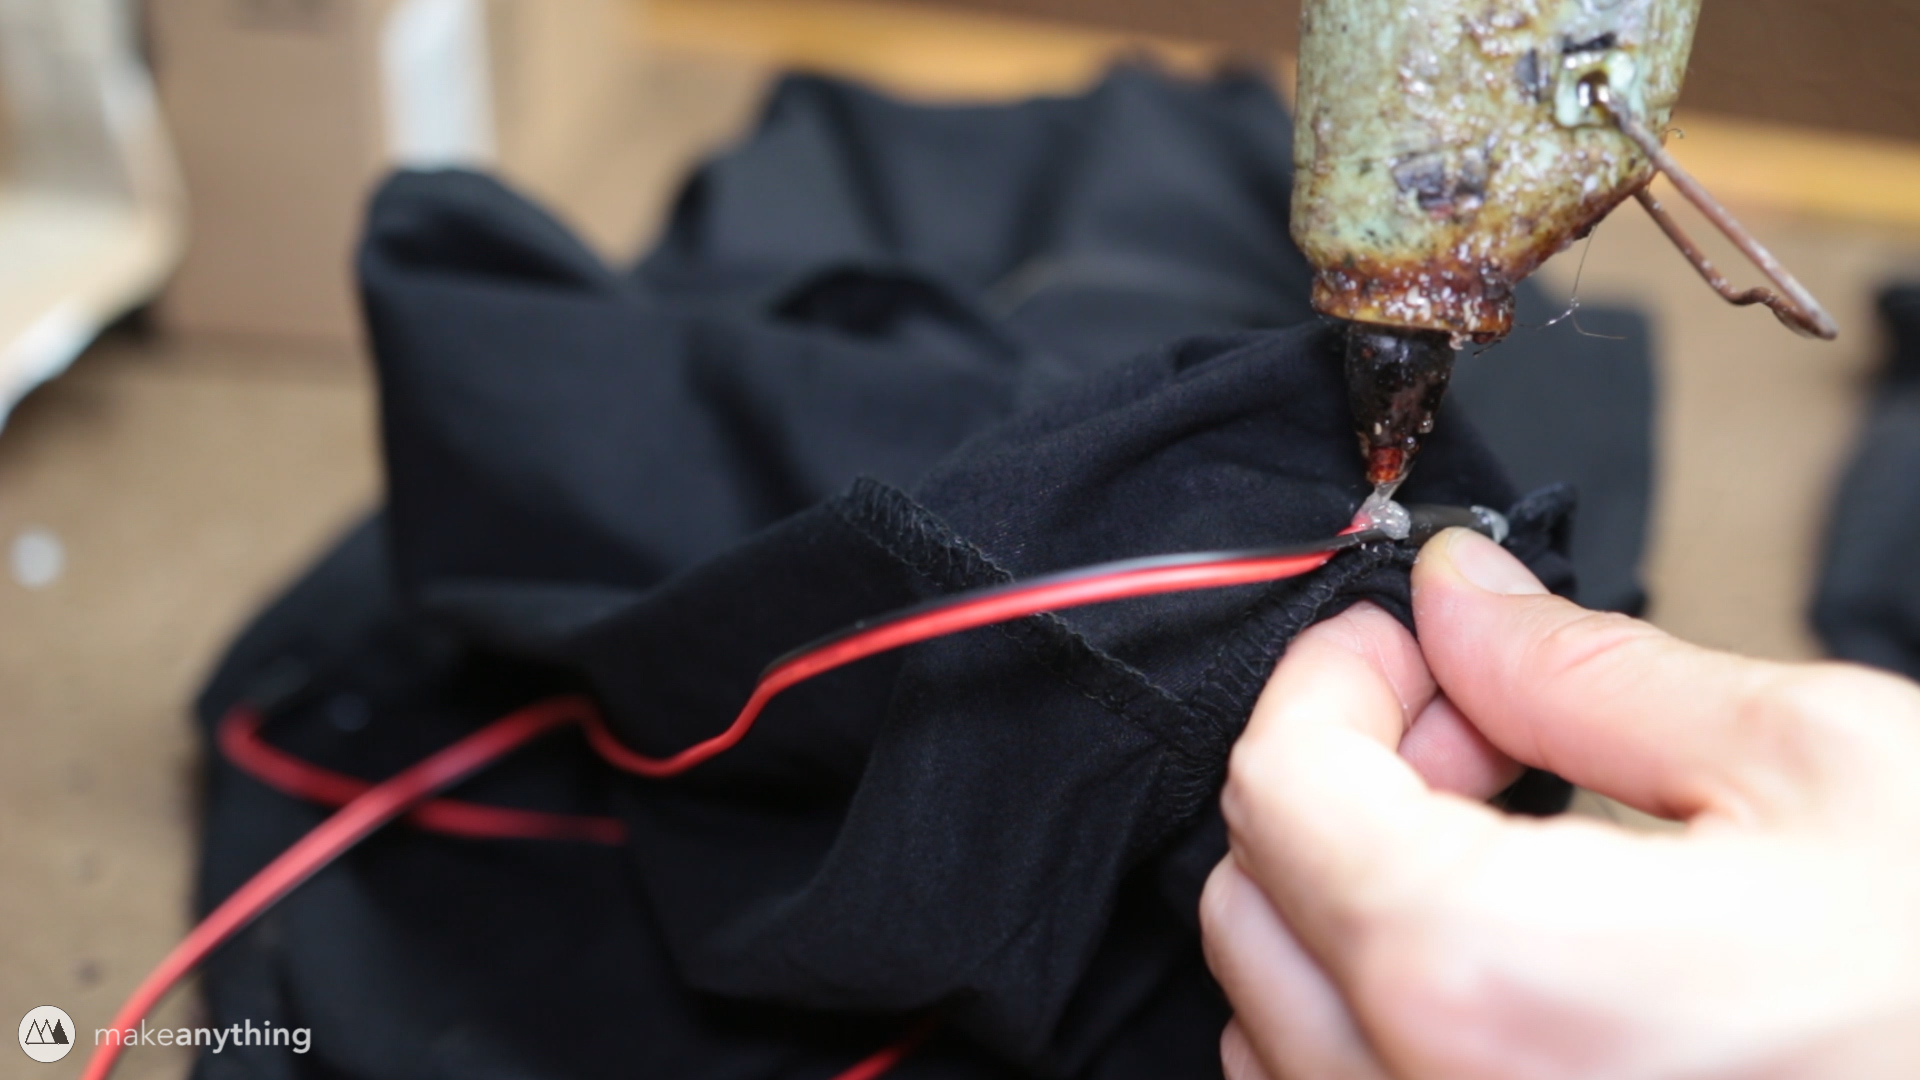
Next up I soldered all the wires I needed to connect to the other parts on my arms and legs. Then I just needed to modify my outfit to hide the wires. I initially intended to wear a full body suit, but the separate shirt and tights actually made things a lot easier.
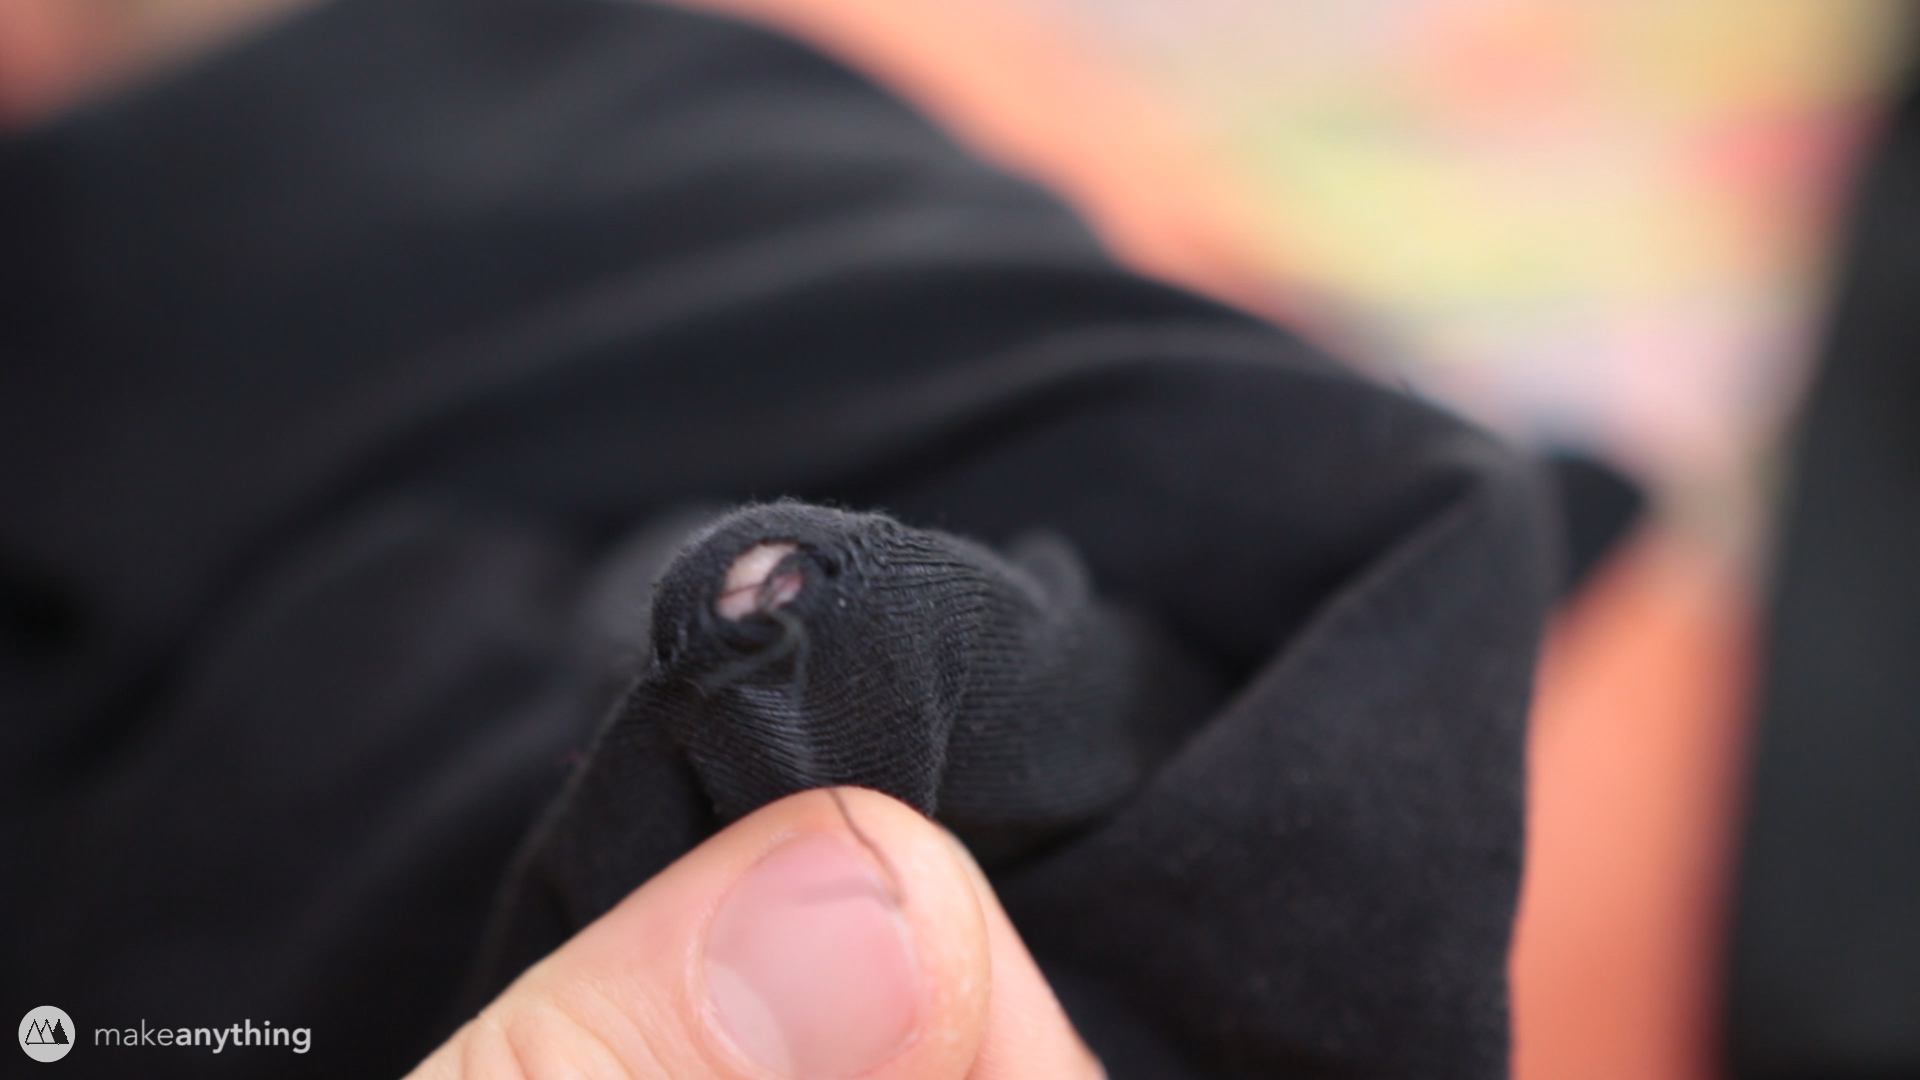
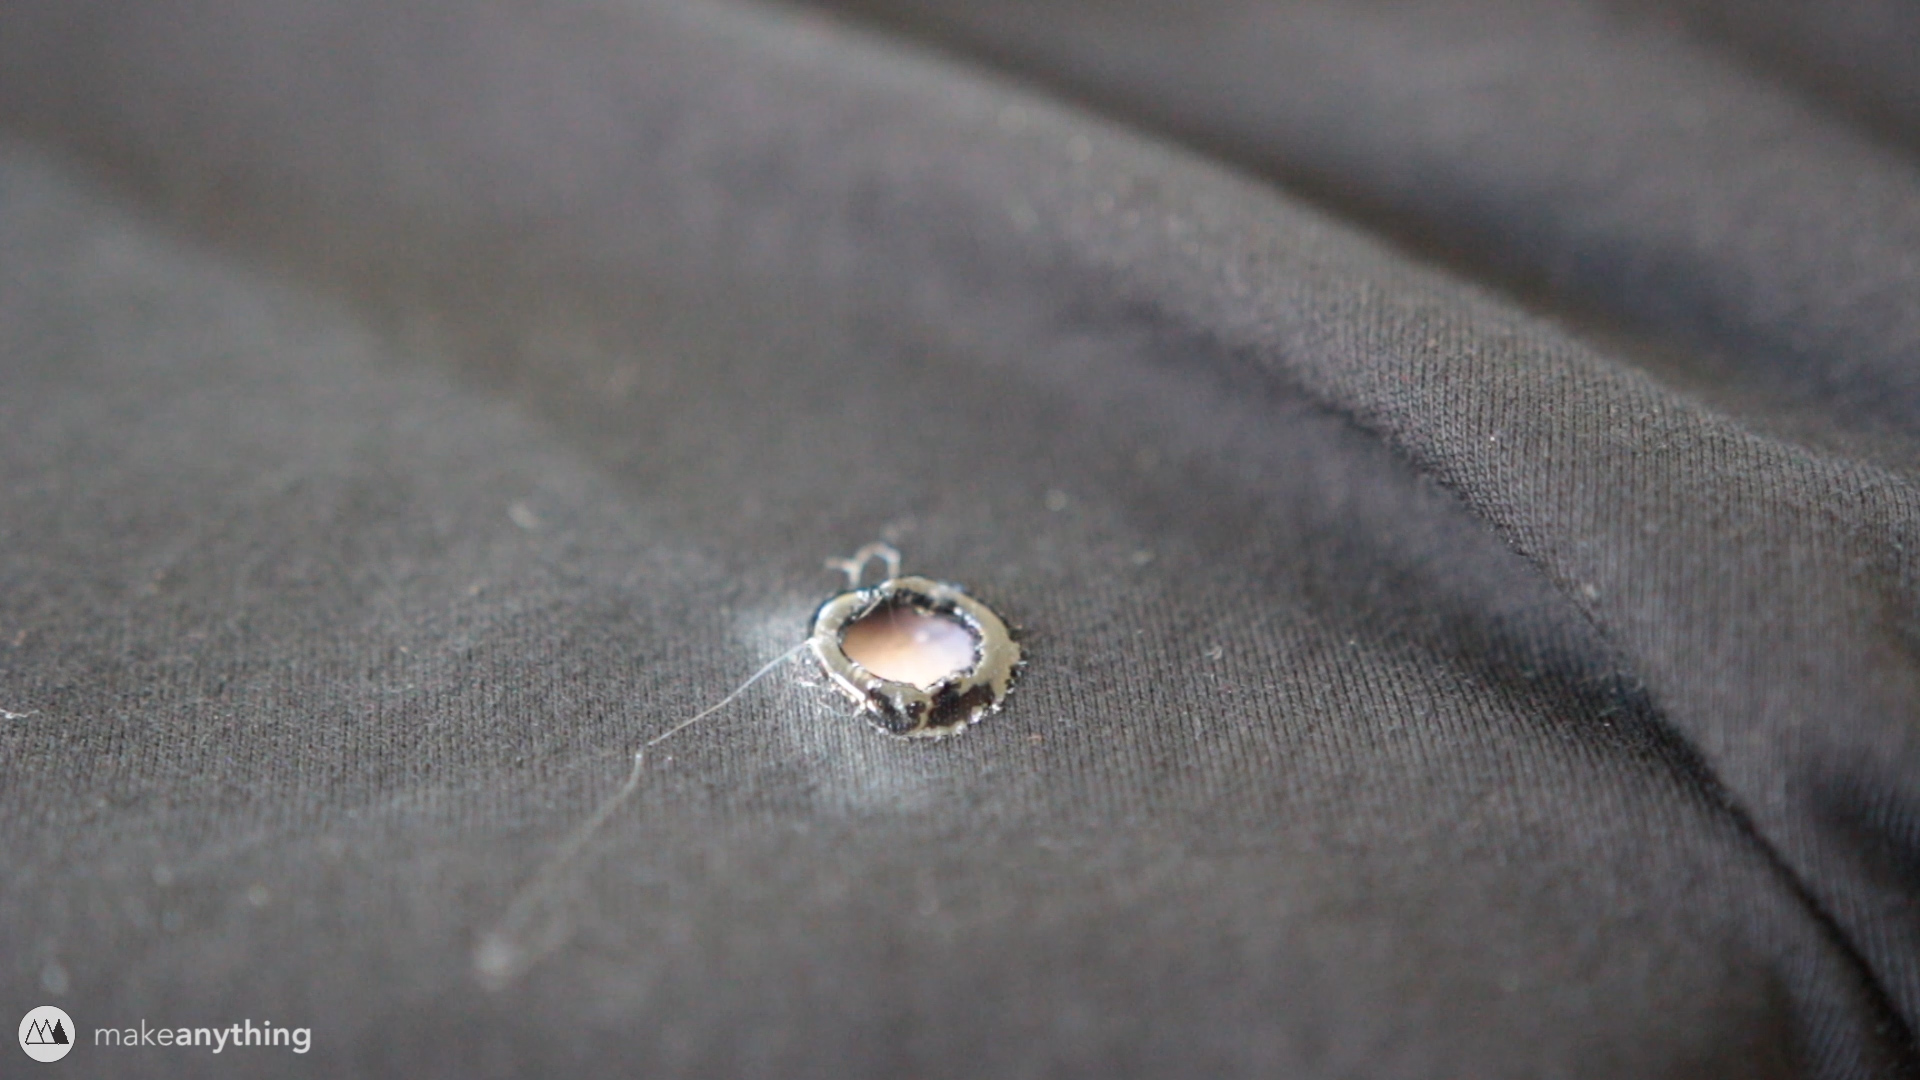
I split the seams of my outfit to feed through most of the wires. At the stomach I had to cut holes into my shirt, so I used E6000 glue again to prevent fraying. After gluing all the wires into place my outfit was finally complete!
Worth it…. totally worth it
Resources
Materials
- Bop It Extreme (Original)
- Desoldering Braid
- Wire Brush
- Solder
- 2-pin Micro Connectors
- Electrical Wire
- E-6000 Industrial Craft Glue
- Velcro Straps
- Matterhackers PRO series PLA
- Tights
Files